FTP for Managed Hosting for WordPress
You can upload files to your Managed Hosting for WordPress account with SFTP. This is useful for uploading large files to your WordPress site or when you need to install a custom theme or plugin manually.
Required: You'll need an FTP (File Transfer Protocol) app to connect and upload content via SFTP (Secure FTP). There are many third-party FTP apps available, we recommend FileZilla.
- Go to your GoDaddy product page.
- On your My Products page, next to Managed Hosting for WordPress, select Manage All.
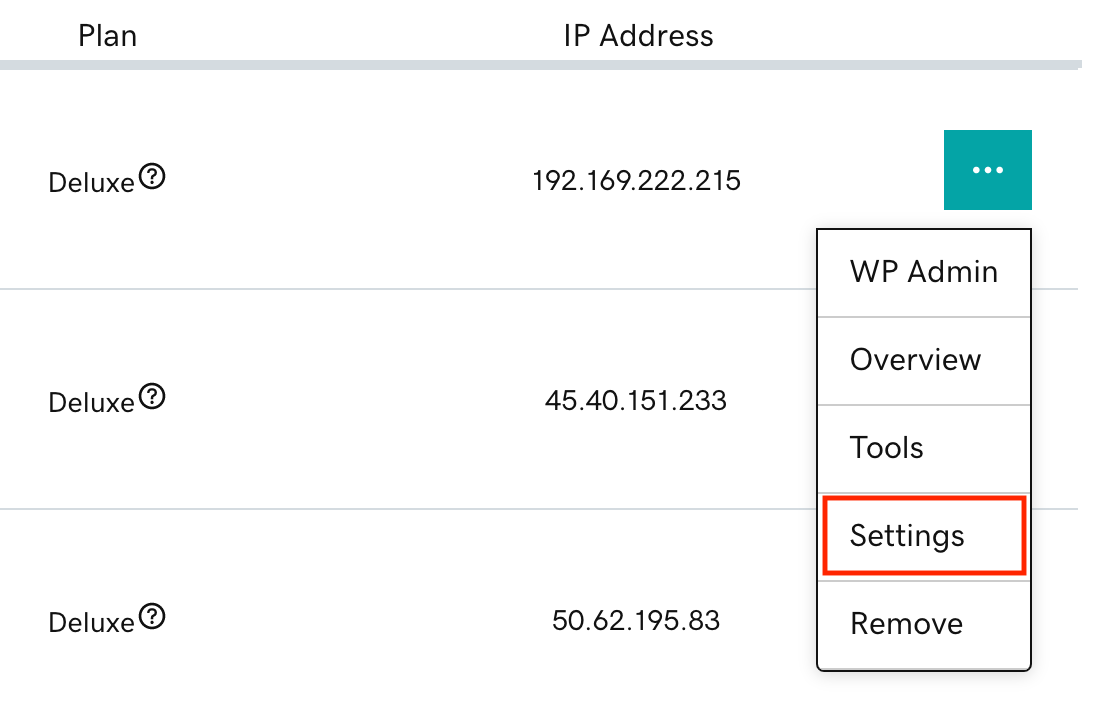
- For the site you want to use, select Settings from the
 menu.
menu.
- Under Production Site, find SSH/SFTP login and then select Change.
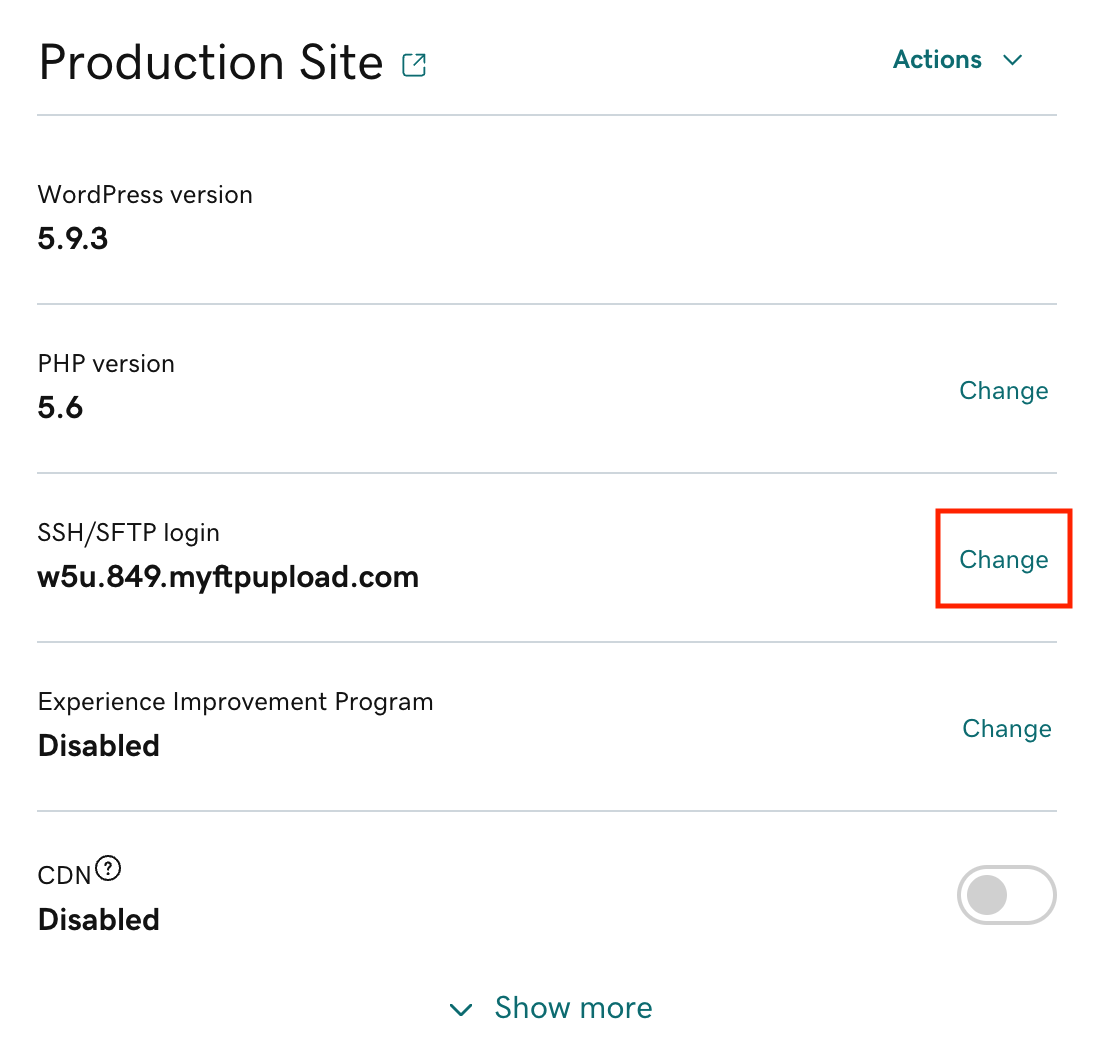
- Copy the Hostname for use in your FTP app, and then select Create New Login.
- Select Create New Login again.
Note: This will delete your current SFTP username and password.
- Copy the new Username and Password for use in your FTP app, and then select Close.
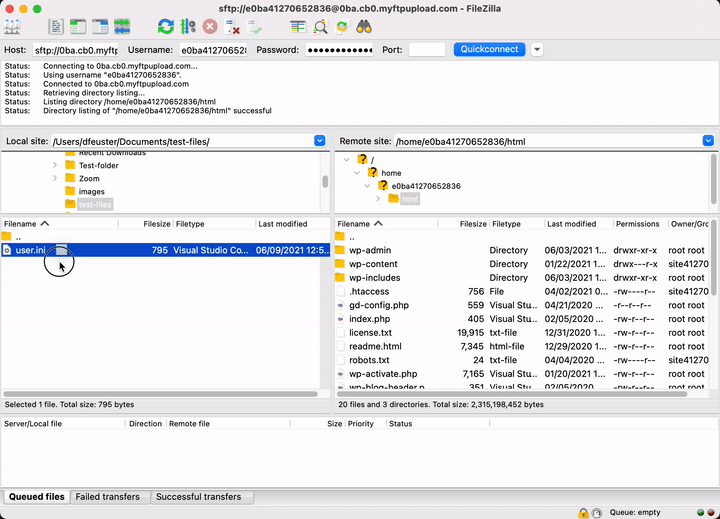
- In your FTP app, fill in the Host, Username, Password, and Port fields. If you're using FileZilla, select Quickconnect:

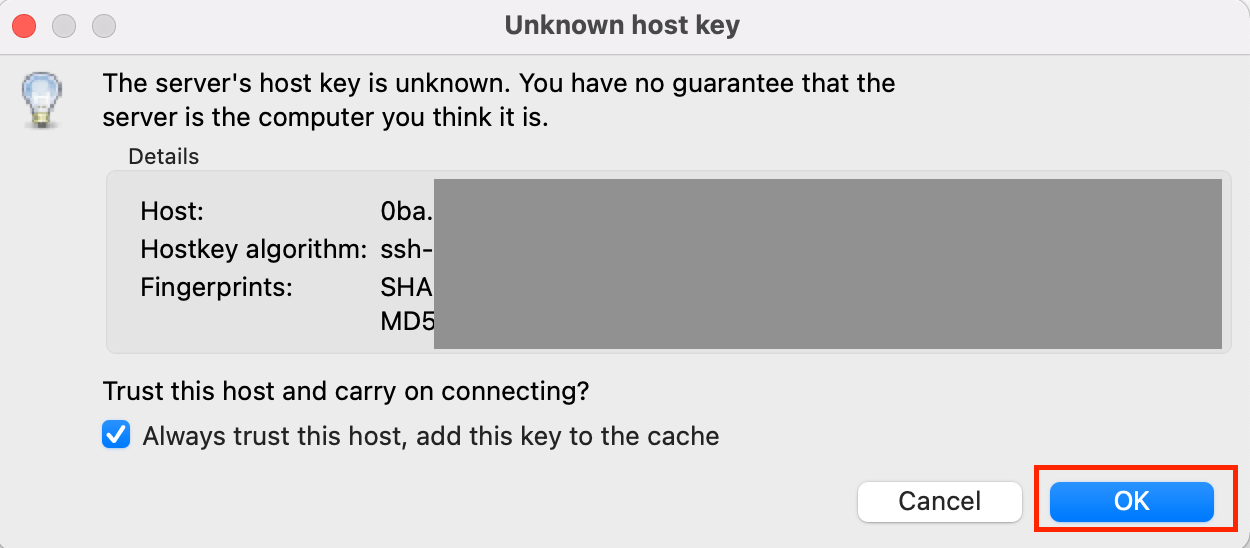
- You'll receive an Unknown host key message. Verify the Host is your domain and then select OK.
- After your FTP app connects to your account, you can drag-and-drop to upload your files.
More info
- Limits on editing files.
- If you like, you can also manage your files directly from your Managed Hosting for WordPress hosting account