Hubungkan GoDaddy Conversations ke akun Gmail saya
Teruskan akun Gmail Anda ke GoDaddy Conversations untuk menerima semua pesan Gmail di kotak masuk terpadu Conversations, sehingga lebih mudah untuk mengelola komunikasi bisnis Anda.
Wajib diisi: Anda harus memiliki akses ke pengaturan akun Conversations dan pengaturan Gmail untuk menghubungkan Gmail, jadi pastikan Anda dapat beralih dengan nyaman di antara 2 tab browser di perangkat sebelum memulai.
- Di browser web, buka halaman produk GoDaddy Anda.
Jika Anda memiliki versi mandiri Conversations, perluas Conversations Unified Inbox . Di sebelah kanan paket Conversations, pilih Kotak Masuk Web .
ATAU
Jika Anda memiliki paket Websites + Marketing, gulir ke Websites + Marketing , lalu pilih Kelola di samping situs Anda. Di menu sebelah kiri, luaskan Conversations .
- Pilih Pengaturan.
- Select Channels.
- Expand Email, and then select Connecct. (If you already have a connected Gmail address, select Add another.)
Note: If you have a Websites + Marketing plan and have enabled chat for your website, you’ll have a default email address to receive chat notifications. This is an internal email address created for you by GoDaddy. Connecting Gmail to Conversations will not affect this default email address.
- Pilih Gmail , lalu pilih Berikutnya .
- Masukkan alamat Gmail yang ingin Anda hubungkan ke Percakapan dan pilih Berikutnya .
- Masukkan nama yang akan dilihat pelanggan saat Anda mengirim email kepada mereka, lalu pilih Berikutnya .
- Pilih Buka Pengaturan Gmail .
- A new tab will open, showing your Gmail settings.
Warning: Make sure you keep both tabs open because you’ll need to switch between them to be guided through the steps.
- Go back to the Conversations tab and select Copy next to the forwarding address.
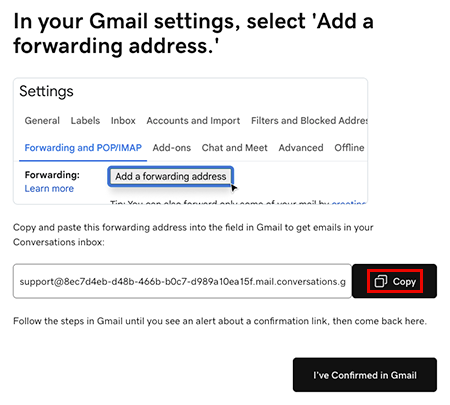
- Buka tab pengaturan Gmail. Di bawah Penerusan dan POP / IMAP, pilih Tambahkan alamat penerusan , tempelkan alamat ke kotak teks, lalu pilih Berikutnya . Anda mungkin perlu mengkonfirmasi bahwa ini memang Anda. Ikuti perintah di layar untuk melakukan ini.
- Anda akan mendapatkan pesan yang mengatakan bahwa tautan konfirmasi telah dikirim ke alamat email yang Anda masukkan. Pilih OK .
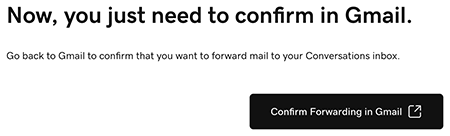
- Back in the Conversations tab, select I’ve Confirmed in Gmail, and then select Confirm Forwarding in Gmail.
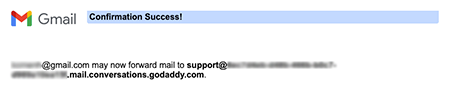
- A new tab will open, showing a Gmail confirmation. Select Confirm. When you see the Confirmation Success! message, you can close this tab.
- Go to the Gmail settings tab and reload the page.
Warning: If you don’t reload the page you might not see the option to select Forward a copy of incoming mail.
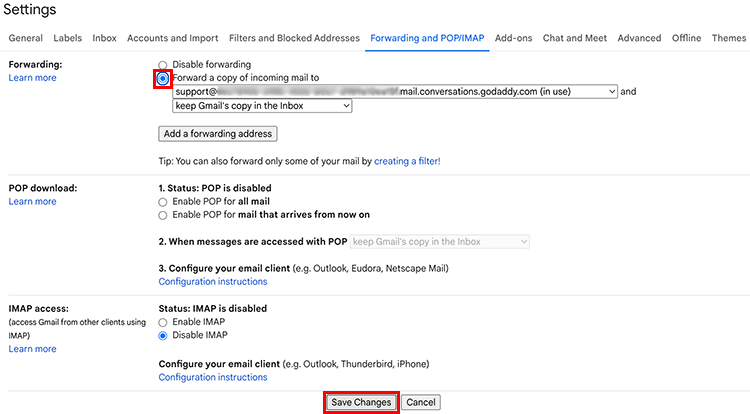
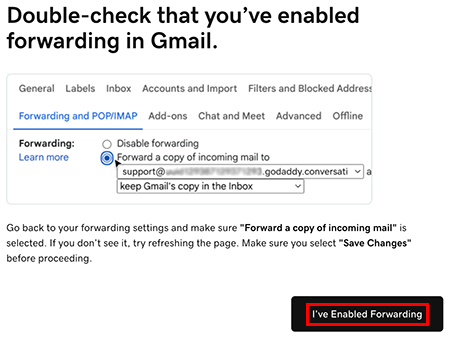
- Under Forwarding and POP/IMAP, make sure Forward a copy of incoming mail is selected. At the bottom of the page, select Save Changes.
- You’ll be taken to your Gmail inbox. At the top of the page you’ll find a message saying you’re now forwarding your email.

- In the Conversations tab, select I’ve Enabled Forwarding.
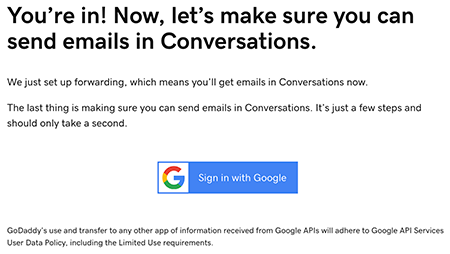
- A message will let you know you’ve successfully set up email forwarding. It could take up to 5 minutes for this message to show. Select Sign in with Google to start the process of making sure you can also reply to Gmail messages from Conversations.
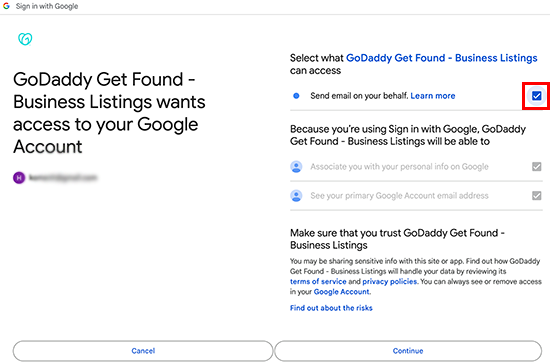
- Masuk ke akun Gmail yang Anda hubungkan ke Conversations dan pilih Lanjutkan .
- Make sure Send email on your behalf is checked and select Continue.
- Dalam pesan terbaru Conversations, Anda akan menemukan email yang mengkonfirmasi bahwa penerusan telah diatur.
Catatan: Meskipun Anda akan menerima pesan yang dikirim ke akun Gmail Anda di Gmail dan Conversations, jika Anda membalas dari akun Gmail, balasan Anda tidak akan ditampilkan di Conversations. Ini karena cara kerja penerusan di Gmail.
Anda sudah siap! Anda sekarang dapat menggunakan kotak masuk terpadu Conversations untuk mengelola semua pesan Gmail Anda, beserta pesan dari saluran lain yang Anda sambungkan ke Conversations.