編輯我的安全和封鎖寄件人清單
在「允許清單」或「封鎖清單」上新增特定的電郵地址,網域或IP位址,藉此控制哪封電郵要寄送隔離區。來自允許寄件者的email不會被隔離,但是會封鎖被寄件者的email。
- 登入您的GoDaddy進階電子郵件安全性頁面(使用您的GoDaddy使用者名稱和密碼)。
- 點選「登入進階電子郵件安全性」 。系統會開啟登入頁面。
- 輸入您的email地址,選取「登入」 ,然後點選「用Microsoft登入」 。
- 按照畫面上的說明登入Microsoft 365 email地址和密碼。進階電子郵件安全性入口網站將會開啟。
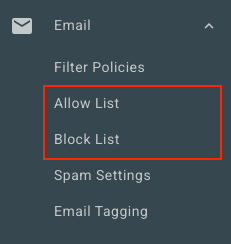
- 點選最左側的Email 。根據您想在允許清單或封鎖清單中新增寄件人,選擇選項:
- 允許清單:選取「允許清單」 。點選右上角的「新增允許項目」 。
- 封鎖清單:選擇封鎖清單。點選右上角的「新增封鎖項目」 。
- 在允許或封鎖下列項目下方,輸入電子郵件地址,網域或IP位址。請用半形逗號或半形分號隔開每個寄件人,或在新行中輸入。
- 點選「儲存」。
編輯所有使用者的允許和封鎖清單
如果您是管理員,可以檢視並編輯機構內所有使用者的允許與封鎖清單。
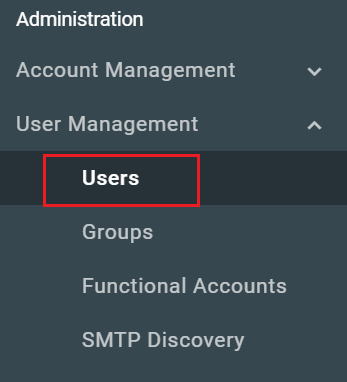
- 點選最左側的「用戶管理」,然後點選「用戶」 。
- 選取您要編輯的使用者名稱/電子郵件地址。
- 在頁面頂端,依您要編輯的清單選取[允許清單]或[封鎖清單] 。
您可以重複這些步驟,檢視並編輯每位使用者的清單。