GoDaddy Smart Terminal cash management
If you accept cash transactions in your in-person store, it’s a good idea to review the starting and closing amounts for a session and verify against the counted cash. You also have access to a Mid-Day Report (X Report) for live snapshots and an End-Of-Day Report (Z-Report) to close out the cash drawer session. This will help you identify and avoid any overage or shortage and ensure your cashflow is accurately documented.
This is good practice whether you have employees or are handling all cash transactions yourself. Mistakes can happen to anyone, and you want to be on top of things before a mistake becomes an issue.
Start a cash drawer sessionClick here to start a cash drawer session at the beginning of a shift.
Start a cash drawer session when you’re ready to record an opening cash amount for a shift or a day. All cash transactions and adjustments throughout the session will be recorded in real time and accessible from the cash management dashboard.
- On your Smart Terminal home screen, tap Register.
- Tap
 More (in the upper-left corner, next to Sale) and tap Cash Management.
- Tap Start Drawer.
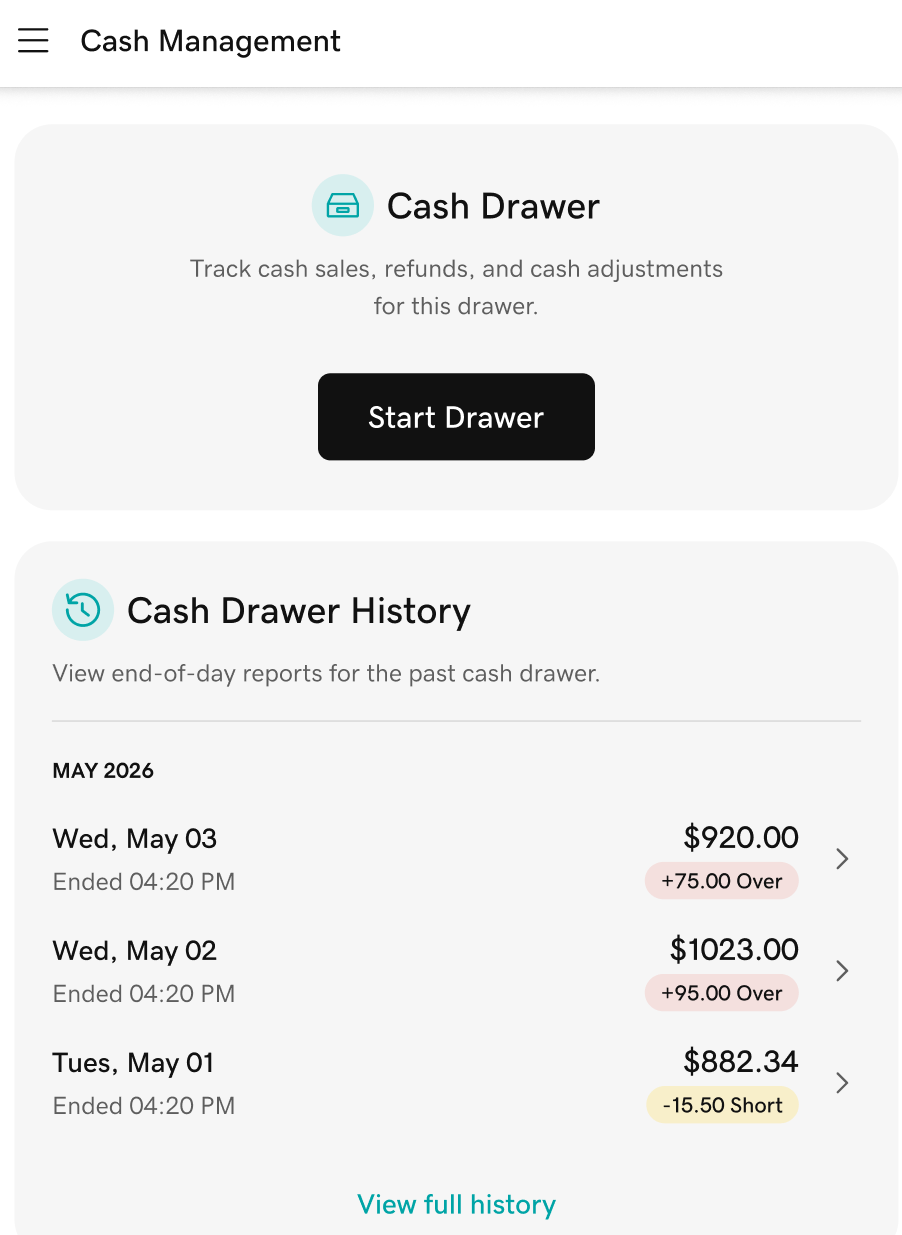
- Enter the starting cash amount for the session, then tap Start.
- The connected cash drawer will open automatically. Add the cash to the drawer and close the drawer.
- Return to the Smart Terminal home screen to begin processing transactions.
Record cash adjustmentsClick here to manually document cash adjustments during a session.
During an active cash drawer session, you can add or remove cash outside of cash sales and manually record the amounts. All cash flow from cash sales or refunds is automatically documented.
- On your Smart Terminal home screen, tap Register.
- Tap More (in the upper-left corner, next to Sale) and tap Cash Management.
- A cash summary for the current session will appear. Below the summary, tap Add Cash or Remove Cash.
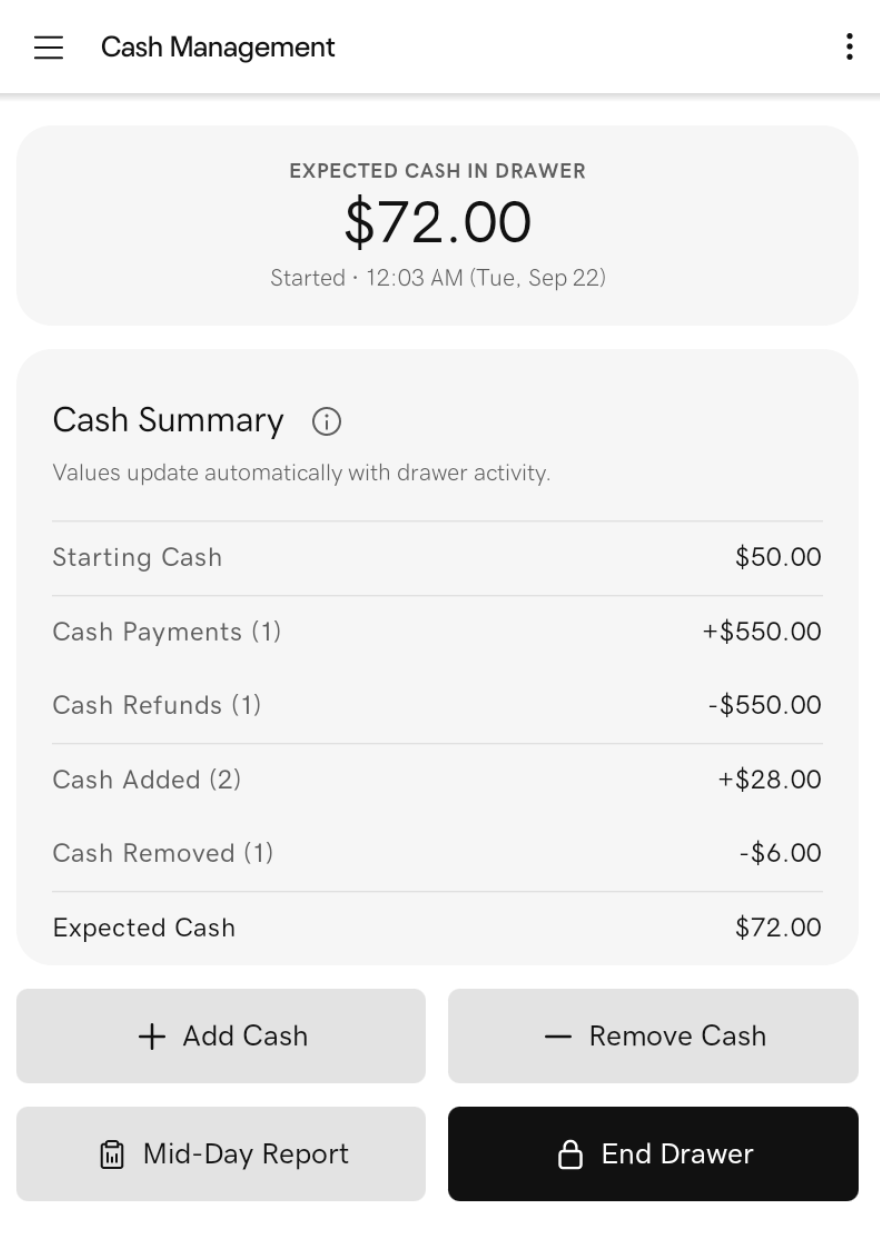
- Enter the amount to add or remove and add any notes about the adjustment. Tap Add Cash or Remove Cash.
- The connected cash drawer will open automatically. Add or remove the cash, then close the cash drawer.
End a cash drawer sessionClick here to close out a cash drawer session at the end of a shift.
Close out the session when you’re ready to count the cash drawer and verify that the amount in the drawer matches the expected amount.
- On your Smart Terminal home screen, tap Register.
- Tap More (in the upper-left corner, next to Sale) and tap Cash Management.
- A current cash summary for the session will appear. Below the summary, tap End Drawer.
- The connected cash drawer will open automatically. Count out the amount in the cash drawer and enter the Amount. Add the amount of Cash Tips, if applicable.
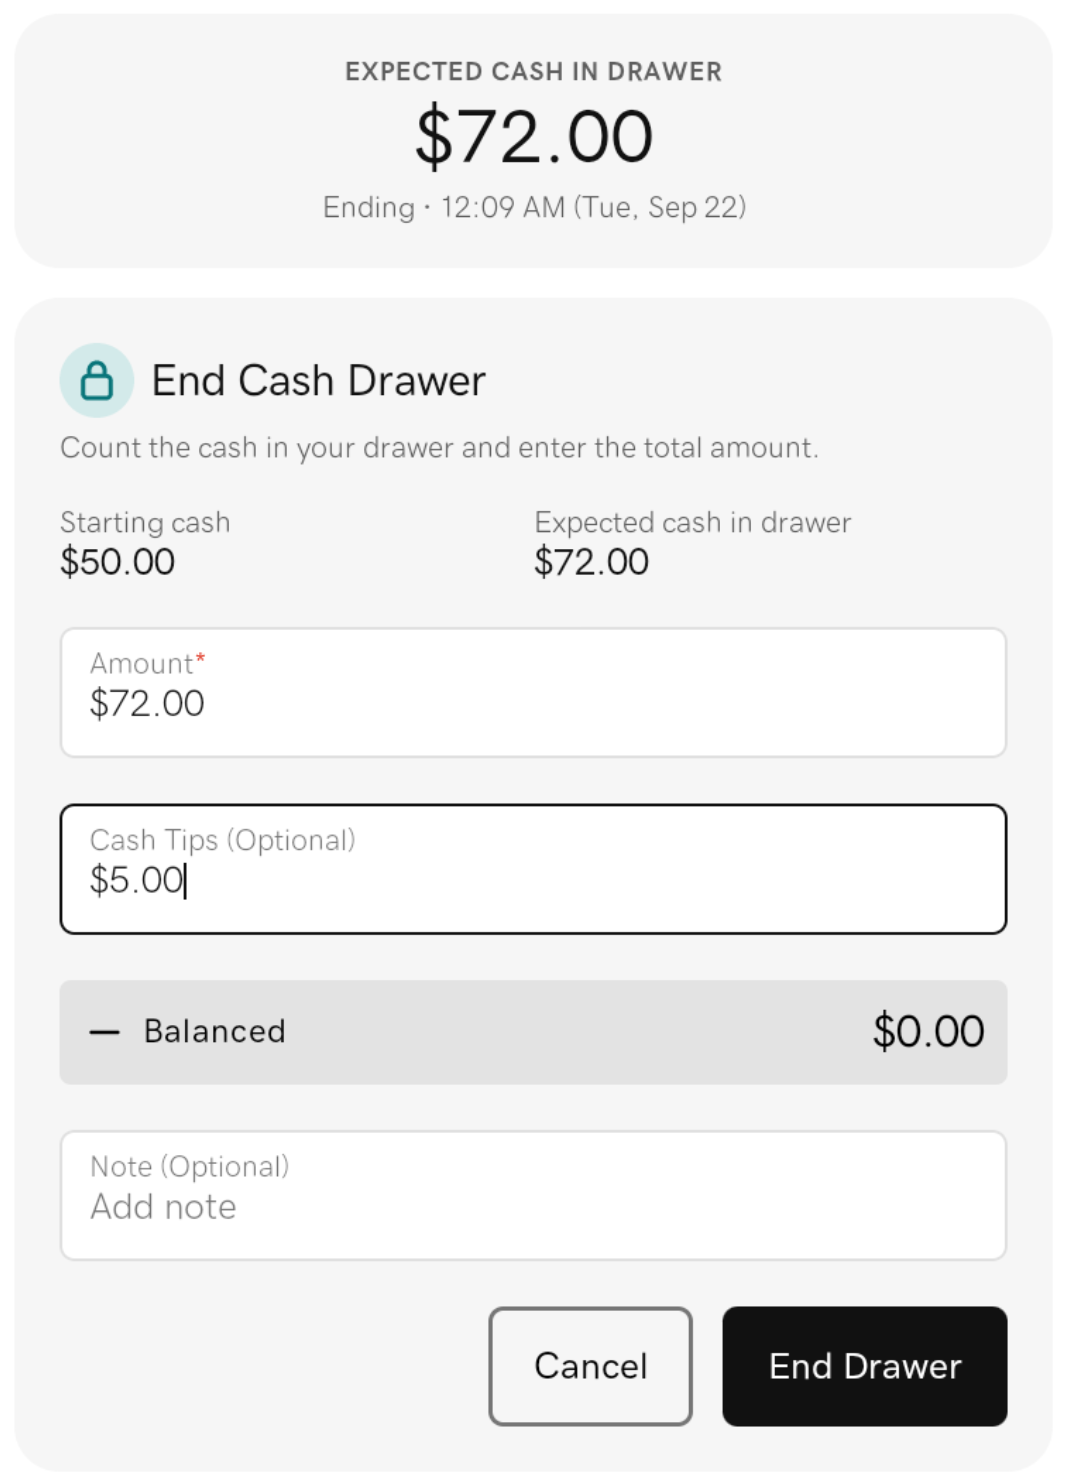
- Review the final amounts. The summary will let you know if the cash drawer is balanced, over or short. Tap End Drawer to close the session.
- You’ll be prompted to print an End-of-Day Report (Z-Report), which provides a breakdown of all transactions and cash drawer activity for the session. Tap Save and Print to print the report.
Review cash drawer historyClick here to review past cash drawer sessions.
Review the transactions and activity for all cash drawer sessions within the past 30 days.
- On your Smart Terminal home screen, tap Register.
- Tap More (in the upper-left corner, next to Sale) and tap Cash Management.
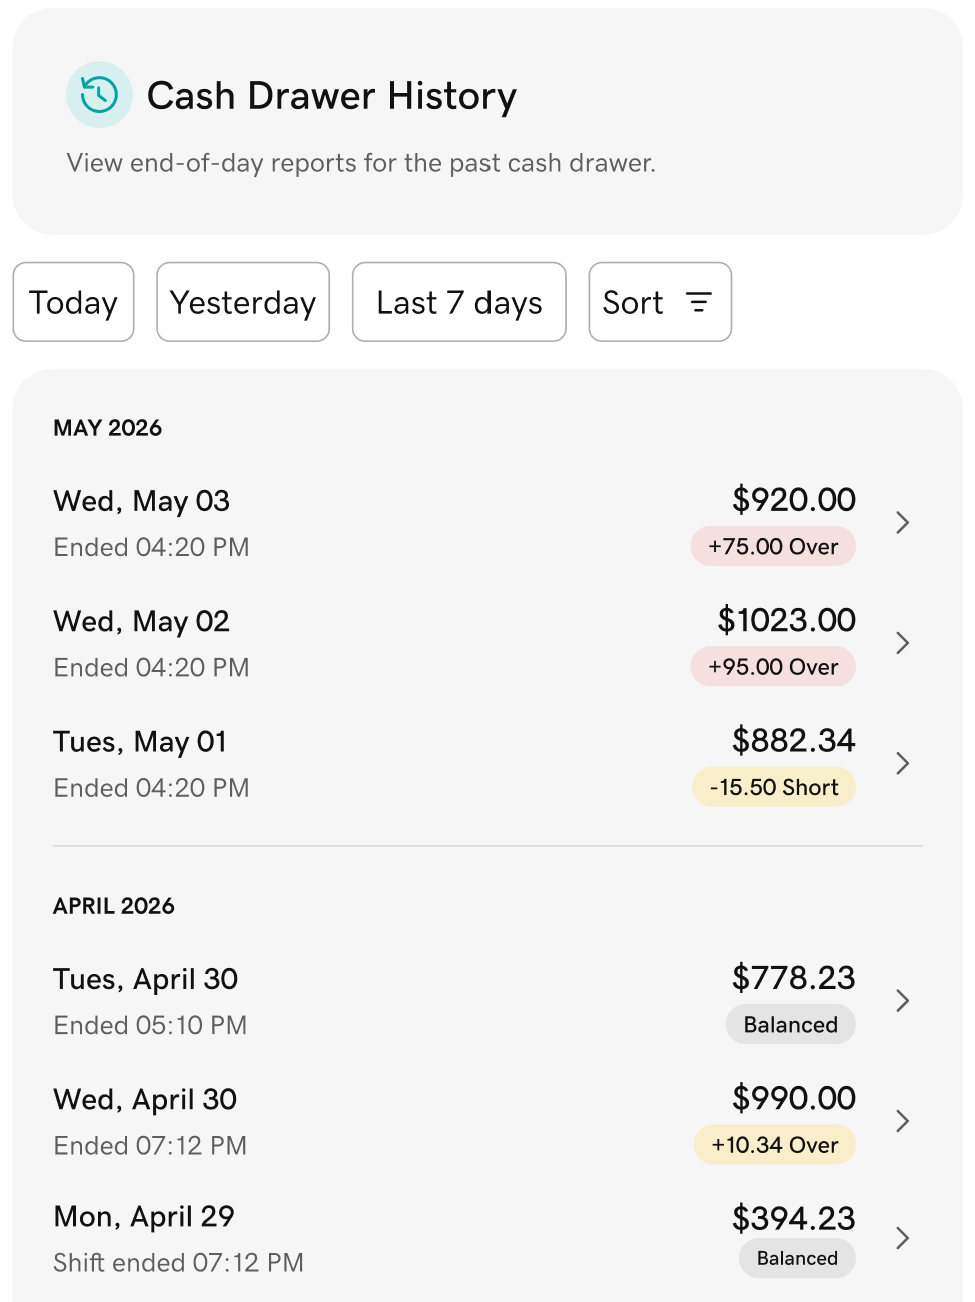
- Under Cash Drawer History, tap View full history.
- You’ll see a list of all closed sessions from the last 30 days, with the most recent first. Filter by date to find a session, then tap the session to open the End-of-Day Report (Z-Report), which provides a breakdown of all transactions and cash drawer activity for the session.
Generate Mid-Day and End-of-Day reportsClick here to run a Mid-Day Report (X-Report) or End-of-Day Report (Z-Report) for the Smart Terminal.
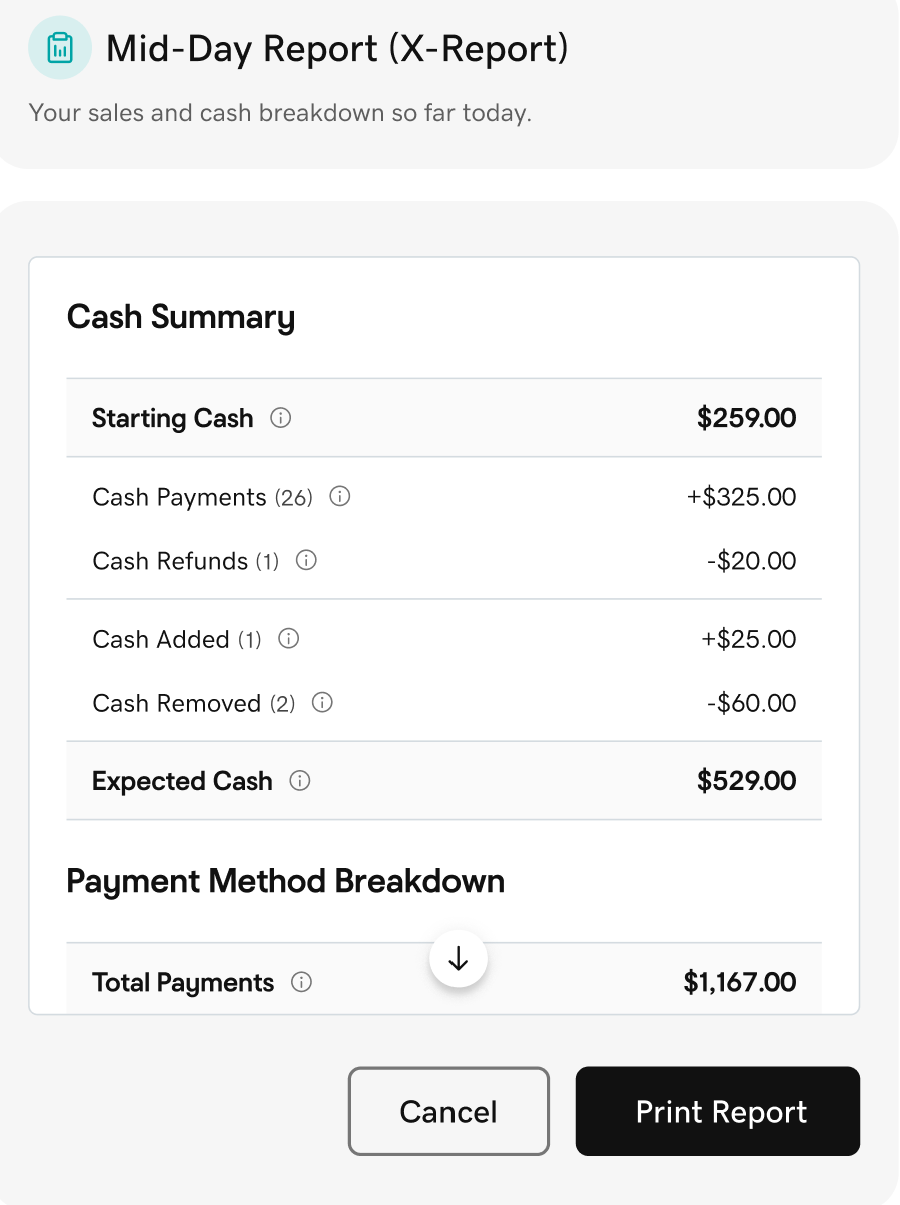
The Mid-Day Report (X-Report) and End-of-Day Report (Z-Report) provide a breakdown of all transactions for a session, including payment method (cash, card, etc.), refunds, voids, documented tips and cash drawer activity.
- The Mid-Day Report provides a snapshot of activity in the current session. It’s only available while the session is running.
- The End-of-Day Report provides a full breakdown of all transactions for the session. It’s available as soon as the session ends.
- After starting a cash drawer session, on your Smart Terminal home screen, tap Register.
- Tap More (in the upper-left corner, next to Sale) and tap Cash Management.
- A current cash summary for the session will appear. Tap Mid-Day Report to open the Mid-Day Report (X-Report), which provides a live snapshot of all transactions and cash drawer activity for the session so far.
- Tap Print Report to print out a copy of the report from your Smart Terminal printer.
- On your Smart Terminal home screen, tap Register.
- Tap More (in the upper-left corner, next to Sale) and tap Cash Management.
- Under Cash Drawer History, tap View full history.
- You’ll see a list of all closed sessions from the last 30 days, with the most recent first. Filter by date to find a session, then tap the session to open the End-of-Day Report (Z-Report), which provides a breakdown of all transactions and cash drawer activity for the session.
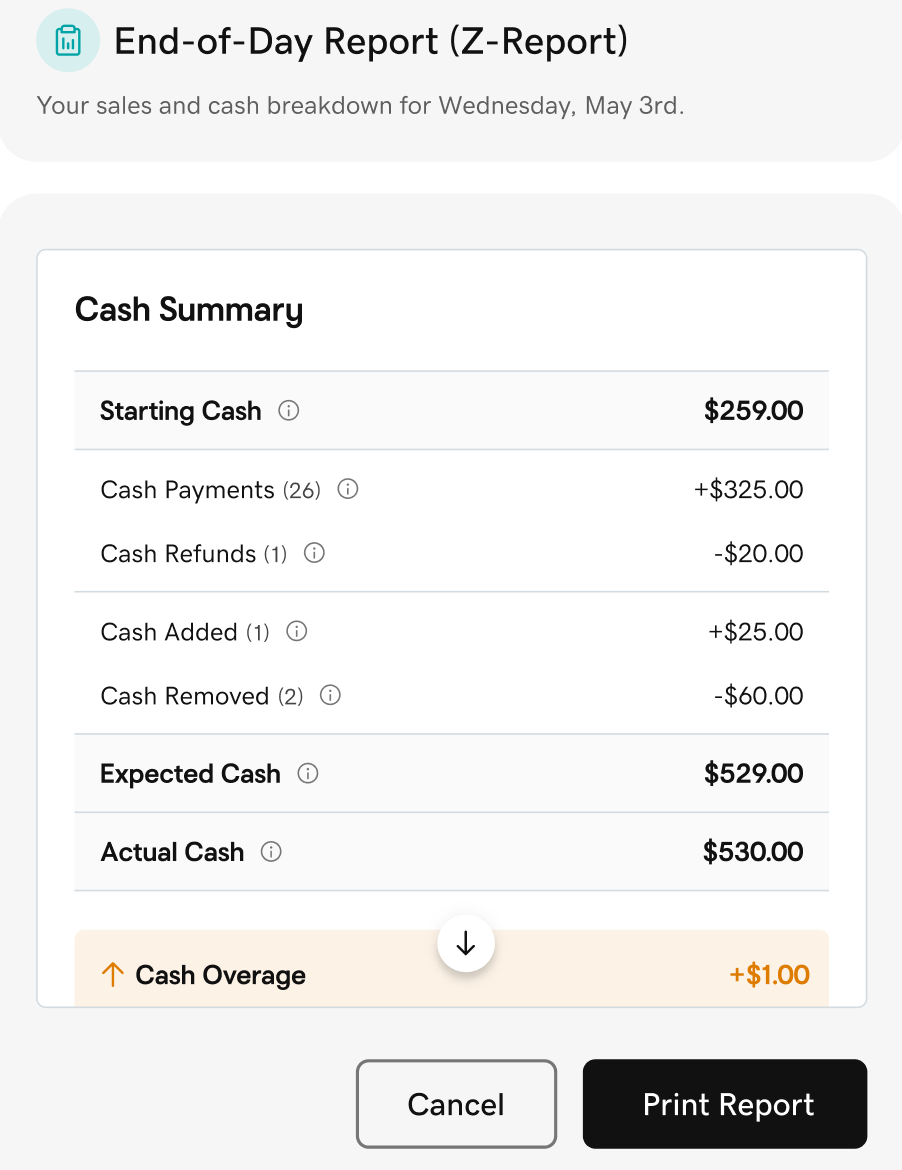
- Tap Print Report to print out a copy of the report from your Smart Terminal printer.
More info
- Connect a cash drawer or another accessory to your Smart Terminal.
- See all compatible accessories for GoDaddy Smart Terminals.
- Learn how to generate additional GoDaddy Payments reports.