Accéder aux e-mails mis en quarantaine et les libérer à l'aide de Advanced Email Security
Avec Advanced Email Security, les utilisateurs et les administrateurs peuvent rechercher et libérer les e-mails en quarantaine. Les e-mails sont mis en quarantaine lorsqu'ils sont suspectés de contenir des logiciels malveillants ou du phishing.
Advanced Email Security peut mettre en quarantaine les messages que Microsoft 365 pourrait ne pas mettre en quarantaine, ce qui a pour effet de stocker ces e-mails dans la quarantaine Advanced Email Security. Vous pouvez passer en revue les messages mis en quarantaine et décider quoi faire avec eux, comme les libérer ou les supprimer.
- Connectez-vous à votre page Sécurité avancée de la messagerie GoDaddy (utilisez votre nom d'utilisateur et votre mot de passe GoDaddy).
- Sélectionnez Se connecter à Advanced Email Security . La page de connexion s’ouvre.
- Entrez votre adresse email, sélectionnez Se connecter , puis Se connecter avec Microsoft .
- Suivez les invites à l'écran pour vous connecter avec votre adresse email et votre mot de passe Microsoft 365. Le portail Advanced Email Security s'ouvre.
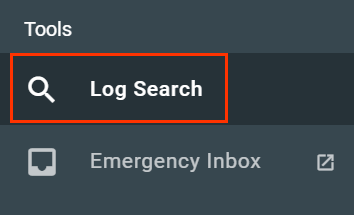
- Sélectionnez Recherche dans les journaux .
- Sélectionnez l’onglet correspondant, que vous soyez administrateur ou utilisateur.
- Sélectionnez Utilisateur spécifique , puis l'adresse e-mail qui a mis les messages en quarantaine.

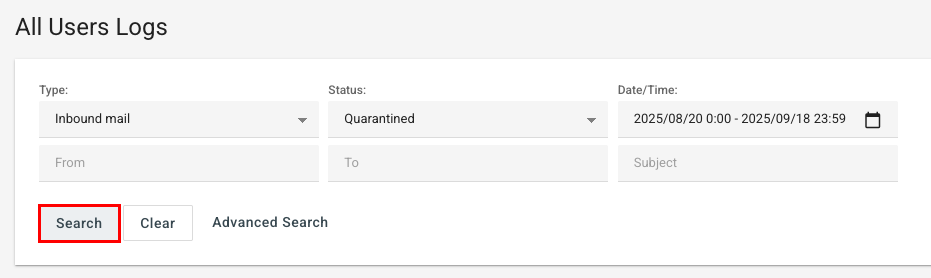
- Sous Type , sélectionnez si l’email était sortant ou entrant, puis choisissez la plage de dates pour laquelle l’email a été envoyé ou reçu.
- Sous Statut , sélectionnez En quarantaine .
- Sélectionnez Rechercher . Cela renvoie une liste de messages en quarantaine pour cet utilisateur dans les filtres que vous avez spécifiés.
- Pour agir sur un message spécifique, sous Actions , sélectionnez
 Aperçu . À partir de là, vous pouvez effectuer les opérations suivantes:
- Libérer : Libérez le message de la quarantaine pour qu'il soit remis dans la boîte de réception du destinataire.
- Libérer et signaler : Libérez le message de la quarantaine pour qu'il soit remis dans la boîte de réception du destinataire et signalez-le comme un faux positif (un email qui a été incorrectement marqué comme spam).
- Supprimer : retirez le message de la quarantaine. Le message ne sera pas remis au destinataire et ne pourra pas être récupéré.

- Pour agir sur plusieurs messages, en regard de chaque message, cochez la case. Au-dessus de la liste des messages, sélectionnez Actions , puis l’une des options suivantes:
- Libérer de la quarantaine : remettez les messages sélectionnés dans la boîte de réception des destinataires.
- Libérer et approuver : remettez les messages dans la boîte de réception des destinataires et ajoutez l'expéditeur à la liste verte, de sorte que les futurs messages du même expéditeur ne soient pas mis en quarantaine.
- Signaler comme faux positif : marquez le (s) message (s) sélectionné (s) comme email (s) légitime (s) incorrectement identifié (s) comme spam.
- Signaler comme faux négatif : marquez le (s) message (s) sélectionné (s) comme spam ou malveillant, même s’ils n’ont pas été mis en quarantaine.
- Masquer les e-mails des journaux : masquez les messages pour qu’ils n'apparaissent pas dans la recherche dans les journaux.
Remarque: le signalement de plusieurs messages comme étant faux positif ou faux négatif est une fonctionnalité réservée aux administrateurs.
- Sous Type , sélectionnez si l’email était sortant ou entrant, puis choisissez la plage de dates pour laquelle l’email a été envoyé ou reçu.
- Sous Statut , sélectionnez En quarantaine .
- Sélectionnez Rechercher . Cela renvoie une liste de messages en quarantaine pour cet utilisateur dans les filtres que vous avez spécifiés.
- Pour agir sur un message spécifique, sous Actions , sélectionnez Aperçu . À partir de là, vous pouvez effectuer les opérations suivantes:
- Signaler comme faux positif : signalez que le message a été incorrectement marqué comme spam.
- Libérer : Libérez le message de la quarantaine pour qu'il soit remis dans la boîte de réception du destinataire.
- Supprimer : retirez le message de la quarantaine. Le message ne sera pas remis au destinataire et ne pourra pas être récupéré.

- Pour agir sur plusieurs messages, en regard de chaque message, cochez la case. Au-dessus de la liste des messages, sélectionnez Actions , puis l’une des options suivantes:
- Libérer de la quarantaine : remettez les messages sélectionnés dans la boîte de réception des destinataires.
- Libérer et approuver : remettez les messages dans la boîte de réception des destinataires et ajoutez l'expéditeur à la liste verte, de sorte que les futurs messages du même expéditeur ne soient pas mis en quarantaine.
- Masquer les e-mails des journaux : masquez les messages pour qu’ils n'apparaissent pas dans la recherche dans les journaux.
Un e-mail libéré de la quarantaine peut prendre jusqu'à 24 heures pour apparaître dans la boîte de réception. Si une erreur se produit, attendez 5 minutes et réessayez.
Par défaut, les e-mails mis en quarantaine sont conservés ou mis en quarantaine pendant 30 jours. Un administrateur peut modifier la période de rétention dans ses paramètres de résumé de quarantaine.
Étapes associées
- Mettez à jour vos listes d'expéditeurs sécurisés et bloqués pour vous assurer que des messages spécifiques sont envoyés en quarantaine.
- Au lieu de mettre en quarantaine la plupart des spams et emails en masse et de vous envoyer un résumé quotidien, les messages peuvent être envoyés directement dans votre dossier Courrier indésirable. Apprenez-en davantage sur Tag and Deliver et découvrez si cette fonctionnalité est disponible pour votre compte .
En savoir plus
- Pour modifier les personnes autorisées à libérer les e-mails en quarantaine, modifiez vos paramètres de spam .
- Tirez le meilleur parti de Advanced Email Security
- Libérer ou supprimer un message mis en quarantaine par Microsoft 365