Create blog posts
In a blog post, you write content based around a topic or keywords, format it and add a photo. All that's left is to publish now or schedule it for later. Not sure what to say? Draft versions are saved automatically, so just jot down a quick idea and finish it when you're ready. Remember to add a blog section to your website to display the posts.
This video is part of the How-To series for Using a Blog for Your Business.
- Go to your GoDaddy product page.
- Scroll down, expand Websites + Marketing and select Manage next to your site.
- On your dashboard, expand Marketing, and then select Blog.
- Select Create Post.
- You can choose to have artificial intelligence (AI) generate a post for you, or create one yourself.
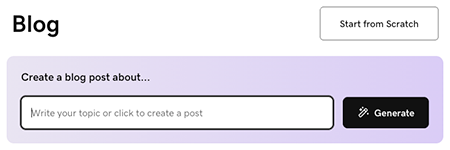
To have AI generate a post for you:
- Enter a topic or short description to guide what the blog post is about, or simply select Generate to allow the AI to generate a post based on what it knows about your business.
- The AI will generate a blog post and display it for you to preview. Use the chat interface to make changes, if needed, or select Edit under the blog post preview to manually edit the post.
To write a post yourself, select Start from Scratch and follow these steps:
- Start with the title. It should contain your main idea keyword and give readers an idea of the benefit they'll get from reading your article. Your title must be less than 65 characters.
- Add the body text. Write in a conversational tone and use headers to separate ideas. Highlight text to format and link it.
- With your cursor in the text area, select
 add to add images, video or a divider. Add a stock image or video, or one of your own images or videos. Learn more about creating a professional-looking image.
 - Add your featured image. It will show in your post and in the blog section of your website.
- Pick a category or add a new one. Categories allow you to create multiple blogs on your website.
Note: To delete a divider line, select the line and press the backspace or delete key on your keyboard. - Select Publish Now to publish your blog post immediately, or select Schedule, and then select a date and time when you want the blog post to be automatically published.
- To complete the process, select Publish Now.
Blog post best practices
These videos are part of the How-To series for Using a Blog for Your Business.
More info
- You've created a post! Now it's time to add a blog post section to your website.