Meine Microsoft 365-E-Mail-Adresse zu Apple Mail unter Mac hinzufügen
Schritt 3 der Reihe Mein Microsoft 365-Konto einrichten.
Fügen Sie Ihre Microsoft 365-E-Mail-Adresse der Apple Mail-App hinzu. Anschließend können Sie auf Ihrem Mac geschäftliche E-Mails senden und empfangen.
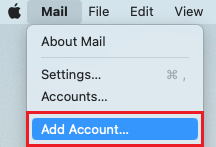
- Öffnen Sie Apple Mail.

- Wenn Sie ein neuer Benutzer sind, fahren Sie mit Schritt 3 fort. Wählen Sie ansonsten Mail aus und anschließend Konto hinzufügen.
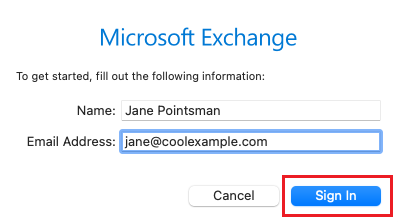
- Wählen Sie Exchange aus und dann Fortsetzen.

- Geben Sie Ihren Namen und Ihre E-Mail-Adresse ein und wählen Sie Anmelden.
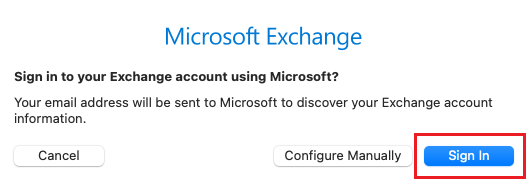
- Klicken Sie auf Anmelden.
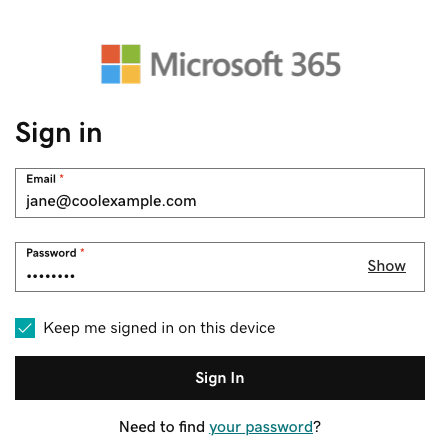
- Enter your email password, and then select Sign In.
- If you see a prompt that says your email is used with more than one account with Microsoft, select Work or school account (not Personal account).
- Enter your email password, and then select Sign In.
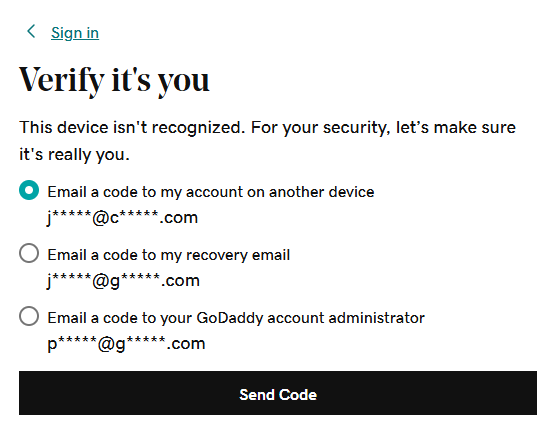
- If you're signing in from a new device or location, you'll see a prompt to Verify it's you and confirm your identity through a one-time code.
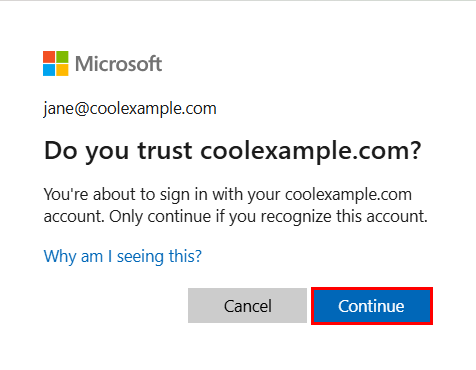
- If you're asked to trust your domain, select Continue.
- If it's your first time signing in and multi-factor authentication (MFA) is enabled, you'll see a prompt to set up your authentication method. (If you have trouble following the on-screen instructions, trying setting up MFA using these steps instead.) If you already have MFA set up, verify your identity using your authentication method.
- Möglicherweise erhalten Sie eine Bitte um Erlaubnis, auf Ihr Konto zuzugreifen. Wählen Sie Annehmen aus.
- Wenn Ihr Administrator die Multi-Faktor-Authentifizierung (MFA) aktiviert hat, verifizieren Sie Ihr Konto oder richten Sie die Authenticator-App ein.
- Möglicherweise erhalten Sie eine Bitte um Erlaubnis, auf Ihr Konto zuzugreifen. Wählen Sie Annehmen aus.
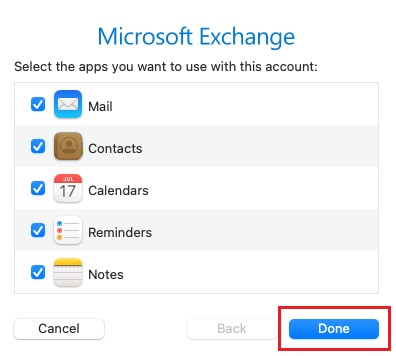
- Wählen Sie Fertig. Beachten Sie, dass Sie jederzeit hierher zurückkehren können, um diese Einstellungen zu bearbeiten.
Ihre Microsoft 365-E-Mail ist jetzt in Ihrem Apple Mail eingerichtet.