Create customized email with the Email Designer
Use the Email Designer to create email that matches your brand, such as welcome messages, product launches or newsletters. No coding or design skills required — choose a template, and then personalize it with your own text, images, fonts and colors. All templates are optimized for desktop and mobile.
Required: Professional Email powered by Titan is intended for personal and business correspondence only. Using Professional Email powered by Titan or the Email Designer for email marketing purposes is strictly prohibited and is a violation of our Terms of Service.
Note: Email Designer is only available to Pro Plus, Premium and Ultra plans. Pro Plus plans can use 1 template, while Premium and Ultra can use an unlimited number of templates. Upgrade my email plan
- Sign in to your Webmail. Use your Professional Email powered by Titan address and password (your GoDaddy username and password won't work here).
- In the upper-left corner, select New email.
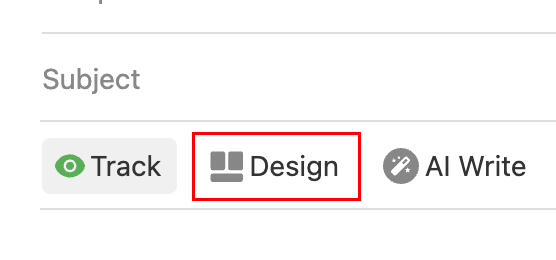
- Under the subject line of the new email, select Design (or Email Designer). If you don’t have any saved templates, the Template Gallery page will open.
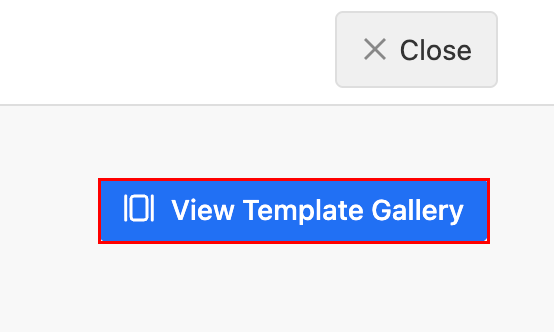
- If you have any saved templates, the Email Designer page will open with your saved templates. To open the gallery, select View Templates Gallery.
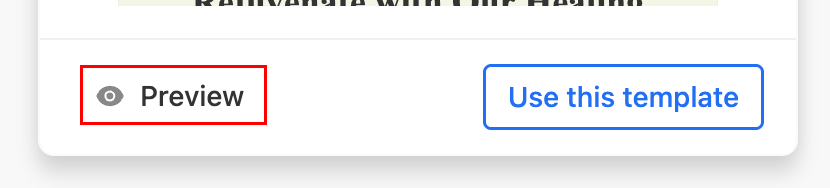
- (Optional) To preview a template, under a template, select Preview.
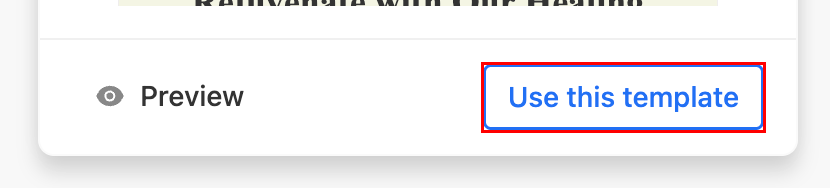
- To use a template in your email, select Use this template. The editor will open.
- Customize the template to your liking. Learn more about using the Email Designer editor from Titan.
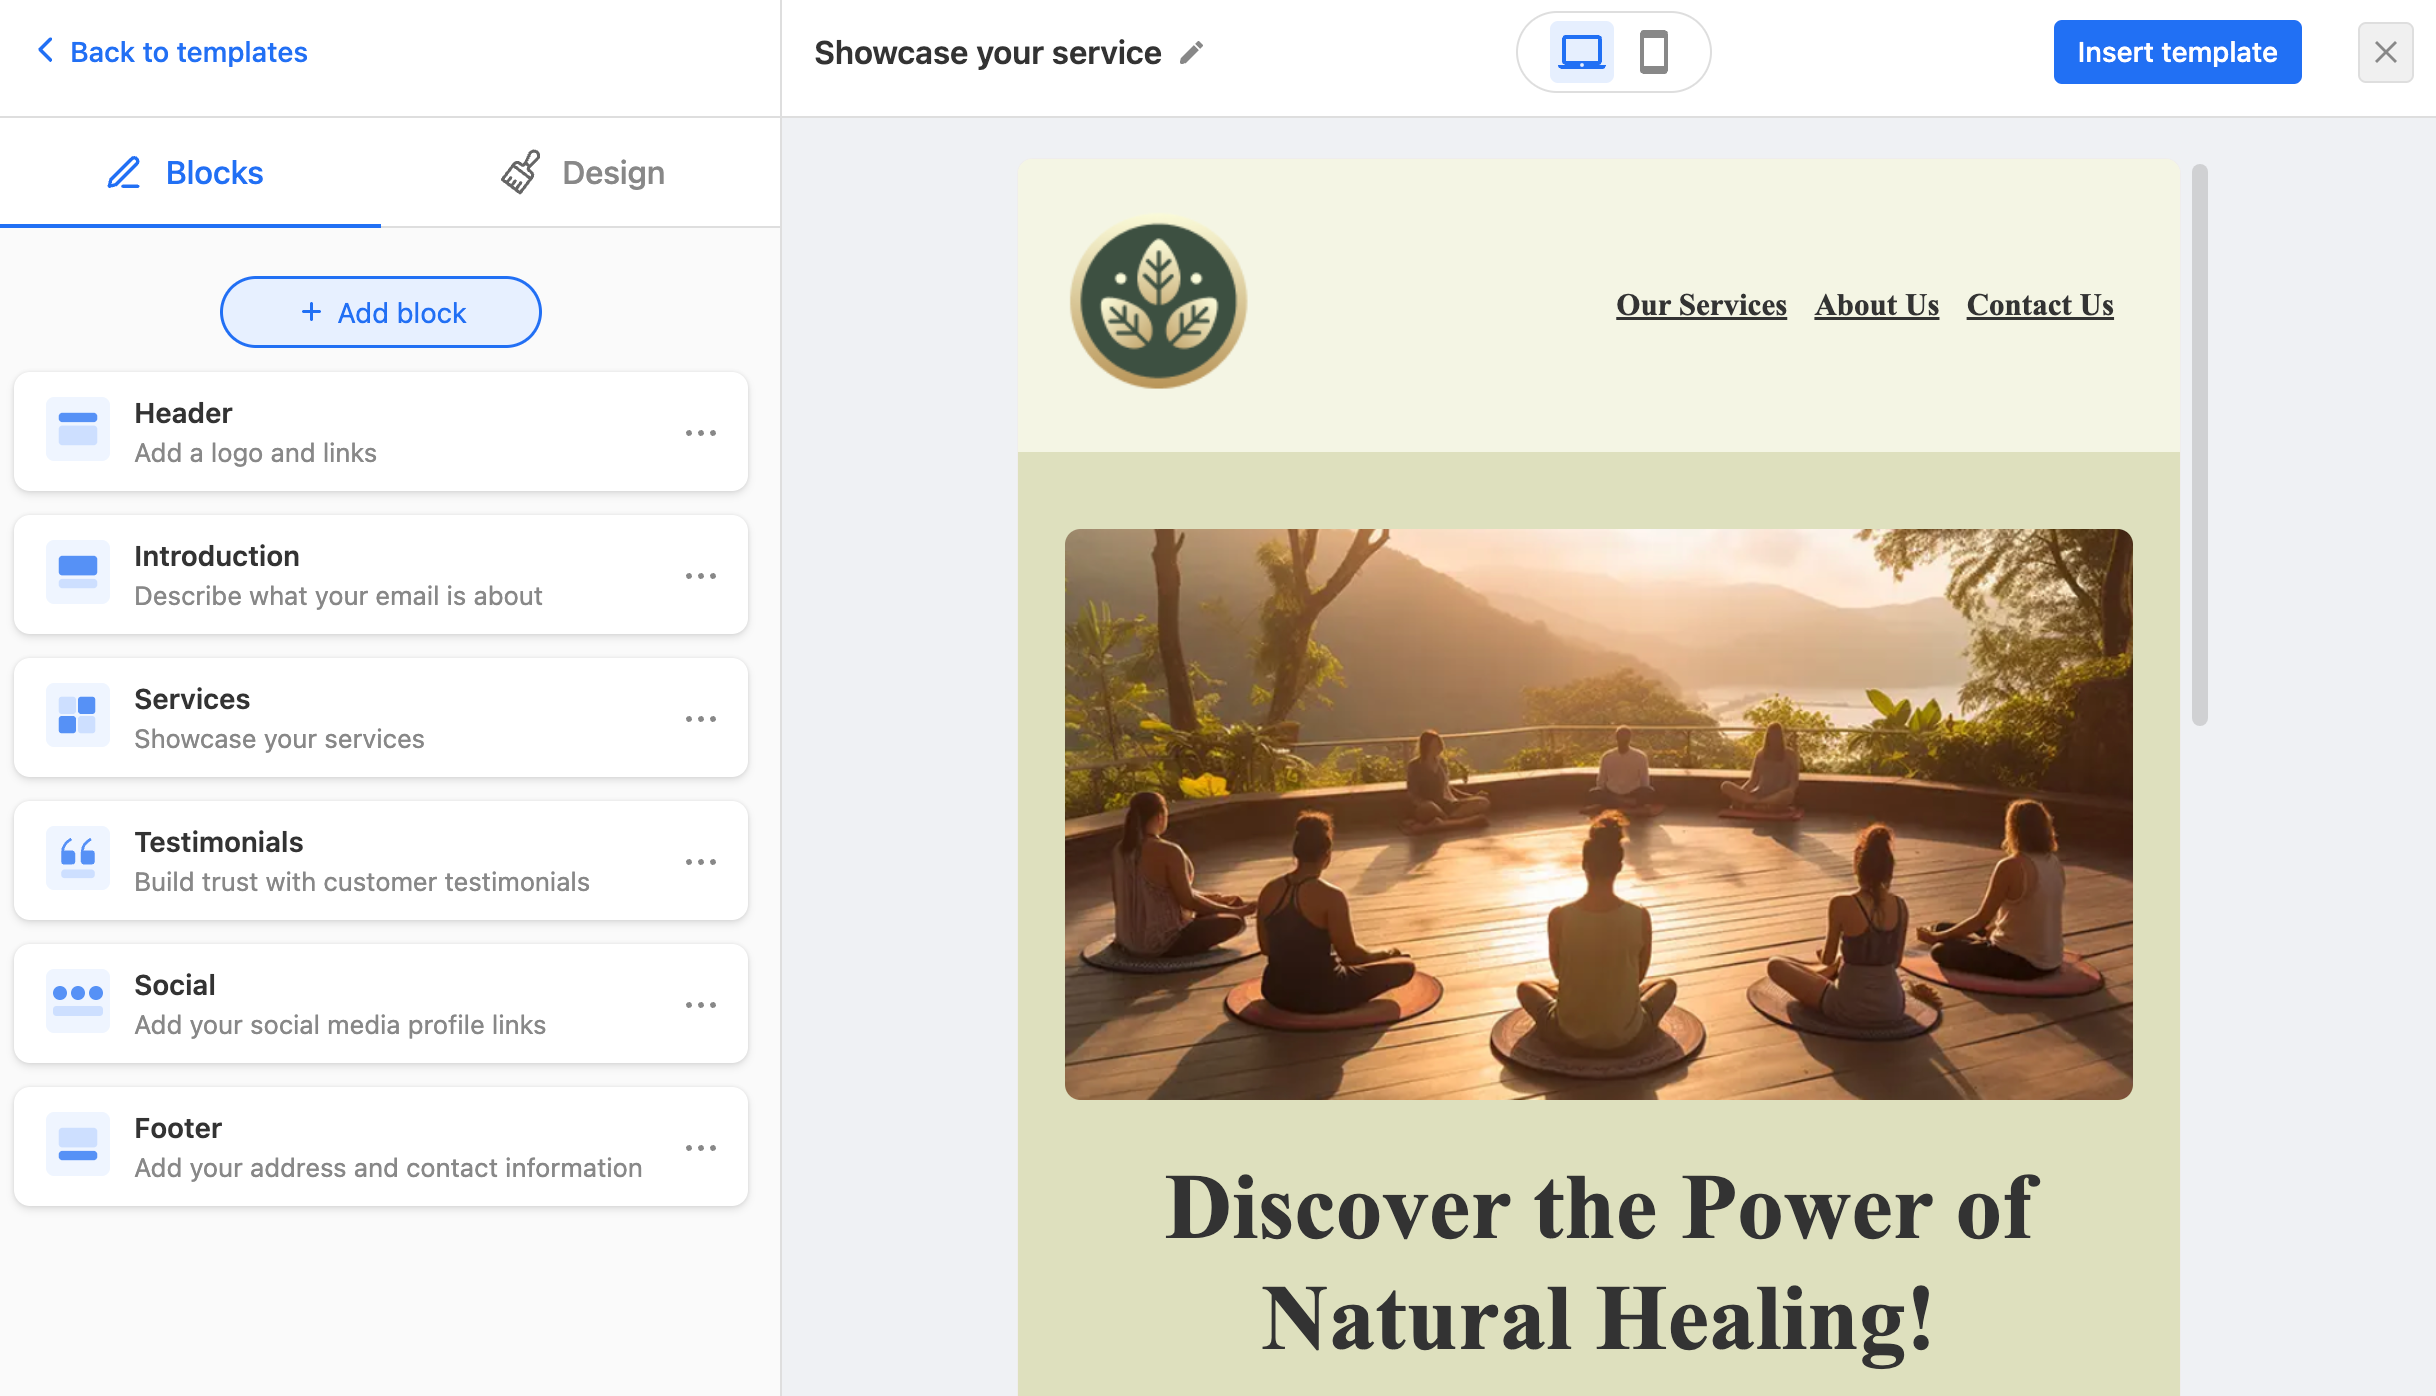
- When you’re ready to add the template to your email, in the upper-right corner, select Insert template. The template will be saved, and you’ll be taken back to your new email with the template inserted.
- If you haven’t named your template already, enter a name for your template, and then select Insert template.
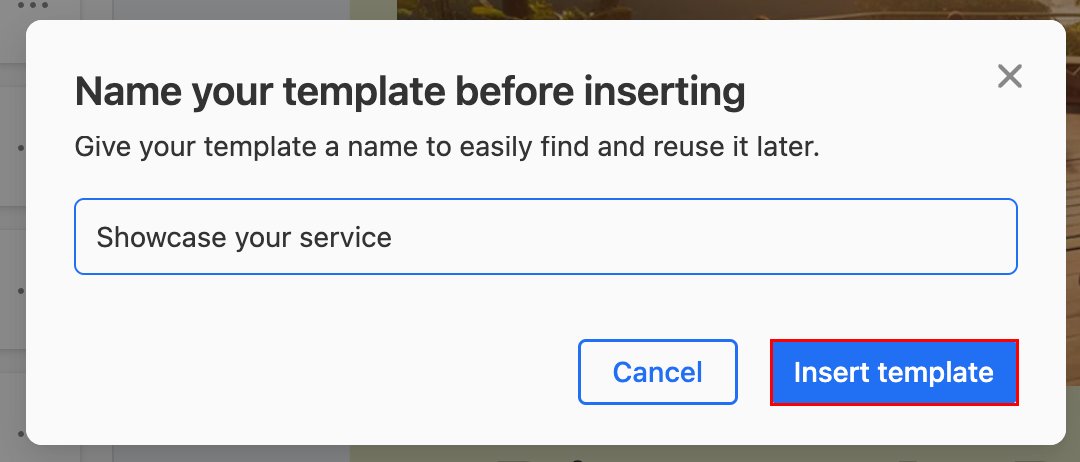
- If you haven’t named your template already, enter a name for your template, and then select Insert template.
- (Optional) With the template inserted in your email, you’ll be in Email Designer mode. This means certain features won’t be available, like Smart Write AI or signatures. To remove the template and go back to the normal email composer, select Clear, and then Yes, clear composer. Or, to edit the template, select Edit.

- When you’re ready to send your email, select Send.
The next time you use the Email Designer, you’ll see your edited template in your saved templates.
More info
- Erstellen Sie meine E-Mail-Signatur
- Find out how you can use AI in Professional Email powered by Titan Webmail to write and edit your email for you.
- If you’re having issues with your email going to spam, check out our troubleshooting steps.