Greifen Sie mithilfe von Advanced Email Security auf unter Quarantäne gestellte E-Mails zu und geben Sie sie frei
Mit Advanced Email Security können Benutzer und Administratoren unter Quarantäne gestellte E-Mails suchen und freigeben. E-Mails werden unter Quarantäne gestellt, wenn sie im Verdacht stehen, Malware oder Phishing zu enthalten.
Advanced Email Security kann Nachrichten, die nicht von Microsoft 365 gesendet werden, unter Quarantäne stellen, sodass diese E-Mails stattdessen in der Advanced Email Security-Quarantäne gespeichert werden. Sie können Nachrichten in Quarantäne prüfen und dann entscheiden, was mit ihnen geschehen soll, z. B. Freigeben oder Löschen.
- Melden Sie sich auf der Seite für erweiterte E-Mail-Sicherheit von GoDaddy an (verwenden Sie Ihren Benutzernamen und Ihr Passwort für GoDaddy).
- Wählen Sie Anmelden bei Advanced Email Security . Die Anmeldeseite wird geöffnet.
- Geben Sie Ihre E-Mail-Adresse ein, wählen Sie Anmelden und dann Mit Microsoft anmelden .
- Befolgen Sie die Anweisungen auf dem Bildschirm, um sich mit Ihrer Microsoft 365-E-Mail-Adresse und Ihrem Passwort anzumelden. Das Portal für erweiterte E-Mail-Sicherheit wird geöffnet.
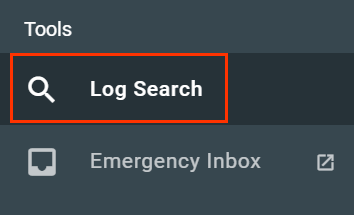
- Wählen Sie Protokollsuche .
- Wählen Sie das Register aus, das als Administrator oder Benutzer übereinstimmt.
- Wählen Sie Bestimmter Benutzer und dann die E-Mail-Adresse aus, die die Nachrichten unter Quarantäne gestellt hat.

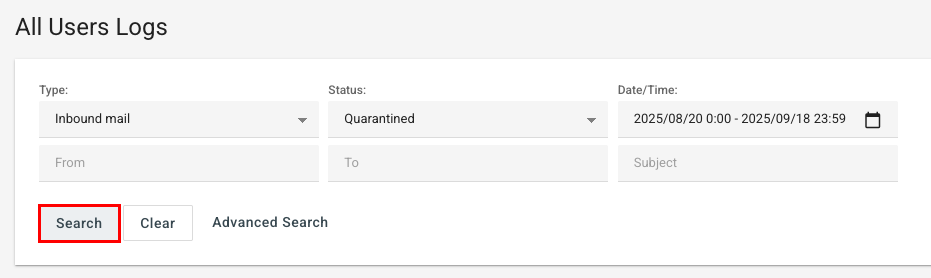
- Wählen Sie unter Typ aus, ob es sich um eine ausgehende oder eingehende E-Mail handelt, und wählen Sie dann den Zeitraum aus, in dem die E-Mail gesendet oder empfangen wurde.
- Wählen Sie unter Status die Option Quarantäne .
- Wählen Sie Suchen . Dadurch wird eine Liste der Nachrichten in Quarantäne für diesen Benutzer innerhalb der von Ihnen angegebenen Filter zurückgegeben.
- Um eine bestimmte Nachricht zu bearbeiten, wählen Sie unter Aktionen die Option
 Vorschau . Hier haben Sie folgende Möglichkeiten:
- Freigeben : Freigeben der Nachricht aus der Quarantäne, sodass sie an den Posteingang des Empfängers zugestellt wird.
- Freigeben und melden : Geben Sie die Nachricht aus der Quarantäne frei, damit sie an den Posteingang des Empfängers gesendet werden kann, und melden Sie sie als falsch positiv (eine E-Mail, die fälschlicherweise als Spam markiert wurde).
- Löschen : Löscht die Nachricht aus der Quarantäne. Die Nachricht wird nicht an den Empfänger zugestellt und kann nicht wiederhergestellt werden.

- Wenn Sie mehrere Nachrichten bearbeiten möchten, aktivieren Sie das Kontrollkästchen neben jeder Nachricht. Wählen Sie über der Liste der Nachrichten Aktionen und dann eine der folgenden Optionen aus:
- Aus der Quarantäne freigeben : Übermitteln Sie die ausgewählten Nachrichten an die Posteingänge der Empfänger.
- Freigeben und genehmigen : Übermitteln Sie die Nachrichten an die Posteingänge der Empfänger und fügen Sie den Absender der Zulassungsliste hinzu, damit künftige Nachrichten desselben Absenders nicht unter Quarantäne gestellt werden.
- Als falsch positiv melden : Markieren Sie die ausgewählten Nachrichten als legitime E-Mails, die fälschlicherweise als Spam identifiziert wurden.
- Als falsch-negativ melden : Markieren Sie die ausgewählten Nachrichten als Spam oder bösartig, auch wenn sie nicht unter Quarantäne gestellt wurden.
- E-Mail in Protokollen ausblenden : Blendet Nachrichten aus, damit sie nicht in der Protokollsuche angezeigt werden.
Hinweis: Das Melden mehrerer Nachrichten als falsch positiv oder falsch negativ ist eine Administratorfunktion.
- Wählen Sie unter Typ aus, ob es sich um eine ausgehende oder eingehende E-Mail handelt, und wählen Sie dann den Zeitraum aus, in dem die E-Mail gesendet oder empfangen wurde.
- Wählen Sie unter Status die Option Quarantäne .
- Wählen Sie Suchen . Dadurch wird eine Liste der Nachrichten in Quarantäne für diesen Benutzer innerhalb der von Ihnen angegebenen Filter zurückgegeben.
- Um eine bestimmte Nachricht zu bearbeiten, wählen Sie unter Aktionen die Option Vorschau . Hier haben Sie folgende Möglichkeiten:
- Als falsch positiv melden : Melden Sie, dass die Nachricht fälschlicherweise als Spam markiert wurde.
- Freigeben : Freigeben der Nachricht aus der Quarantäne, sodass sie an den Posteingang des Empfängers zugestellt wird.
- Löschen : Löscht die Nachricht aus der Quarantäne. Die Nachricht wird nicht an den Empfänger zugestellt und kann nicht wiederhergestellt werden.

- Wenn Sie mehrere Nachrichten bearbeiten möchten, aktivieren Sie das Kontrollkästchen neben jeder Nachricht. Wählen Sie über der Liste der Nachrichten Aktionen und dann eine der folgenden Optionen aus:
- Aus der Quarantäne freigeben : Übermitteln Sie die ausgewählten Nachrichten an die Posteingänge der Empfänger.
- Freigeben und genehmigen : Übermitteln Sie die Nachrichten an die Posteingänge der Empfänger und fügen Sie den Absender der Zulassungsliste hinzu, damit künftige Nachrichten desselben Absenders nicht unter Quarantäne gestellt werden.
- E-Mail in Protokollen ausblenden : Blendet Nachrichten aus, damit sie nicht in der Protokollsuche angezeigt werden.
Es kann bis zu 24 Stunden dauern, bis eine aus der Quarantäne freigegebene E-Mail im Posteingang angezeigt wird. Wenn ein Fehler auftritt, warten Sie 5 Minuten und versuchen Sie es dann erneut.
Standardmäßig werden unter Quarantäne gestellte E-Mails 30 Tage lang aufbewahrt bzw. unter Quarantäne gestellt. Ein Administrator kann den Aufbewahrungszeitraum in den Quarantäne-Übersichtseinstellungen ändern .
Ähnliche Schritte
- Aktualisieren Sie Ihre Listen sicherer und blockierter Absender , um sicherzustellen, dass bestimmte Nachrichten in die Quarantäne verschoben werden.
- Anstatt die meisten Spam- und Massen-E-Mails unter Quarantäne zu stellen und Ihnen eine tägliche Zusammenfassung zu senden, können Nachrichten direkt in Ihrem Junk-E-Mail-Ordner zugestellt werden. Erfahren Sie mehr über Tag and Deliver und darüber, ob es für Ihr Konto verfügbar ist .
Weitere Informationen
- Wenn Sie ändern möchten, wer E-Mails in Quarantäne freigeben kann, bearbeiten Sie Ihre Spam-Einstellungen .
- Holen Sie das Beste aus Advanced Email Security heraus
- Geben Sie eine von Microsoft 365 unter Quarantäne gestellte Nachricht frei oder löschen Sie sie