How can I run a test order in my WooCommerce shop?
If this your first time running an online business, then you'll soon discover that a big part of your day-to-day activities is making sure that your shop is running as expected. Even before launching, going through the customer journey in your site is certain to give you some interesting insights.
In this article we'll go through a couple of fast and simple ways of how you can run a test order and why it's an important tool in your arsenal of managing a shop.
Quick Links
Using the "Check payments" gateway
WooCommerce offers a number of integrated payment gateways like Check payments and bank transfer. In this article we'll be covering the one called "Check payments". It has been designed to allow your customers to pay for their orders in person by using checks. However, it is also considered an "offline payment gateway" which means that orders don't need a payment processor in order be placed.
Due to this functionality, Check payments is also a great choice for doing test orders. Let's check the pros and cons of using this as your test order method.
Pros
- Great option for doing a big number of tests fast
- Easy to setup and enable
- Allows you to easily follow the customer journey from start to finish
- No need of any extra preparation before doing a test
Cons
- Doesn't emulate the full payment process as orders placed through the Check payments gateway don't go through a payment processor
- Not easy to do tests after your shop has launched as it may allow customers to place an order without paying
If this sounds good, follow these steps:
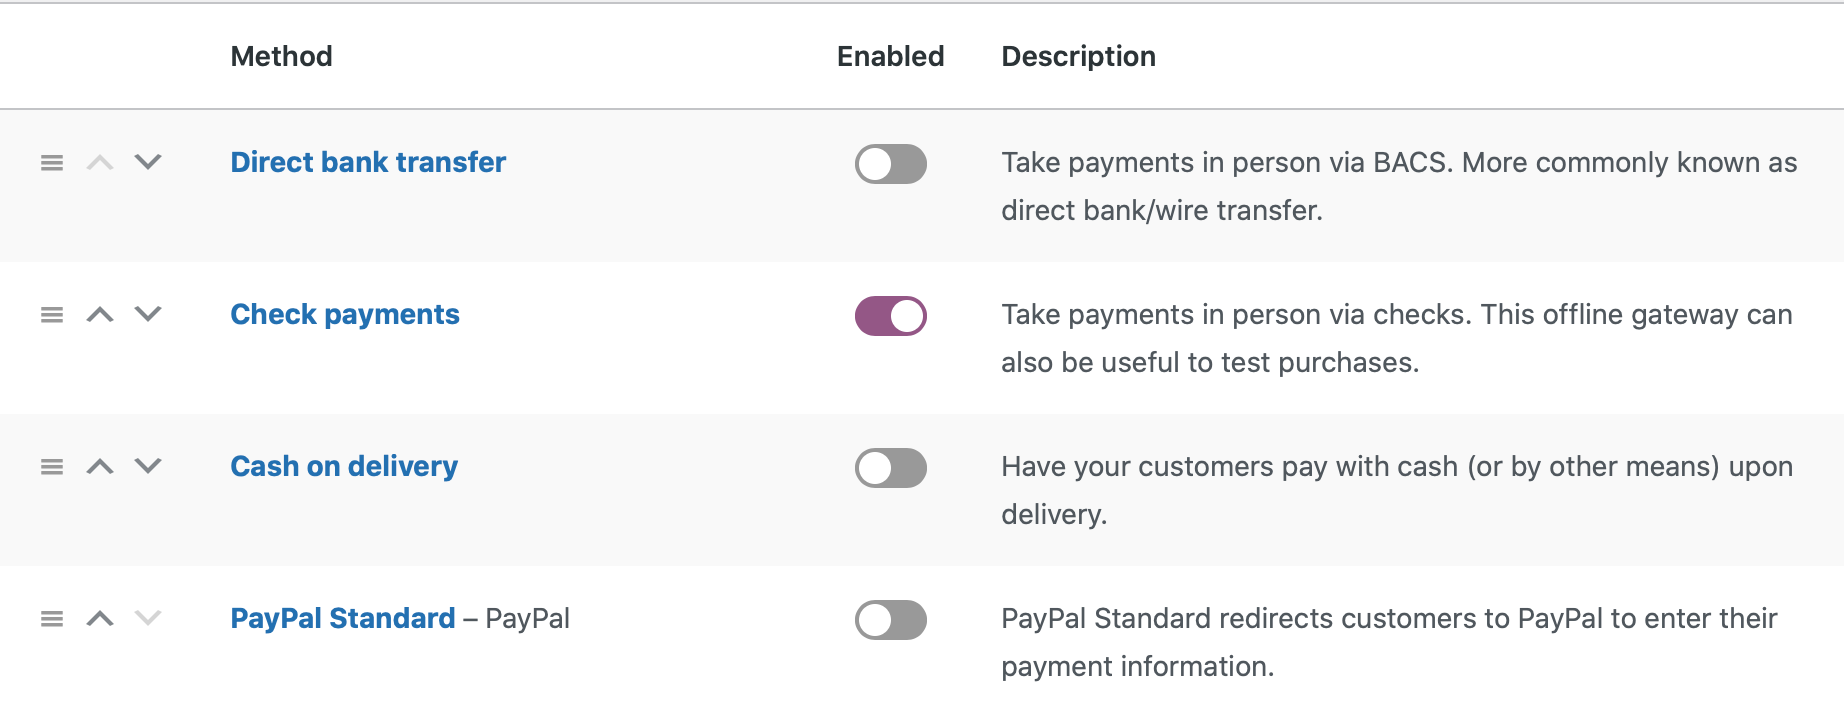
- Navigate to WooCommerce > Settings > Payments from your shop's admin dashboard.
-
Toggle on the option next to the Check payments gateway under the Enabled column.

- Log in to a test, user account in your shop and navigate to a product page. After following the checkout process, make sure you use Check payments option (or equivalent if you've changed the title of the payment option for your shop) in the checkout page.
- Click to place the order.
So now you should be able to use Check payments gateway to place a test order!
(Back to top)Place an order and refund
You can place an actual order in your shop and refund it. However, please note that this guide assumes you've already connected your payment gateway (such as PayPal Standard) and you're ready to place an actual order. All payment processors have their own configuration process, so make sure you've taken any steps needed to connect them before running a test order.
Let's have a quick look at the pros and cons of this method.
Pros
- Allows you to familiarize yourself with the refund process
- Can catch any issues with your payment processor, plugin or theme early - even before the launch of your shop
- You can experience the full customer journey first-hand and ensure it's what you were looking for
Cons
- Some payment processors require refund fees
- Needs a lot of configuration before you can make your first test order
- You may need to create a test product with a low price or change the price of one of your products to place an order
- Also, please note that some payment processors have a limit as to how low an order should be before you can place it or refund it.
If this method works for you, follow these steps::
- Navigate to your shop and pick a product to purchase.
- After you've placed the order, navigate to WooCommerce > Orders from your admin dashboard and choose the order you'd like to refund.
- You may need to scroll down a bit until you find the Refund button under the line items of the order.
- After you click on the button, you can then refund each line item of an order individually.
- There are two refund methods supported by WooCommerce, one called Automatic and the second Manual. You can find more about their difference
here, but in short:
- An Automatic refund means that when the refund is completed in your shop, then it's also completed in the payment processor. Not all payment gateways support this method so you may want to reach out to your processor's support team to ask them for more information. You can also check this link with some payment gateway plugins that already support this feature.
-
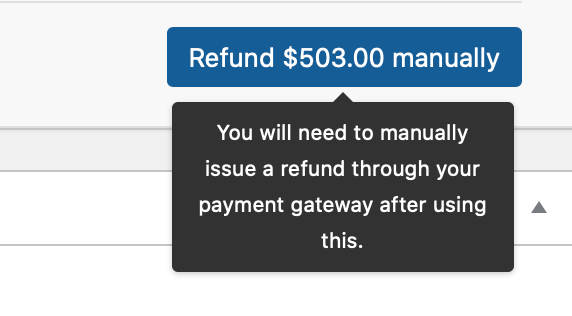
A Manual refund means that when the refund is completed in your shop, it isn't completed in your payment processor and you'll need to complete it manually
on your own. You'll know that you'll need to what when you see the Refund $X manually.

Well done on completing a refund for test purposes!
(Back to top)However, kindly note that the list above isn't exhaustive. The methods above are the quickest and simplest methods when getting started with WooCommerce as they're available out of the box and need almost no configuration to use them. There are a couple more ways you can run a test order, one of them being sometimes directly incorporated in your payment gateway plugin or creating a 100% discount coupon. Some gateway plugins offer a sandbox/testing/development environment you can utilize for your tests. Unlike the previous methods we've discussed, this is very similar to the last one - like placing an actual order - but with some key differences.
Many payment processors will require you to do a slightly different configuration to enable the sandbox environment, so if you decide to find out more about this method, make sure to deactivate it before launching your shop.
You are now able to run a test order with multiple ways and even begin to troubleshoot some critical issues that you may encounter! However, if you have more questions, don't hesitate to reach out to our Guides to provide you with more information.
More Info
- Find out more information about choosing a payment gateway
- Learn how you can add or update a WooCommerce payment method