Set up Application Performance Monitoring (APM)
Keep your WordPress site running smoothly by monitoring its performance with Application Performance Monitoring (APM). This powerful tool helps you understand your site's performance, identify slow-loading pages, and spot issues before they affect your visitors. Whether you're a freelancer managing client sites or just getting started with WordPress performance optimization, APM provides valuable insights into your site's health.
Benefits of APM
- Identify performance bottlenecks: See which pages, plugins, or database queries are slowing down your site.
- Monitor site health: Get real-time alerts when your site experiences issues.
- Improve user experience: Fix slow-loading elements that frustrate visitors.
- Track performance trends: Monitor improvements over time as you optimize your site.
- Prevent downtime: Catch problems early before they impact your visitors.
- Data-driven decisions: Make informed choices about plugins, themes, and hosting configurations.
About New Relic integration
This APM solution uses New Relic, an industry-leading performance monitoring platform. You'll need to provide a New Relic license, but don't worry — New Relic offers free accounts that work perfectly for getting started. Your performance data flows directly to your New Relic account, giving you complete control and privacy over your site's monitoring information.
Prerequisites
Before setting up APM integration, you'll need:
- A New Relic account (free accounts are supported).
- A New Relic API key for your WordPress application.
Warning: Ensure you create an API key with the Key type of Ingest - License. Once the key is made, there'll be an option to copy it. The API key must end with NRAL. Save this API key for the steps below.
Set up APM integration
- Go to your GoDaddy product page.
- On your My Products page, select Manage All next to Managed Hosting for WordPress.
- For the site where you want to set up APM, select the
 menu, and then select Settings.
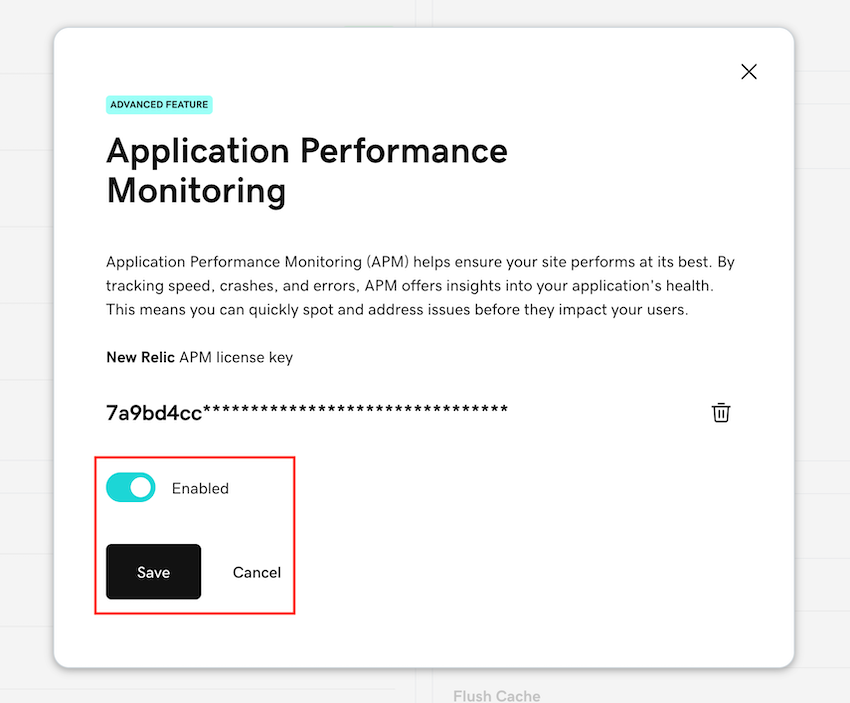
 - Under Production Site, next to Application Performance Monitoring, select Enable.
- Enter your New Relic API key in the provided field.
Note: Ensure you're using an Ingest key. User keys are not compatible with this integration.
- Select Connect. We'll validate your API key and its associated region automatically.
- Select Enable, and then Save.
Once validated, your APM integration will be provisioned. Your WordPress application may briefly restart during this process. After provisioning, performance data will stream directly to your New Relic account.
Important information about your data
- Performance data flows directly from your site to New Relic. We don't capture or have access to review this information.
- Your API key should be treated as confidential information and never shared during support interactions.
- You maintain complete control over your monitoring data through your New Relic account.
Recommendations for optimal use
Monitor resource usage: APM uses server resources and can impact your site's performance if left running continuously. Consider enabling APM during specific periods when you're actively optimizing your site or troubleshooting issues.
Start with New Relic's guidance: If you're new to APM, review New Relic's comprehensive documentation for onboarding guidance and tips on interpreting your performance data.
Set up alerts: Configure New Relic alerts to notify you when performance thresholds are exceeded, helping you stay proactive about site maintenance.
Getting the most from your APM data
Once your integration is active, you can access detailed performance metrics in your New Relic dashboard. Focus on key areas like page load times, database query performance, and plugin efficiency to identify the most significant opportunities for improvement.
Remember, the goal isn't perfect performance metrics but creating a better experience for your site's visitors while maintaining a healthy, stable WordPress environment.
More info
- Explore detailed documentation on New Relic API keys from Newrelic.com.