Create or edit a contact group
Create a contact group to email multiple people at once. Sending a message to the group will send it to each of its members, saving you from adding each recipient individually.
Note: This feature is only available to Pro Plus, Premium, and Ultra plans. Pro Plus plans can create 1 contact group, while Premium and Ultra plans can create unlimited contact groups. Upgrade my email plan
Select a tab based on whether you want to create or edit a contact group.
Create a new contact group
- Sign in to webmail. Use your Professional Email powered by Titan address and password (your GoDaddy username and password won't work here).
- In the upper-left corner, select New email.
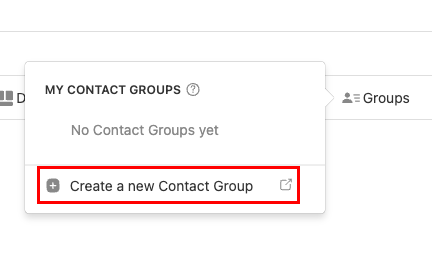
- Under the Subject, select Groups, and then Create a new Contact Group. A new window will open.
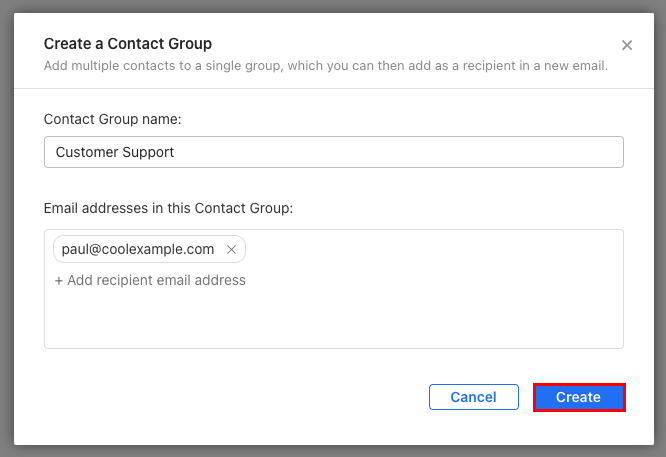
- Under Contact Group name, enter a name for your contact group.
- Under Email addresses in this Contact Group, enter the email address that you want to add, and then hit Enter on your keyboard. If the email address exists in your contacts, you can select it when it comes up as you type.
- Repeat step 5 to add as many email addresses as you would like to the group.
- Select Create. You’ll see your contact group in your list of contact groups.
To send an email to a contact group, enter the name of the contact group in the To, Cc, or Bcc line, and then select it from the list.

Edit a contact group
- Sign in to webmail. Use your Professional Email powered by Titan address and password (your GoDaddy username and password won't work here).
- In the upper-left corner, select New email.
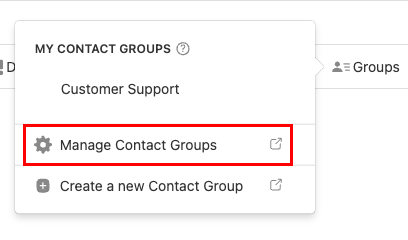
- Under the Subject, select Groups, and then Manage Contact Groups. Your list of contact groups will open in a new window.
- Hover over the contact group, and then select
 Edit.
Edit. - Edit the contact group name or members as desired, and then select Save.