Conectar GoDaddy Conversations à minha conta do Gmail
Encaminhe sua conta do Gmail para GoDaddy Conversations para receber todas as suas mensagens do Gmail em sua caixa de entrada unificada do Conversations, tornando mais fácil gerenciar suas comunicações comerciais.
- Em um navegador da web, acesse sua da GoDaddy.
Se você tiver a versão autônoma do Conversations, expanda a Caixa de entrada unificada do Conversations . À direita do seu plano Conversations, selecione Caixa de entrada da web .
OU
Se você tiver um plano Websites + Marketing, role até Websites + Marketing e selecione Gerenciar ao lado do seu site. No menu à esquerda, expanda Conversations .
- Selecione Configurações.
- Select Channels.
- Expand Email, and then select Connecct. (If you already have a connected Gmail address, select Add another.)
Note: If you have a Websites + Marketing plan and have enabled chat for your website, you’ll have a default email address to receive chat notifications. This is an internal email address created for you by GoDaddy. Connecting Gmail to Conversations will not affect this default email address.
- Selecione Gmail e depois Avançar .
- Digite o endereço do Gmail que você deseja conectar a Conversas e selecione Avançar .
- Insira o nome que seus clientes verão quando você enviar um email e selecione Próximo .
- Selecione Abrir configurações do Gmail .
- A new tab will open, showing your Gmail settings.
Warning: Make sure you keep both tabs open because you’ll need to switch between them to be guided through the steps.
- Go back to the Conversations tab and select Copy next to the forwarding address.
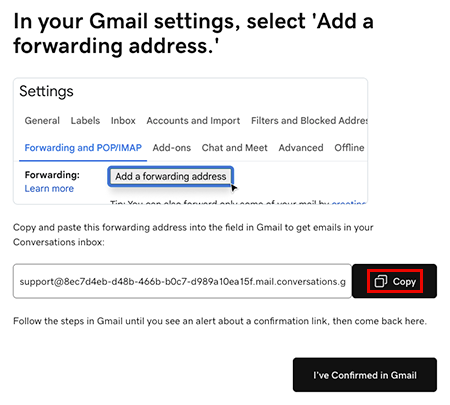
- Vá para a guia de configurações do Gmail. Em Encaminhamento e POP / IMAP, selecione Adicionar um endereço de encaminhamento , cole o endereço na caixa de texto e selecione Avançar . Pode ser necessário confirmar que é você. Siga as instruções na tela para fazer isso.
- Você receberá uma mensagem dizendo que um link de confirmação foi enviado para o endereço de email inserido. Selecione OK .
- Back in the Conversations tab, select I’ve Confirmed in Gmail, and then select Confirm Forwarding in Gmail.
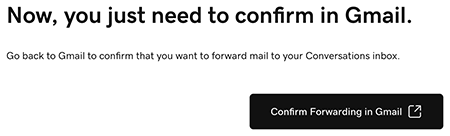
- A new tab will open, showing a Gmail confirmation. Select Confirm. When you see the Confirmation Success! message, you can close this tab.
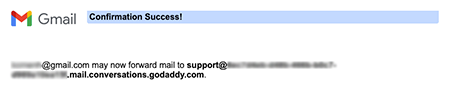
- Go to the Gmail settings tab and reload the page.
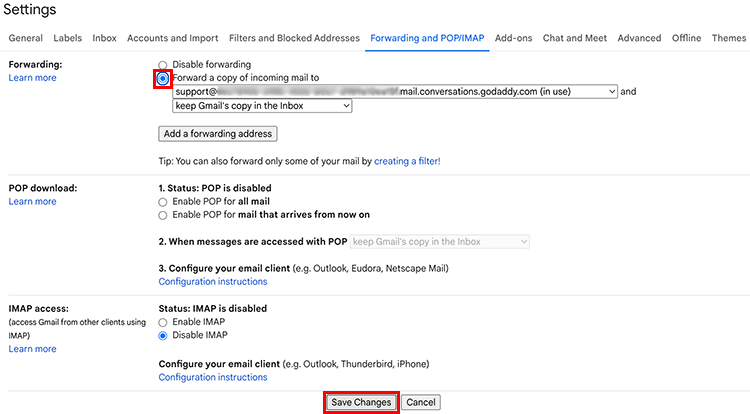
Warning: If you don’t reload the page you might not see the option to select Forward a copy of incoming mail.
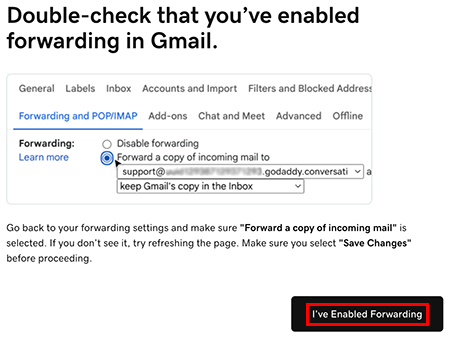
- Under Forwarding and POP/IMAP, make sure Forward a copy of incoming mail is selected. At the bottom of the page, select Save Changes.
- You’ll be taken to your Gmail inbox. At the top of the page you’ll find a message saying you’re now forwarding your email.

- In the Conversations tab, select I’ve Enabled Forwarding.
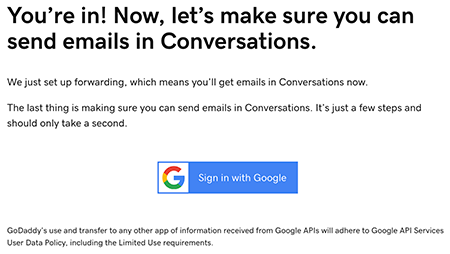
- A message will let you know you’ve successfully set up email forwarding. It could take up to 5 minutes for this message to show. Select Sign in with Google to start the process of making sure you can also reply to Gmail messages from Conversations.
- Faça login na conta do Gmail que você conectou ao Conversations e selecione Continuar .
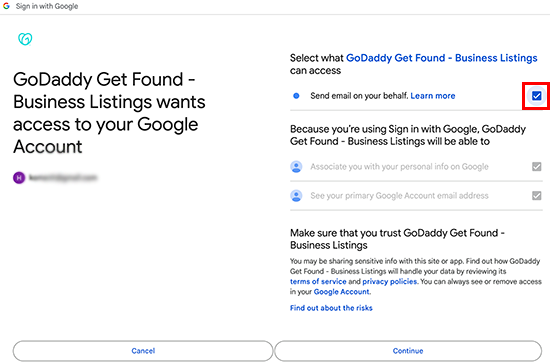
- Make sure Send email on your behalf is checked and select Continue.
- Em suas mensagens recentes do Conversations, você encontrará um email confirmando que o encaminhamento foi configurado.
Tudo pronto! Agora você pode usar sua caixa de entrada unificada do Conversations para gerenciar todas as suas mensagens do Gmail, juntamente com as mensagens de outros canais que você conectar ao Conversations.