Connect an accessory to a GoDaddy Smart Terminal
Connect compatible external printers, cash drawers and barcode scanners to your GoDaddy Smart Terminal with wired (USB or Ethernet) or wireless (Wi-Fi network or Bluetooth) connections. Depending on your device, accessories can be connected through another accessory or connected directly to the Smart Terminal.
Need help deciding? Check out our recommended accessory connections for different business types.
Note: GoDaddy Smart Terminal Flex is compatible with Ethernet (via network router) connections only.
Select an accessory to learn more:
| Receipt printers |
|---|
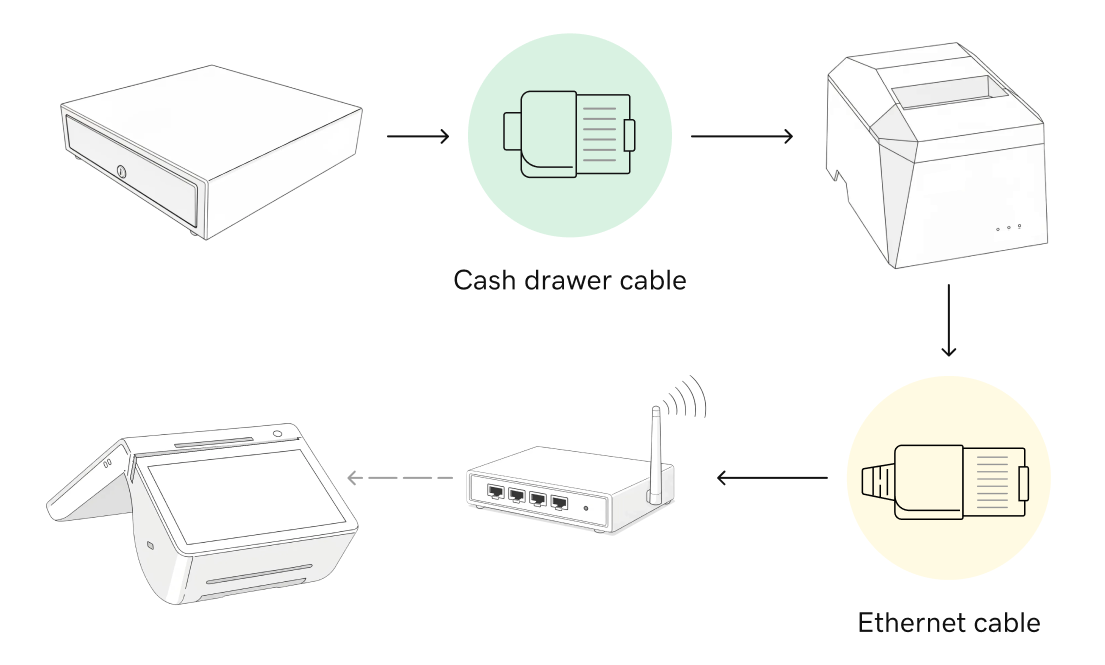
Connect a GoDaddy Smart Terminal to an external printer with a USB, Ethernet (via Wi-Fi network router) or Bluetooth connection. Ethernet (via network router)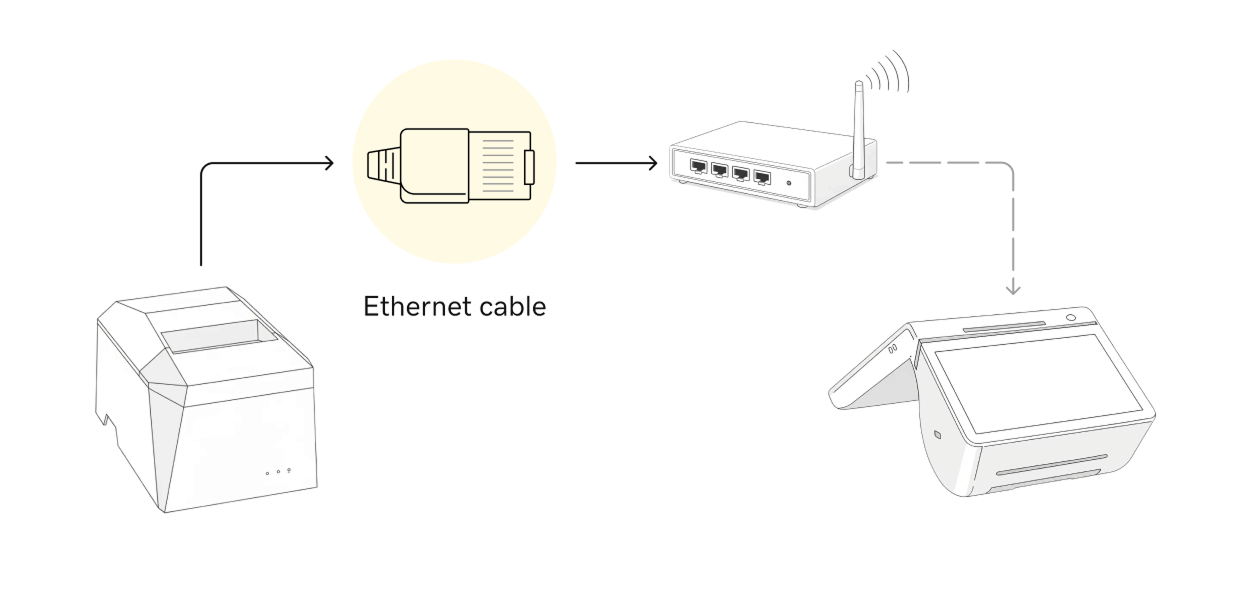
USB connection 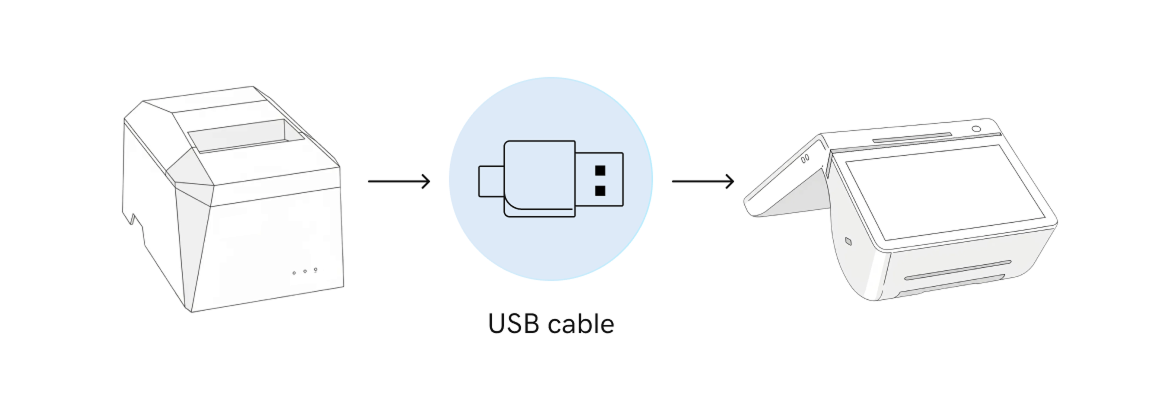
|
| Cash drawers |
|---|
Connect an external cash drawer directly to a GoDaddy Smart Terminal or chain it with an external USB or Ethernet-connected printer. Direct connection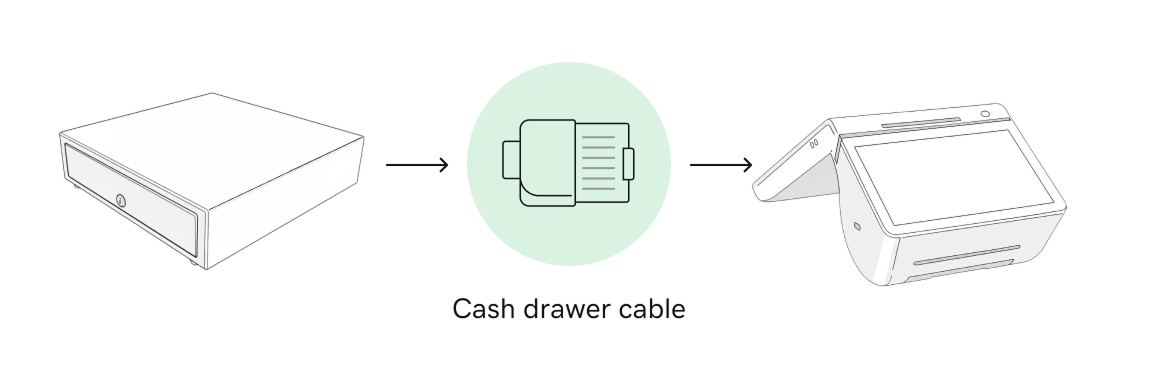
Printer-driven (USB or Ethernet) 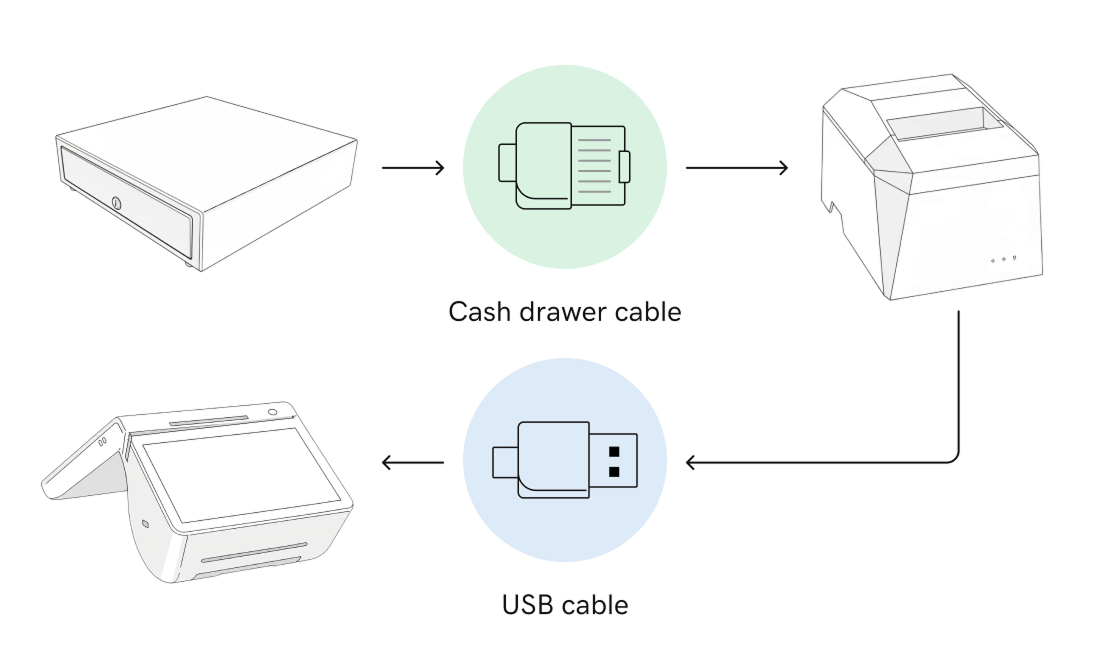
|
| Barcode scanners |
|---|
Connect an external barcode scanner to a GoDaddy Smart Terminal Duo or a GoDaddy Smart Terminal Pro with a USB cable.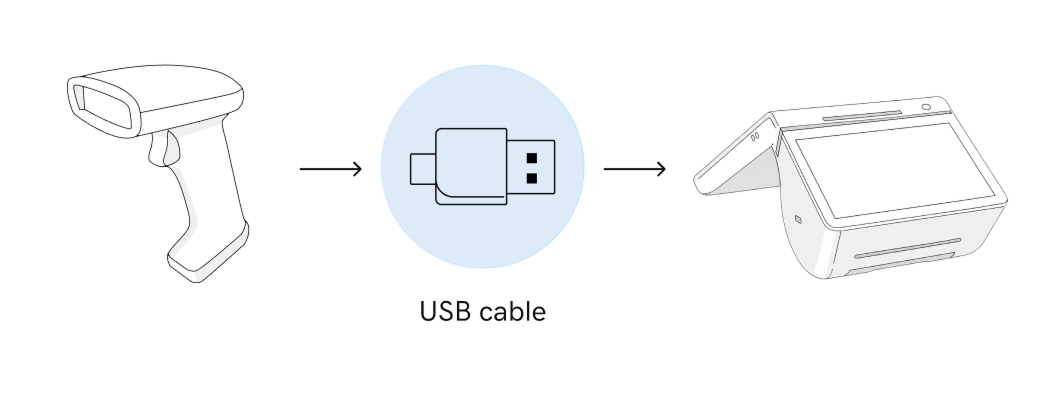
|
More info
- See all compatible accessories for GoDaddy Smart Terminals and find out more about accessory connection types and terms.
- Order accessories for your Smart Terminal.