Add more storage to my Managed Hosting for WordPress plan
You can add more storage to your Managed Hosting for WordPress plan to help manage your storage effectively and avoid hitting the default limits. This add-on feature is billed pro-rated to match your site's regular renewal period.
All sites, including the staging site, under a plan will share the storage allotted to the plan. Here's the default storage available for each plan type:
- Basic - 10 GB
- Deluxe - 20 GB
- Ultimate - 30 GB
If you reach or exceed your storage quota, certain functionalities will be restricted:
- Unable to upload new media files
- Unable to install new themes
- Unable to install new plugins, although existing plugins can still auto-update for security reasons
Note: You can manage your storage by purchasing more or cleaning up existing storage.
Here's how to add storage to your Managed Hosting for WordPress plan:
- Go to your GoDaddy product page.
- On your My Products page, next to Managed Hosting for WordPress, select Manage All.
- For the plan you want to add storage to, select Settings from the
 menu.
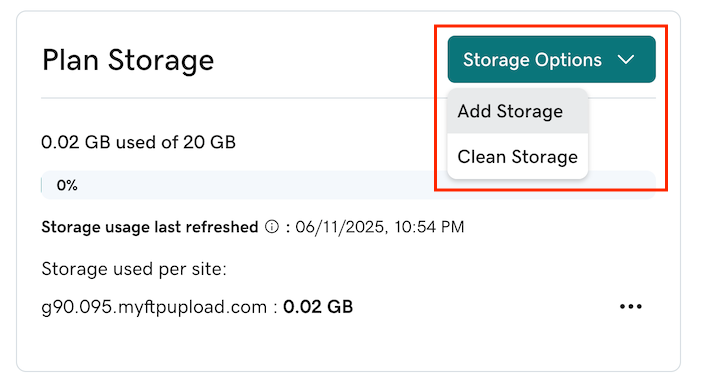
menu. - In the lower-right corner, under Plan Storage, select Storage Options and then select Add Storage.
- Review the changes, and then select Continue to Cart and complete the purchase process.
Note: The storage add-on is linked to the lifecycle of the main Managed Hosting for WordPress plan. If the main plan is canceled, the storage add-on will also be automatically canceled. Additionally, the add-on is billed on a pro-rated basis. For example, if you buy a 20GB storage add-on six months into a one-year Managed Hosting for WordPress plan, you'll be billed for the remaining six months.