編輯一個SPF記錄
隨時編輯您的SPF(寄件人政策框架)記錄,以便變更可允許哪些郵件伺服器代表您的網域傳送email。 SPF記錄可以幫助偵測並防止email欺騙。您一次只能在您的網域上使用一份SPF記錄,而我們也無法提供自訂SPF記錄的說明。您的網域必須使用GoDaddy名稱伺服器才能編輯GoDaddy帳戶中的SPF記錄。
範例:如果您的email設定有Professional Email,GoDaddy的Microsoft 365,Linux主機服務,第4代VPS&如果是專屬主機(或專屬主機),則您的SPF記錄必須將「值」設為v = spf1 include:secureserver.net -all ,才能正常運作。
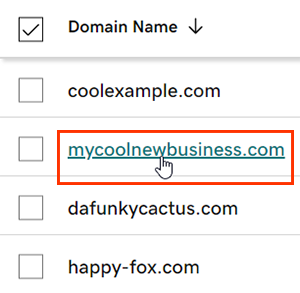
- 登入您的 GoDaddy 網域組合。(需要協助您登入嗎?找尋您的使用者名稱或密碼。)
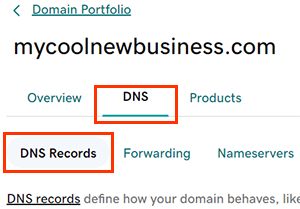
- 選取個別網域以存取「網域設定」頁面。
- 點選DNS以檢視您的DNS記錄。
- 點選欲編輯記錄旁邊的
 「編輯」。
「編輯」。 - 編輯SPF記錄的資訊。
- 名稱:記錄的主機名稱或前綴,不含網域名稱。輸入@將記錄放在您的根網域上,或輸入前綴,如mail 。名稱必須遵循以下規範:
- 您可以使用半形句點 (.),但不可作為第一個或最後一個字元。
- 不可使用連續句點 (…)。
- 不能以連字號開頭或結尾(-)
- 連續63個字元,中間不可使用半形句點(.)
範例: 63characters.63characters.coolexample.com
- 最多255個字元
- 值:表明只允許從您的郵件伺服器接收電郵的SPF規則。值必須遵循以下準則:
- 上限為512個字元
- 只允許使用ASCII字元
- GoDaddy Professional Email,Microsoft 365,Linux主機服務,第4代VPS&專屬主機,及媒體廟宇郵件使用下列SPF記錄:
v=spf1 include:secureserver.net -all - 如果您使用GoDaddy的Microsoft 365和進階電子郵件安全性附加元件,請前往電子郵件& Office儀表板即可找到您的SPF記錄。
- TTL(上線時間):伺服器應該在重新整理之前快取資訊的時間。預設為1小時。
- 名稱:記錄的主機名稱或前綴,不含網域名稱。輸入@將記錄放在您的根網域上,或輸入前綴,如mail 。名稱必須遵循以下規範:
- (選用)點選「新增更多記錄」以一次新增多個DNS記錄。如果您改變心意,請選擇
 刪除可移除所有尚未儲存的記錄。
 - 點選「儲存」以確認編輯。如果您一次新增多個紀錄,請點選「儲存所有紀錄」。
- Domain Protection的網域需要額外的身分驗證。如果您有開啟兩步驟驗證(2SV)的功能至少有24小時,請輸入我們透過簡訊傳送的代碼,或輸入您驗證器應用程式中的代碼。否則,請輸入我們寄到您GoDaddy帳戶電子郵件地址的一次性密碼。
大多數的DNS更新會在一小時內生效,但可能需要48小時才能全面更新。
相關步驟
- 了解SPF記錄如何協助防止email欺騙。
- 新增DKIM記錄至您的Microsoft 365組織。
- 您也可以在Linux主機,第4代VPS主機和專屬主機中新增SPF,DKIM或DMARC記錄。