Manage my WordPress comment settings
WordPress comes with a built-in commenting system that adds a comment block to the bottom of your posts and pages where your audience can share their thoughts and ideas. WordPress comments is a fully-fledged comment system that doesn't require a third-party plugin to add comment features to your site. However, there are third-party plugins available that expand the capabilities of WordPress comments.
Enabling comments on your site has many benefits but also comes with some risks. It's important to understand both before getting started with WordPress comments. Unmoderated comments can get out of control and damage your site's brand reputation.
Why enable comments on my WordPress site?
Building user-engagement around WordPress comments can improve your site's SEO ranking and create social proof that your content is relevant, current, and interesting to your audience.
Providing a place for your audience to discuss the topic of your post or page answers the question many site builders have -- how can I get more content onto the page? This type of user-generated content (UGC) can help web crawlers figure out how relevant your page is to a search query. In addition, you can collect feedback on the topic to help improve your content.
Creating a space for your audience to contact you organically without using a contact form can keep them coming back to engage with your content. Comments can also be a reliable source of lead generation for marketing purposes.
What are the risks to having comments enabled on my site?
The primary risk to WordPress comments is unmoderated comments ueroding trust between your brand and your audience. The default settings for WordPress comments are safe, but there are some improvements that you can make in the settings to safeguard your site.
Spammers will try to funnel your traffic or mislead your audience. Placing common-sense limits on comments can reduce your risk.
Moderating comments can become a chore as your site takes on more traffic, which can lead to more effort than you're willing or able to put into it. Familiarizing yourself with the comment options before getting started with WordPress comments will help you come up with a comment strategy that makes sense for your situation.
A comment strategy can be as restrictive as deciding you don't want to manage comments and turning them off all together, or as permissive as leaving your comments open with little or no moderation at all. The main idea is to create a strategy that makes sense for your situation and the goals you've set for your site.
What are the basics for managing comments on my site?
When comments are enabled, WordPress adds text boxes to the bottom of your posts and pages where your audience can engage with your content.
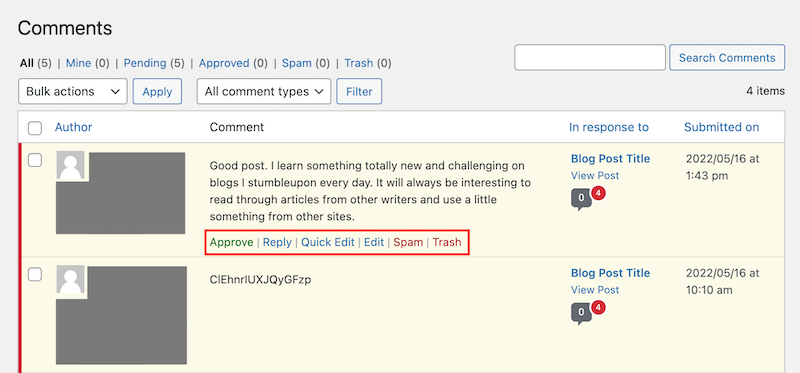
You can view and manage comments in the Comments section of the WordPress dashboard. There are several views where comments are stored:
- All: A list of all comments
- Mine: Your comments. This is based on who you're signed in as.
- Pending: Comments that are pending approval.
- Approved: Comments that have already been approved.
- Spam: Comments that have been flagged as unwanted or irrelevant.
- Trash: Comments flagged as unwanted. They're automatically removed after 30 days.

In this section, you can hover over an individual comment to approve, mark as spam, move to trash, edit, or reply to it.
WordPress built-in comment tools
Let's look at the built-in comment moderation tools available in WordPress. You'll need to stay signed into the WordPress dashboard to manage your comment settings.
Select a task from the following list to manage your WordPress comment settings:
- Sign in and open Discussion Settings
- Disable comments
- Prevent anonymous comments
- Close comments on old posts
- Limit the number of links allowed in a comment
- Build a comment moderation list
- Build a comment blocklist
Sign in and open Discussion Settings
You can find the controls for managing comments on the Discussion Settings page in your WordPress dashboard. Here's how to get there:
- Sign in to your WordPress dashboard. (Need help signing in to WordPress?)
- In the left-menu, select Settings and then Discussion.
Disable comments
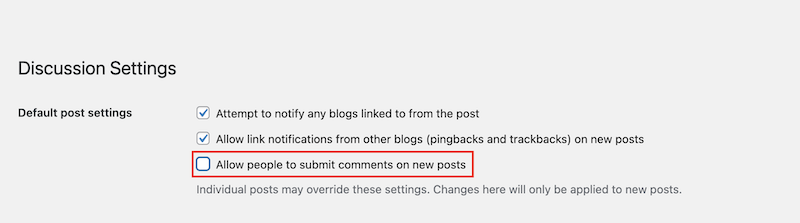
In the Default post settings section, you can disable comments entirely by clearing the checkbox for Allow people to submit comments on new posts. This will prevent anyone from commenting on new posts.
- Sign into WordPress and open Discussion Settings. (Remind me how to do this)
- In the Default post settings section, clear the checkbox next to Allow people to submit comments on new posts.
- Scroll to the bottom of the page and select Save Changes.
Note: If you have comments enabled on individual posts or pages, individual settings will overwrite the default post settings for these posts or pages.
Prevent anonymous comments
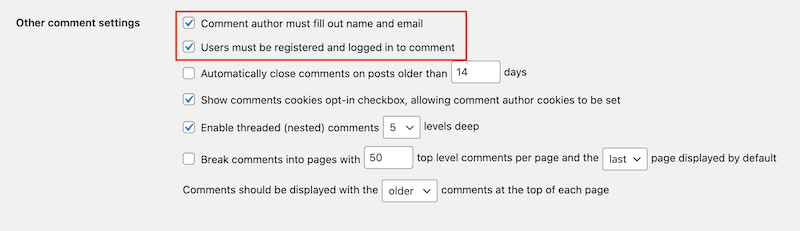
If your WordPress site allows comments, you can prevent anonymous user comments by selecting the check box for Comment author must fill our name and email or Users must be registered and logged in to comment, or both.
Requiring your audience to provide contact info or sign in before they can comment is an excellent way to prevent bots from spamming your comments. It's also an excellent way to generate leads that are genuinely invested in your content.
- Sign into WordPress and open Discussion Settings. (Remind me how to do this)
- In the Other comment settings section, select or unselect the box next to the following options to enable or disable them:
- Comment author must fill out name and email.
- Users must be registered and logged in to comment.
- Scroll to the bottom of the page and select Save Changes.
Close comments on old posts
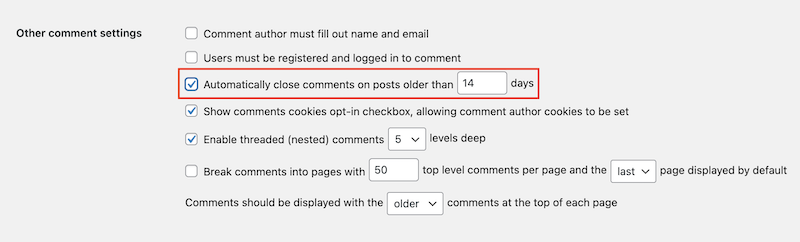
One of the best ways to prevent spammers from overwhelming your moderation queue is to close comments on posts that are older than a certain number of days. WordPress recommends starting with posts older than 14 days.
- Sign into WordPress and open Discussion Settings. (Remind me how to do this)
- In the Other comment settings section, select the checkbox next to Automatically close comments on articles older than XX days.
- On the same line, change the number of days to the number you prefer.
- Scroll to the bottom of the page and select Save Changes.
Note: For Managed Hosting for WordPress plans, this is set to 14 days automatically. This isn't a permanent limitation and can be changed to whatever meets the needs of your site.
Limit the number of links allowed in a comment
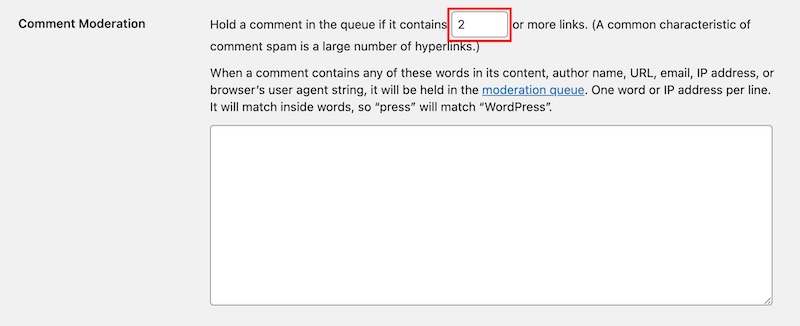
You can limit the number of links in a comment in the Comment Moderation section. The default setting is 2, which will hold any comment with 2 or more links in the moderation queue. This setting allows you to reduce the risk of spammers funneling traffic from your site. You can set it to 0 if you want to moderate all links in comments.
- Sign into WordPress and open Discussion Settings. (Remind me how to do this)
- Scroll down to the Comment Moderation section and, in the first line of this section, change the number according to your preference. Any comments having that number of links or more will automatically require approval.
- Scroll to the bottom of the page and select Save Changes.
Build a comment moderation list
Comments can be flagged for moderation based on specific words contained in the content, author name, URL, email, IP address, or browser's user agent string. Moderated comments are held in the moderation queue. It's important to understand that you can add one item per line (not comma-separated values) and it will also match inside words, so “press” will match “WordPress”.
- Sign into WordPress and open Discussion Settings. (Remind me how to do this)
- Scroll down to the Comment Moderation section and enter the items you want to moderate into the box, one item per line. You can enter keywords, phrases, IP addresses, domains or URLs, usernames, or email addresses.

- Scroll to the bottom of the page and select Save Changes.
Build a comment blocklist
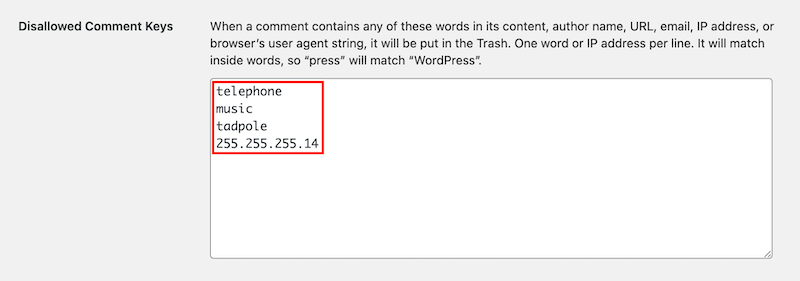
WordPress comments includes a setting to build a comment blocklist in the Disallowed Comment Keys box to help moderate comments. Any comments that include a word from the blocklist in its content, author name, URL, email, IP address, or browser's user agent string are sent to Trash instead of posting or being held in the moderation queue. When building the blocklist, it's important to understand that you should add one item per line (not comma-separated values) and it will also match inside words, so “press” will match “WordPress”.
- Sign into WordPress and open Discussion Settings. (Remind me how to do this)
- Scroll down to the Disallowed Comment Keys section and enter blocklisted items into the box, one item per line. You can enter keywords, phrases, IP addresses, domains or URLs, usernames, or email addresses.
- Scroll to the bottom of the page and select Save Changes.