Troubleshoot a Smart Terminal cash drawer
The cash drawer will automatically open during cash transactions and when specifically triggered from the Register app. If your cash drawer isn’t opening, try the following troubleshooting steps to resolve issues with an external cash drawer.
Complete the steps in the following order until you find the one that resolves your issue.
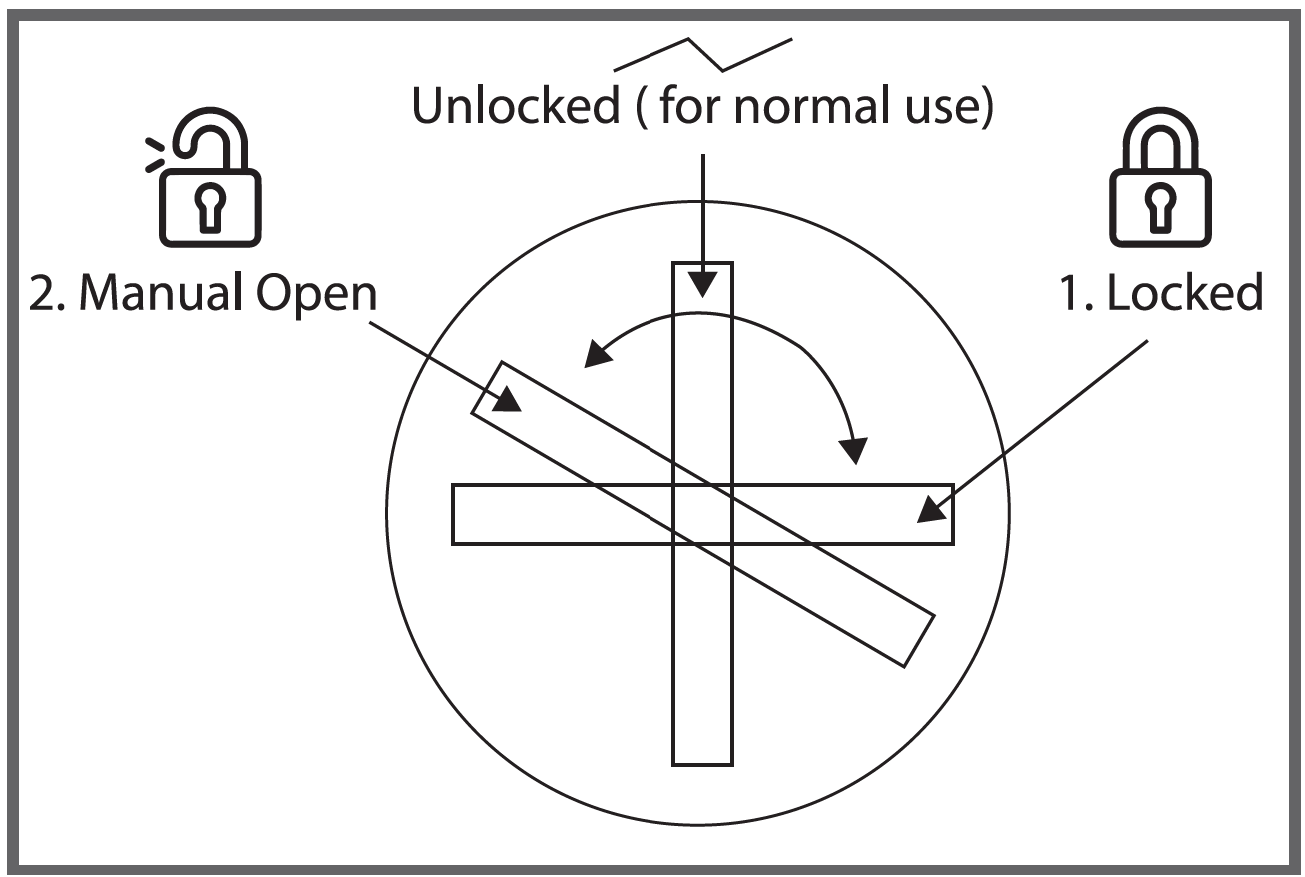
Step 1: Unlock the cash drawerClick here to manually unlock the cash drawer.
Use the included key to manually turn the lock to the vertical Unlocked position.
If the drawer is physically Locked, the Smart Terminal trigger won’t be able to open the drawer. The Unlocked position means that the drawer is closed and will open when triggered by the Smart Terminal.
Step 2: Double-check your setupClick here to verify that all components are connected correctly.
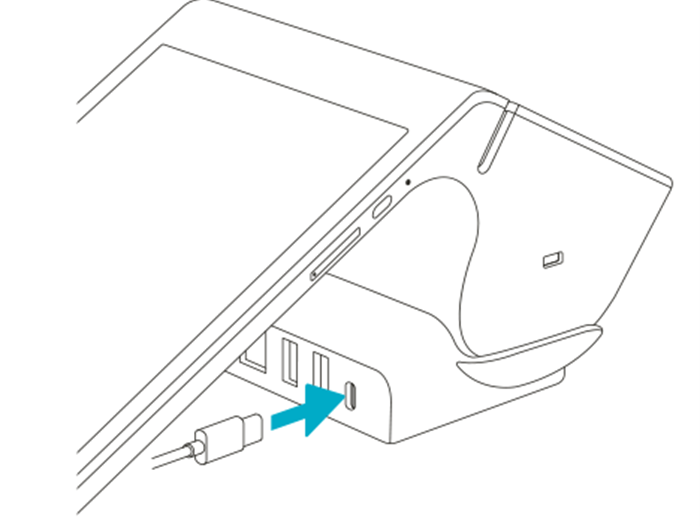
- Follow the connection steps to confirm that the cash drawer is connected correctly to the Smart Terminal via a direct or printer-driven connection.
- For all wired connections, make sure the cords are undamaged. Unplug and plug in each end of the cord to ensure that all connections are tight.
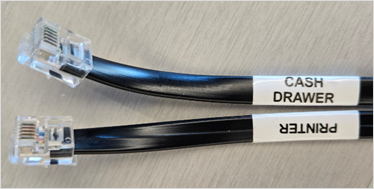
- Verify that the correct end of the cord is plugged into the cash drawer. For Star Micronics CD4-1416, the ends of the cord are labeled Cash drawer (plug into the drawer) and Printer (plug into the printer or charging dock). For different models, check the instruction manual to verify the connection.
- For connections using the charging dock (Duo):
- Smart Terminal Duo: The Smart Terminal must remain in the charging dock while using the connected accessory.
- For connections using the charging dock, run a diagnostic test to make sure the charging dock is connected properly.
- Tap Help on the second page of the Smart Terminal home menu.
- At the bottom of the screen, tap Diagnostics.
- Tap Dock to test the connection to the dock or hub.
- If the test result shows Docked, everything is connected correctly. If it shows Not Docked, review your connections, then try scanning again:
- Smart Terminal Duo: Seat the Smart Terminal in the docking station with the ports facing toward the merchant screen.
- Smart Terminal Duo: Seat the Smart Terminal in the docking station with the ports facing toward the merchant screen.
Step 3: Reboot and run a cash drawer testClick here to test the cash drawer and try out different ways to open the drawer.
- Hold down the power button on the Smart Terminal until the screen goes dark, wait about 30 seconds, then press and hold the power button until it turns back on again.
- Tap Accessories on the first page of the Smart Terminal home menu.
- Tap Test next to the cash drawer (or a printer with a linked cash drawer) and then tap I’m Ready, Test It. The cash drawer should open.
- Review the different methods to open the cash drawer:
- Automatic trigger: The cash drawer will automatically open during cash transactions.
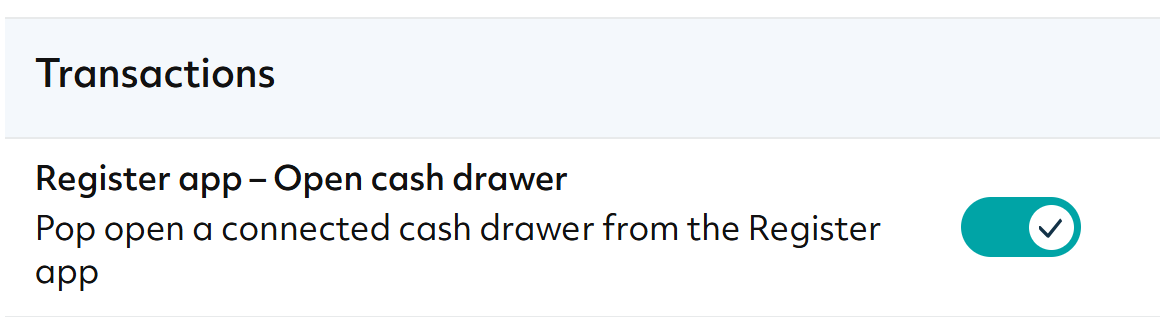
- Register app: Users with Register app – Open cash drawer device permission can tap Open Drawer at the bottom of the Register app to open the drawer when needed.
- Key lock/unlock: Use one of the keys included with your cash drawer to manually unlock and open the cash drawer.
Step 4: Contact customer supportClick here for additional support.
If you’ve gone through troubleshooting and the cash drawer still isn’t working, it may need to be replaced. It’s a good idea to check the device manual or manufacturer first, though, to make sure you’ve covered all your bases.
If replacement is needed:
- For accessories purchased from GoDaddy, please contact us for assistance.
- For all other accessory purchases, please contact the device manufacturer or the retailer where you made the purchase.
Note: If you purchased the accessory through a different retailer, make sure that the cash drawer is compatible with your GoDaddy Smart Terminal.
More info
- Connect a cash drawer or a different external accessory to your GoDaddy Smart Terminal.
- Check compatible accessories and order an accessory for your GoDaddy Smart Terminal.
- Learn about the warranty for hardware and accessories purchased through GoDaddy.