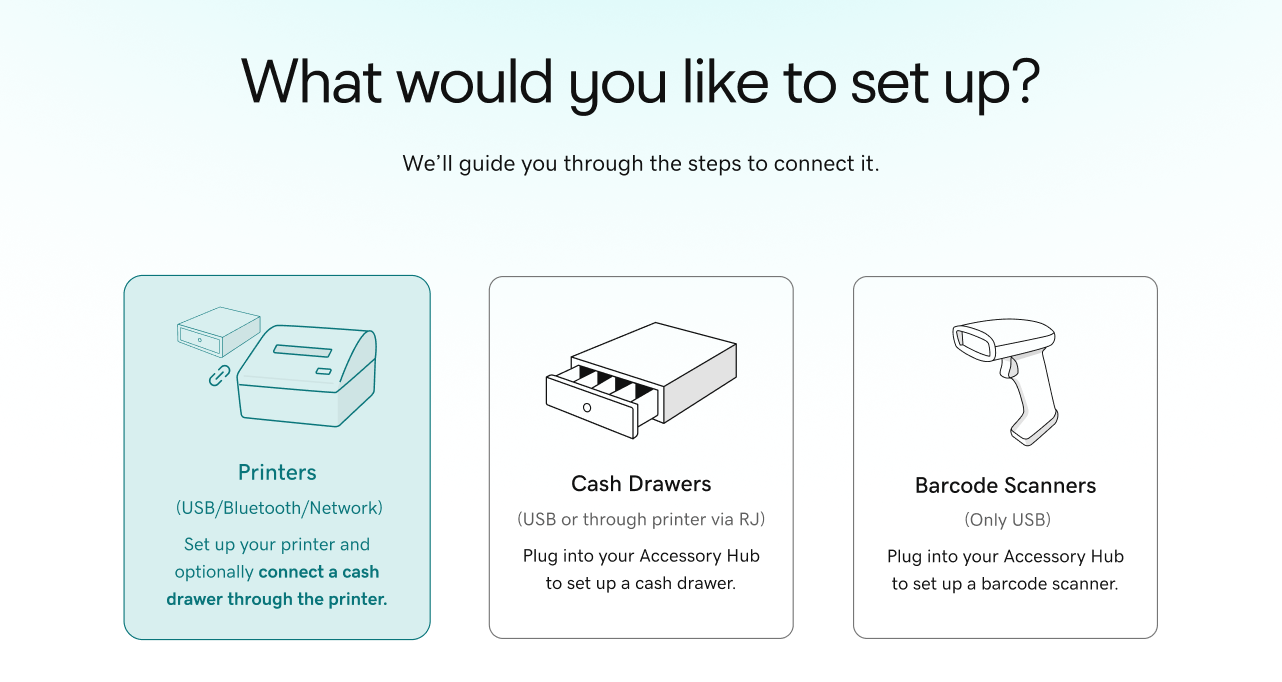
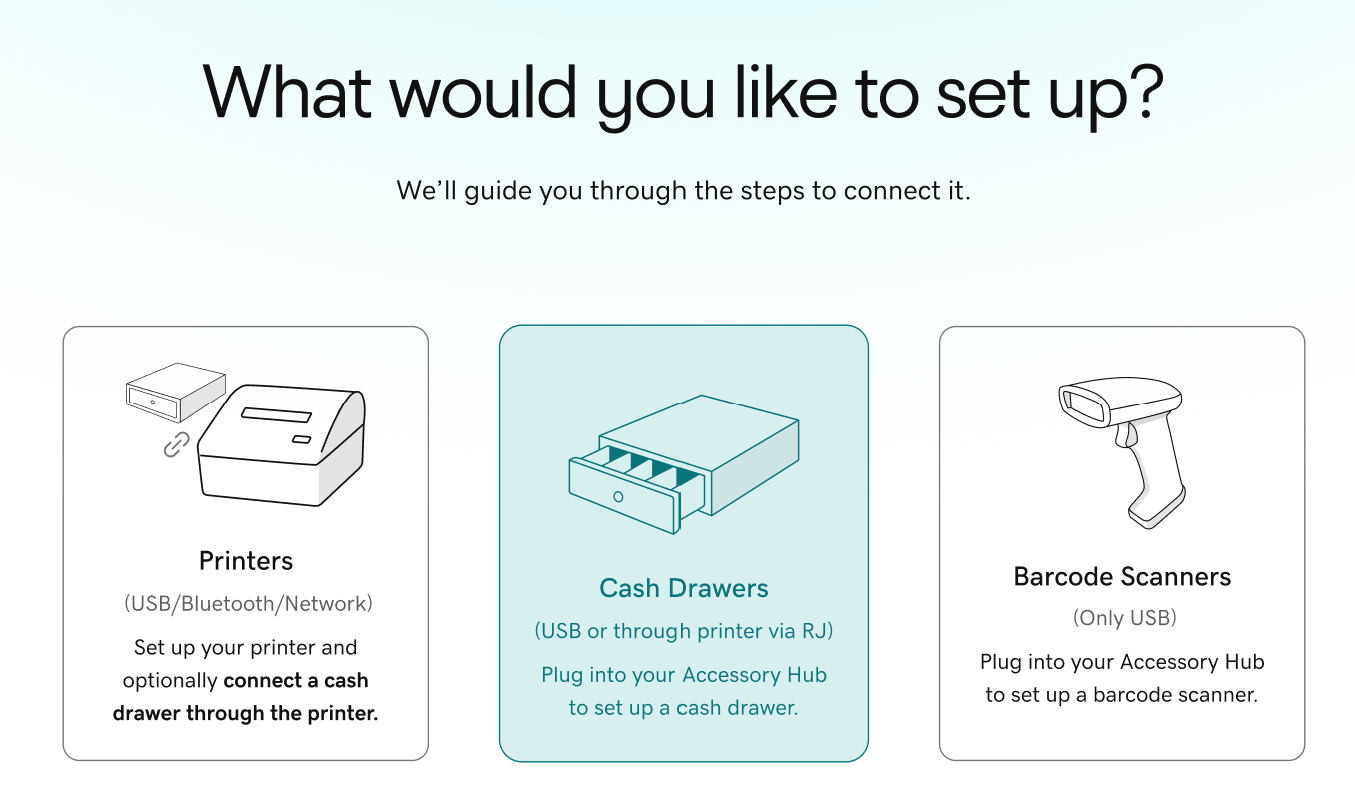
Connect a cash drawer to a GoDaddy Smart Terminal
Optimize your checkout process by connecting a cash drawer to your Smart Terminal. Connected cash drawers can open automatically during certain events, like a cash transaction or when a receipt is printed.
You can connect a compatible cash drawer directly (GoDaddy Smart Terminal Duo only) or connect the cash drawer to any Smart Terminal through an external printer. Connecting the printer and cash drawer together streamlines your setup if you need both accessories.
Available for: GoDaddy Smart Terminal Duo only
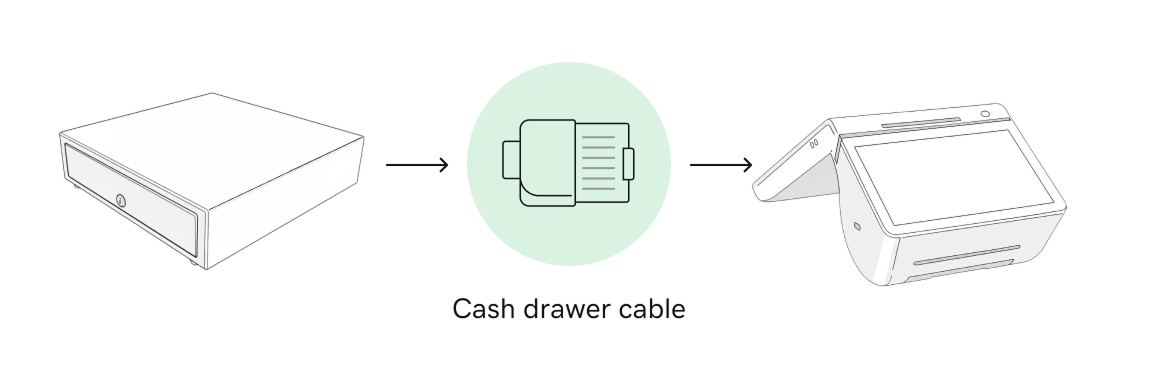
Connect a cash drawer directly to the GoDaddy Smart Terminal Duo dock with a wired connection. This type of connection does not require an external printer.
- Navigate to the home menu on your Smart Terminal Duo.
- Connect one end of the cash drawer cable (RJ-11/RJ-12 or USB) into the cash drawer and the other end into the Smart Terminal charging dock.
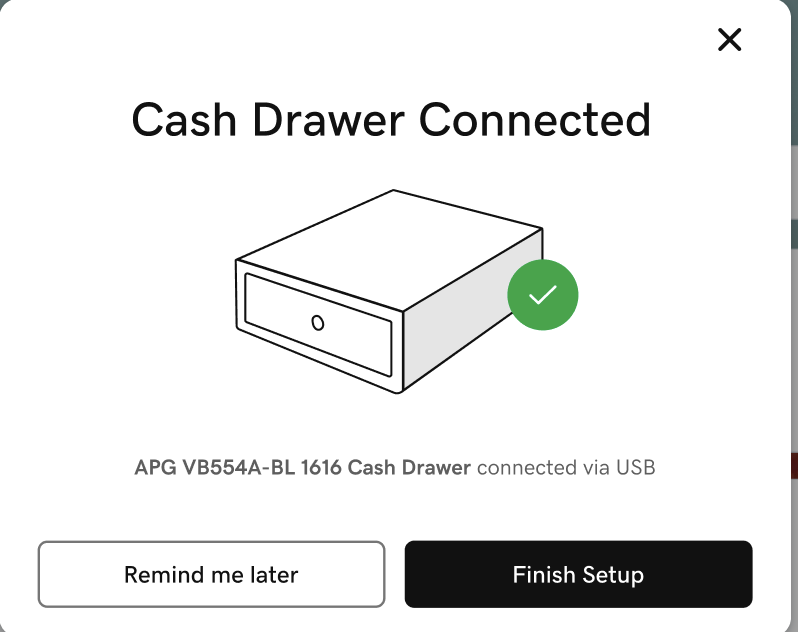
 Note: The Smart Terminal Duo must remain in the charging dock while using the cash drawer.
 - A confirmation notification will appear on the Smart Terminal home menu that says the cash drawer is connected. Tap Finish Setup.
- Test the cash drawer:
- When prompted, tap Test Drawer.
- Use the included key to manually turn the lock to the vertical Unlocked position.
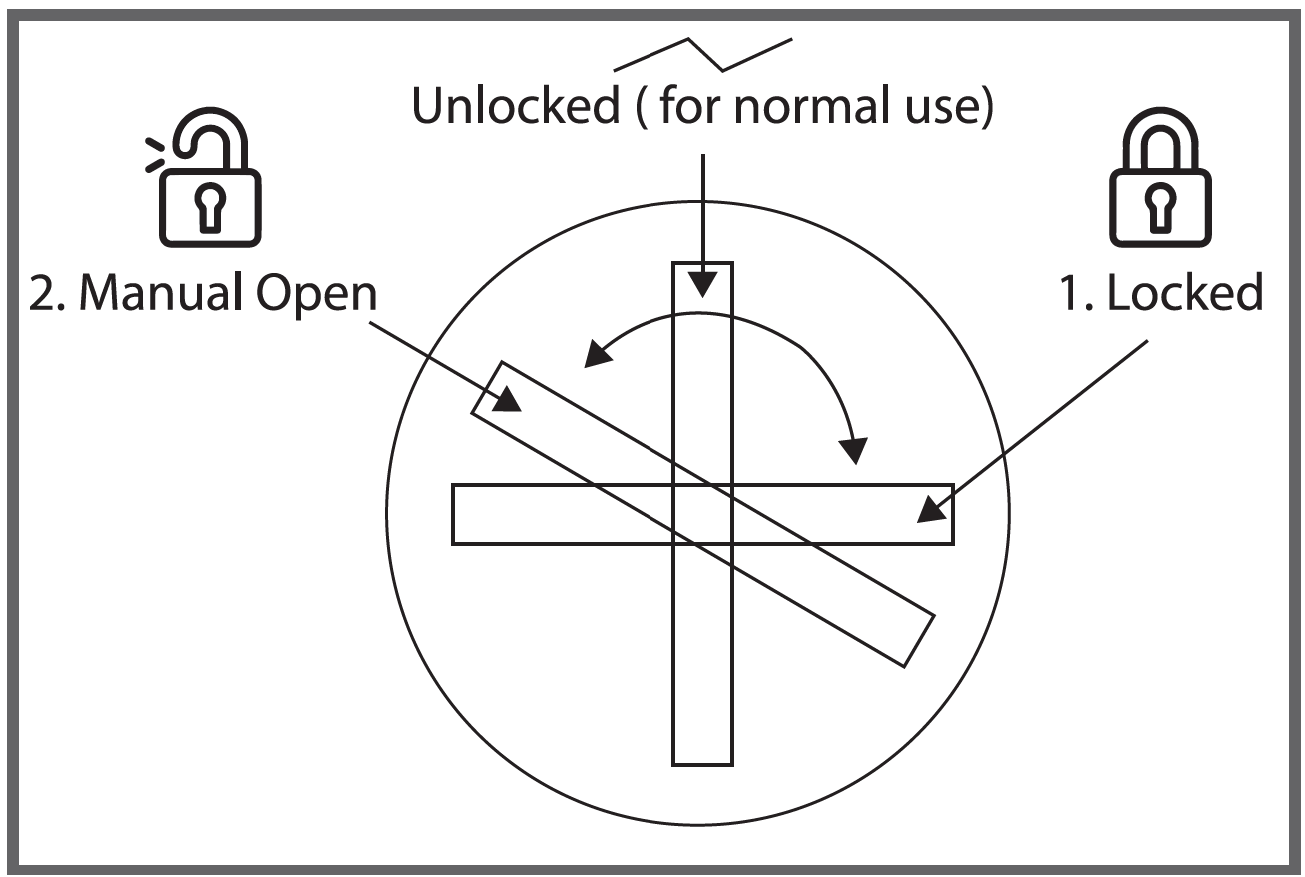
- Review the onscreen info, tap I’m Ready, Test It and verify that the cash drawer opens. Tap Yes, It Opened to confirm.
- Review the different methods to open the cash drawer:
- Automatic trigger: The cash drawer will automatically open during cash transactions.
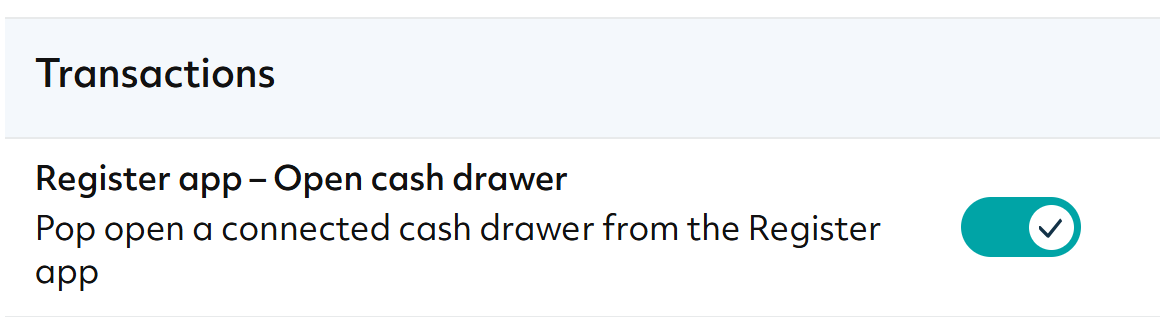
- Register app: Users with Register app – Open cash drawer device permission can tap Open Drawer at the bottom of the Register app to open the drawer when needed.
- Key lock/unlock: Use one of the keys included with your cash drawer to manually unlock and open the cash drawer.
Follow our guided walkthroughs to connect the cash drawer to a compatible external printer with a wired cash drawer cable. Then, connect the printer to the Smart Terminal via USB or Ethernet (network router) connection.
Connect with a USB printerClick here to set up a cash drawer and USB printer.
Available for: GoDaddy Smart Terminal Pro, GoDaddy Smart Terminal Duo
- Navigate to the Smart Terminal home menu.
- With the printer turned off, connect one end of the provided cash drawer cable (RJ-11/RJ-12 or USB) into the cash drawer and the other end into the printer.
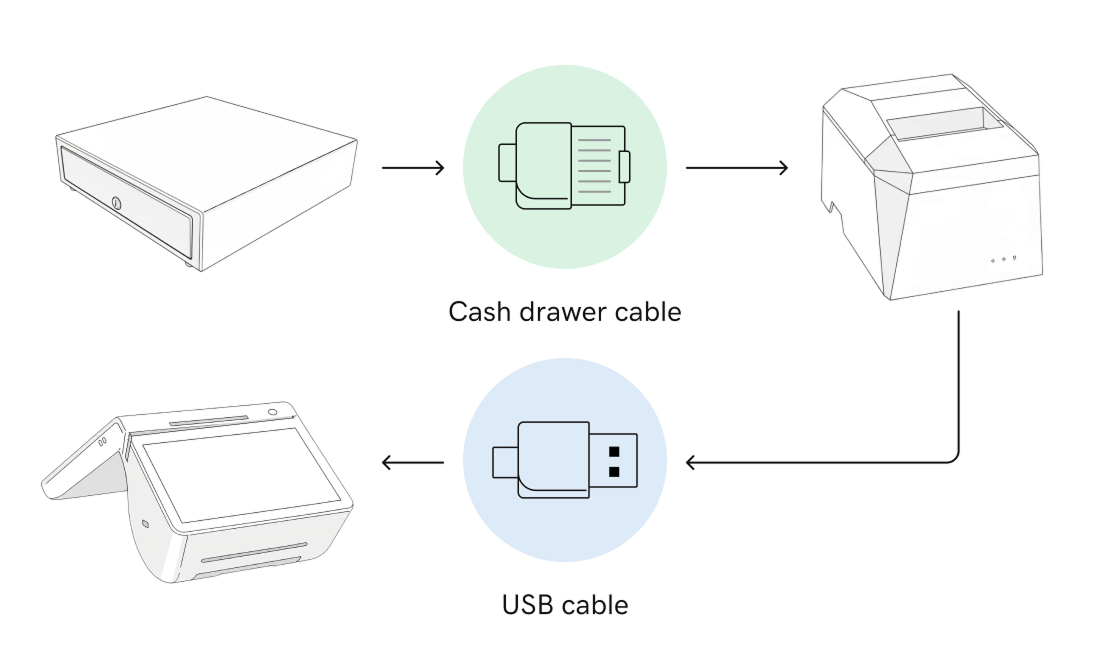
- Connect the USB cord from the printer directly into the USB port on the Smart Terminal charging dock (Duo).
- Smart Terminal Duo: The Smart Terminal must remain in the charging dock while using the printer.
- Load the printer paper if you haven’t yet.
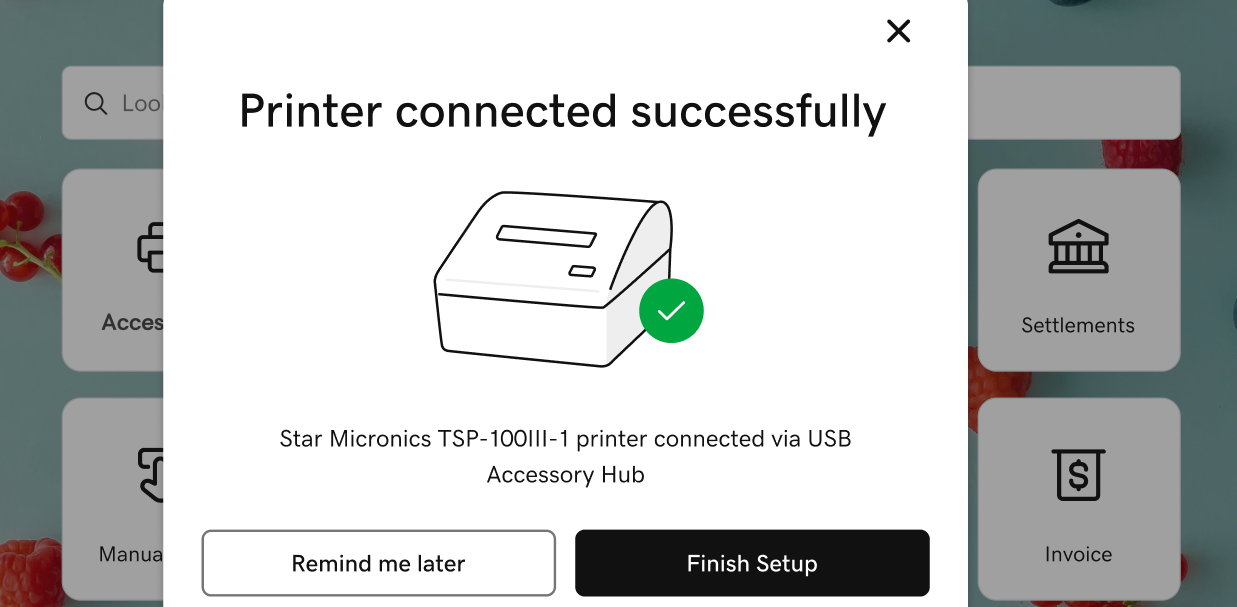
- Turn the printer on. A confirmation notification will appear on the Smart Terminal home menu that says the printer is connected. Tap Finish Setup.
- Test the printer and cash drawer and customize the name and receipt settings.
- Tap Print Test Page. Wait for the receipt to print, then tap Yes, it printed to confirm.

- Enter a custom Name for the printer (like “Bar” or “Kitchen”). Tap Save and continue.
- To test the connected cash drawer, use a key to manually turn the cash drawer lock to the vertical Unlocked position.
- On the Smart Terminal, tap Test it here and then tap I’m Ready, Test It. Verify that the cash drawer opens and tap Yes, It Opened to confirm.
- Tap Go to Receipt Settings. To assign specific receipts to print from this printer (like an order or customer receipt), update the receipt settings for the printer.
- Tap Print Test Page. Wait for the receipt to print, then tap Yes, it printed to confirm.
- Review the different methods to open the cash drawer:
- Automatic trigger: The cash drawer will automatically open during cash transactions.
- Register app: Users with Register app – Open cash drawer device permission can tap Open Drawer at the bottom of the Register app to open the drawer when needed.
- Key lock/unlock: Use one of the keys included with your cash drawer to manually unlock and open the cash drawer.
Connect with an Ethernet printerClick here to set up a cash drawer and printer via Ethernet (network router).
Available for: GoDaddy Smart Terminal Pro, GoDaddy Smart Terminal Flex, GoDaddy Smart Terminal Duo
To connect a cash drawer via an Ethernet printer, you’ll need to connect the Smart Terminal and printer to the same router and then connect the cash drawer to the printer with a wired connection.
- Connect the Smart Terminal to a Wi-Fi network, using either a wireless or Ethernet (wired) connection.
- With the printer turned off, connect one end of the provided cash drawer cable (RJ-11/RJ-12 or USB) into the cash drawer and the other end into the printer.
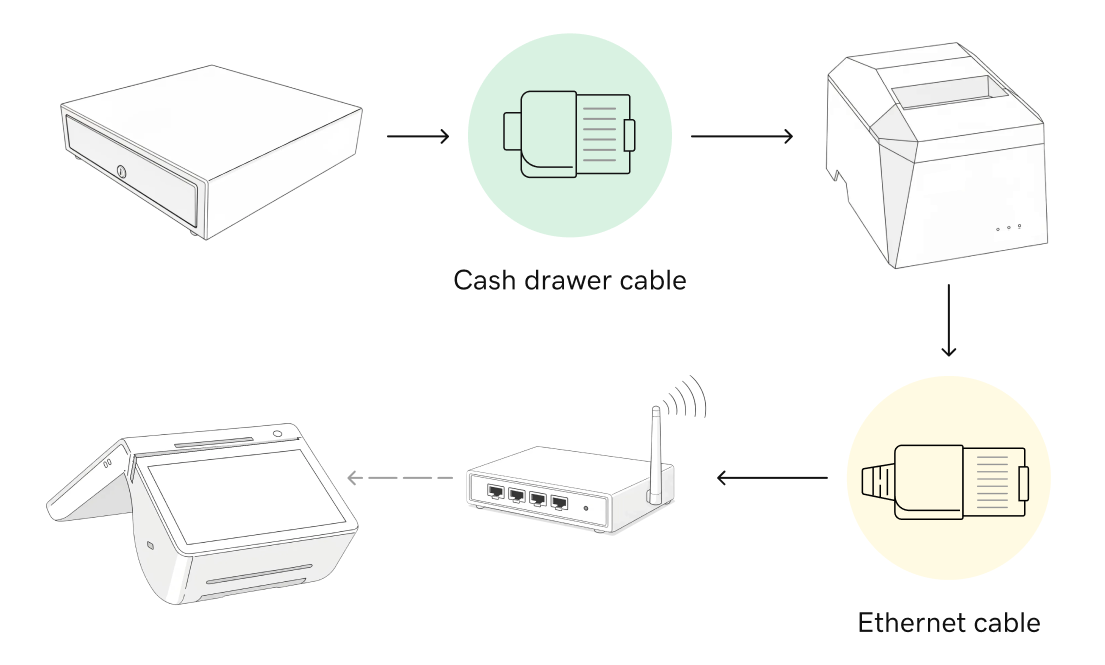
- Connect one end of an Ethernet cable into the printer and the other end into the same Wi-Fi router that the Smart Terminal is connected to.
- Find the IP address for the printer:
- Load the printer paper if you haven’t yet.
- With the printer powered off, press and hold the printer’s power button and feed button for a few seconds.
- The printer will print two test receipts. Release the feed button when it begins printing the first receipt.
- Locate the IP address on the second test receipt. The IP address will be listed in the IP Parameters towards the bottom of the second receipt.
- Turn on the printer if it’s still powered off.
- Add the printer to the Smart Terminal:
- On the Smart Terminal, tap Accessories on the first page of the Smart Terminal home menu.
- Tap Add accessory, then tap Printers and then tap Network.
- Follow the onscreen steps to double-check your connections and printer paper. Tap Next until you reach the IP address input screen.
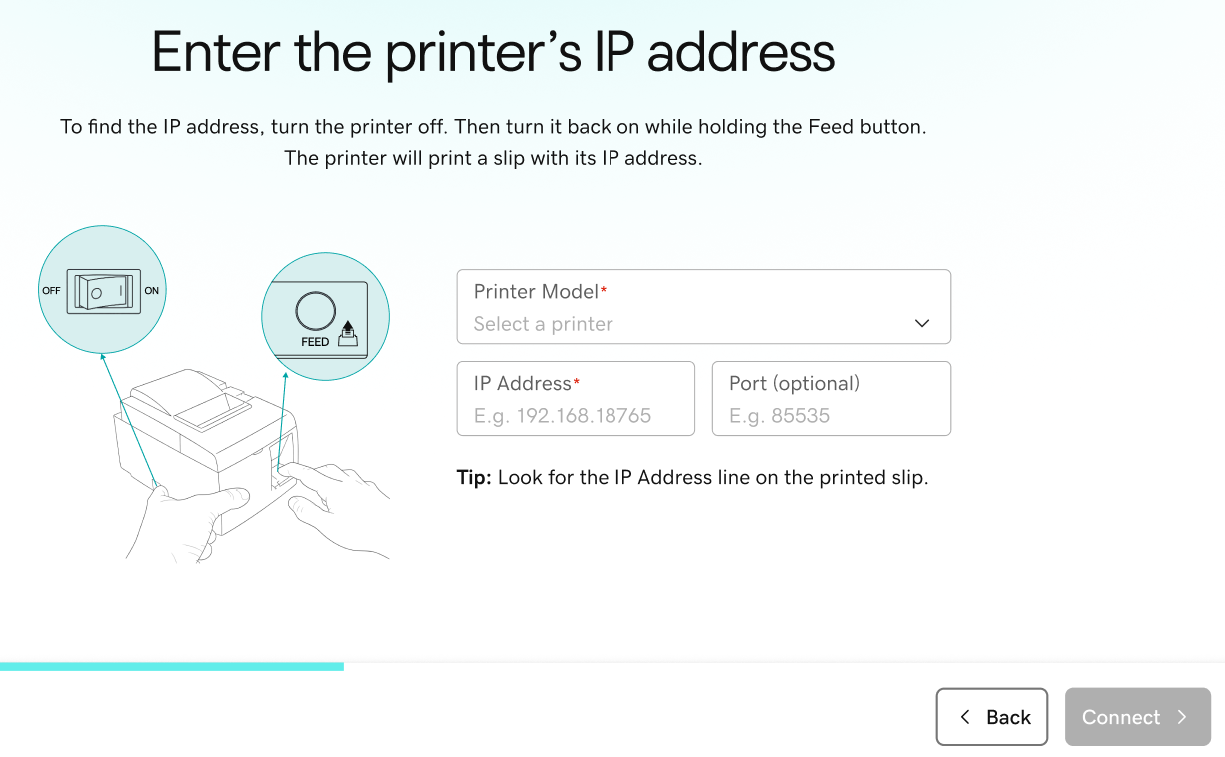
- Under Printer Model, select your printer brand and model from the drop-down list.
- Under IP Address, enter the IP address from your test receipt. Tap Connect.
- Test the printer and cash drawer and customize the name and receipt settings.
- Tap Print Test Page. Wait for the receipt to print, then tap Yes, it printed to confirm.
- Enter a custom Name for the printer (like “Bar” or “Kitchen”). Tap Save and continue.
- To test the connected cash drawer, use a key to manually turn the cash drawer lock to the vertical Unlocked position.
- On the Smart Terminal, tap Test it here and then tap I’m Ready, Test It. Verify that the cash drawer opens and tap Yes, It Opened to confirm.
- Tap Go to Receipt Settings. To assign specific receipts to print from this printer (like an order or customer receipt), update the receipt settings for the printer.
- Tap Print Test Page. Wait for the receipt to print, then tap Yes, it printed to confirm.
- Review the different methods to open the cash drawer:
- Automatic trigger: The cash drawer will automatically open during cash transactions.
- Register app: Users with Register app – Open cash drawer device permission can tap Open Drawer at the bottom of the Register app to open the drawer when needed.
- Key lock/unlock: Use one of the keys included with your cash drawer to manually unlock and open the cash drawer.
Connect to your existing printerClick here to connect a cash drawer to a printer that’s already set up via USB or Ethernet.
Available for: GoDaddy Smart Terminal Pro, GoDaddy Smart Terminal Flex, GoDaddy Smart Terminal Duo
To add a cash drawer to a connected USB or Ethernet printer, connect the cash drawer to the printer with a wired connection and then complete the cash drawer setup.
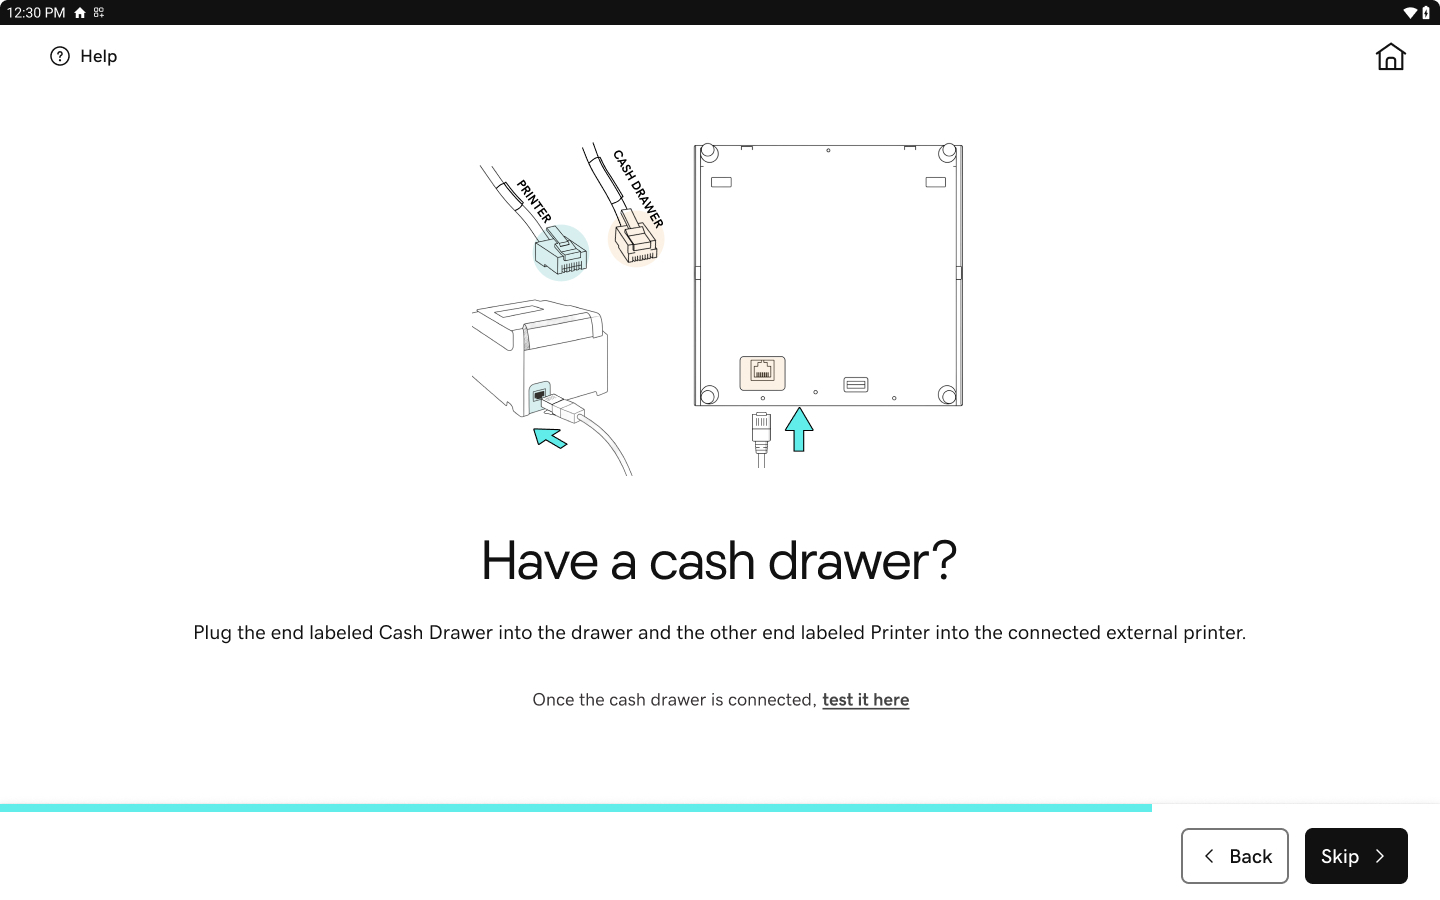
- With the printer turned off, connect one end of the provided cash drawer cable (RJ-11/RJ-12 or USB) into the cash drawer and the other end into the USB or Ethernet port on the printer.
- Turn on the printer.
- Add the cash drawer to the Smart Terminal:
- Tap Accessories on the first page of the Smart Terminal home menu.
- Tap Add accessory, then tap Cash Drawers and then tap Plug Into Printer.
- If multiple compatible printers are connected, tap the printer you’re using with the cash drawer, and then tap Next.
- Test the cash drawer:
- When prompted, tap Test Drawer.
- Use the included key to manually turn the lock to the vertical Unlocked position.
- Review the onscreen info, tap I’m Ready, Test It and verify that the cash drawer opens. Tap Yes, It Opened to confirm.
- Review the different methods to open the cash drawer:
- Automatic trigger: The cash drawer will automatically open during cash transactions.
- Register app: Users with Register app – Open cash drawer device permission can tap Open Drawer at the bottom of the Register app to open the drawer when needed.
- Key lock/unlock: Use one of the keys included with your cash drawer to manually unlock and open the cash drawer.
More info
- If your cash drawer isn’t working as expected, check out our troubleshooting tips for help.
- Connect a different external accessory (like a printer or barcode scanner) to your GoDaddy Smart Terminal.
- See all compatible accessories for GoDaddy Smart Terminals and find out more about accessory connection types and terms.
- Order accessories for your Smart Terminal.