Allow access to a file or folder that shows an Access Denied security warning
If you receive an Access Denied Website Security warning when accessing a part of your site that should be available to all users, you can add the file path or URL in the Website Security Firewall settings to immediately restore functionality.
Note: Keep in mind that allowing a file or URL path should be considered a temporary solution as it can cause a vulnerability to the site. The better solution would be to investigate why the URL is being blocked and find a workaround.
- Go to your GoDaddy product page.
- Under Website Security and Backups, next to the Website Security account you want to manage, select Manage.
- Under Firewall/CDN, select
 Green Status,
  Yellow Status, or
  Red Status.
- Select Settings.
- Select Access Control.
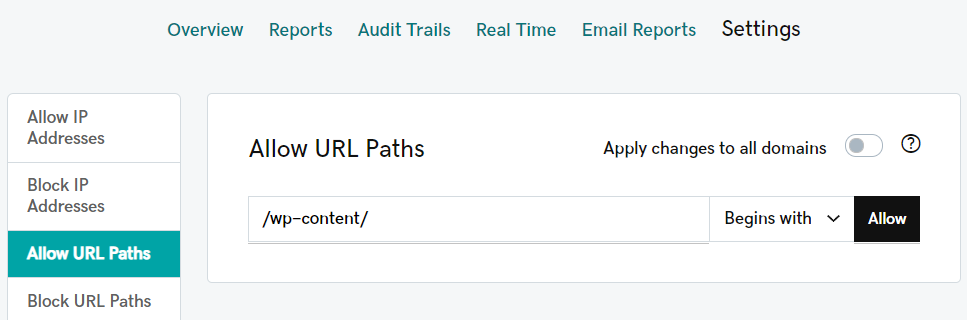
- Select Allow URL Paths.
- Type the path into the text box, and then select if you want to allow access to the entire folder and all subfolder or only allow access to a specific folder or file.
Note: You cannot add paths to your allow list that include 'admin' like /admin/, /administrator/, or /wp-admin/.
- To allow access to an entire folder including all files and all sub folders, type the path and then select Begins with from the drop-down menu. For example, if you want to allow access to /wp-content/images and wp-content/videos, type /wp-content/.
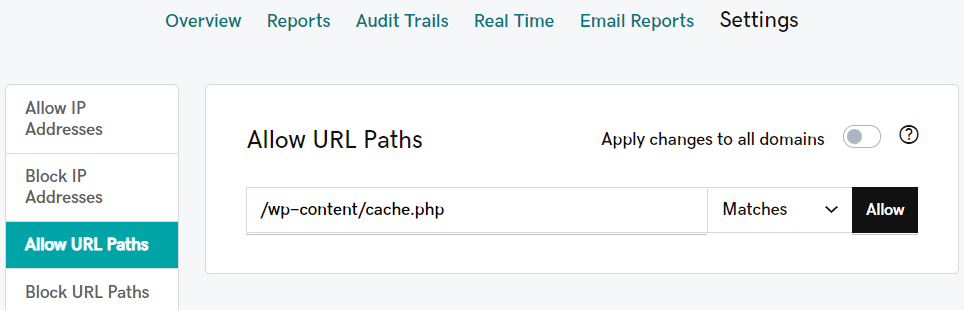
- To allow access to a single folder like /wp-content/, type the path and then select Matches from the drop-down menu. Include the file name if you want to only allow access to a single file in a folder like /wp-content/cache.php.
- Select Allow.
If you need assistance regarding a firewall block, please open a support ticket.
More info
- You can also allow or block access by IP address.
- Learn more about firewall block signatures.