Enable the protected page feature
The Protected Pages feature offers an additional layer of protection to your site by allowing you to restrict access or add additional authentication methods to certain pages.
- Go to your GoDaddy product page.
- Under Website Security and Backups, next to the Website Security account you want to manage, select Manage.
- Under Firewall/CDN, select
 Green Status,
  Yellow Status, or
  Red Status.
- Select Settings.
- Select Access Control.
- Select Protected Pages.
- Type in the URL for the page you'd like to add protection to, select the type of protection and then select Protect Page.
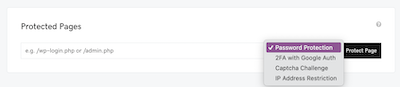
There are four authentication methods for you to choose from: Password Protection, Two Factor Authentication with Google Authenticator, Captcha Challenge, and IP Address Restriction.
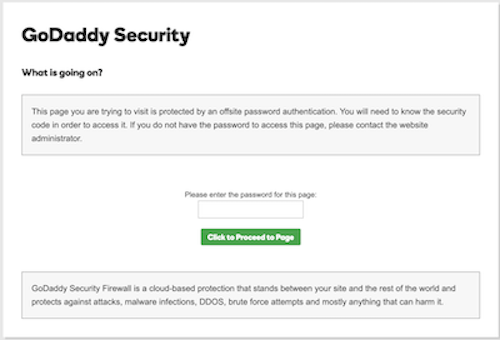
- Password Protection: The Password Protection option generates a random password, it’s not possible to customize it, but you can request a new password at any time in the firewall dashboard.
- 2FA with Google Auth: You will need to Install the Google Authenticator app on your device to use this option. To add the code to your app, scan the provided QR code or select "Counter-Based Mode" and type in the provided key.
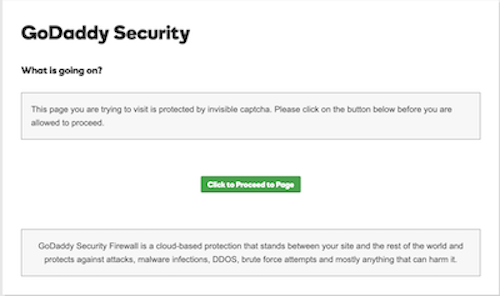
- Captcha Challenge: If enabled, the user will be prompted to click a button on the protected page in order to view it.
- IP Address Restriction: Only IP addresses that are allowed in the firewall settings will be able to access the protected page. Allow or block website access

Note:
- Successful validation lasts for 30 days for all protected page options except for IP address restriction.
- Validation is cookie-based, if you access the protected page from a different device or if the browser cookies have been cleared, you will be prompted to revalidate. You can also remove and re-add the protected page to force a revalidation for all users.
- If you add the root directory of the website (/) as a protected page, it may disrupt the SSL issuance and renewal processes.