Acceder y liberar correos electrónicos en cuarentena usando Advanced Email Security
Con Advanced Email Security, los usuarios y administradores pueden buscar y liberar correos electrónicos en cuarentena. Los correos electrónicos se ponen en cuarentena cuando se sospecha que contienen malware o phishing.
Advanced Email Security puede poner en cuarentena mensajes que Microsoft 365 podría no poner, lo que hace que estos correos electrónicos se almacenen en la cuarentena de Advanced Email Security. Puedes revisar los mensajes en cuarentena y luego decidir qué hacer con ellos, como liberarlos o eliminarlos.
- Inicia sesión en tu página de seguridad avanzada del correo electrónico de GoDaddy (usa tu nombre de usuario y contraseña de GoDaddy).
- Selecciona Iniciar sesión en Seguridad avanzada del correo electrónico . Se abrirá la página de inicio de sesión.
- Ingresa tu dirección de correo electrónico, selecciona Iniciar sesión y luego Iniciar sesión con Microsoft .
- Sigue las indicaciones en pantalla para iniciar sesión con tu dirección de correo electrónico y contraseña de Microsoft 365. Se abrirá el portal de Advanced Email Security.
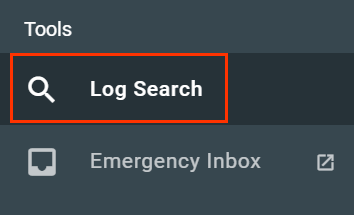
- Selecciona Búsqueda de registros .
- Selecciona la pestaña que coincida con si eres un administrador o un usuario.
- Selecciona Usuario específico y luego la dirección de correo electrónico que tiene mensajes en cuarentena.

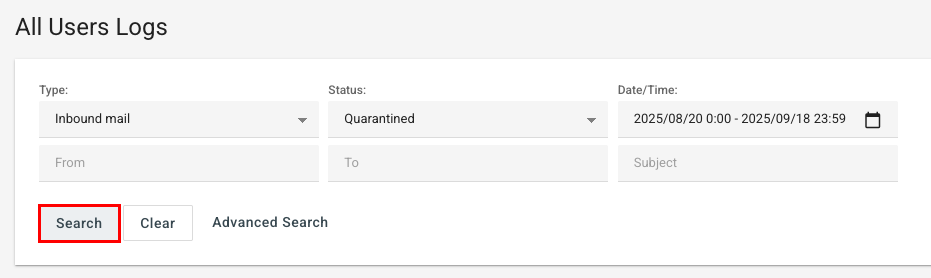
- En Tipo , selecciona si el correo electrónico era saliente o entrante, y luego elige el intervalo de fechas para el envío o la recepción del correo electrónico.
- En Estado , selecciona En cuarentena .
- Selecciona Buscar . Esto devuelve una lista de mensajes en cuarentena para ese usuario dentro de los filtros que especificaste.
- Para actuar en un mensaje específico, en Acciones , seleccione
 Vista previa . Desde aquí, puedes hacer lo siguiente:
- Liberar : Libera el mensaje de la cuarentena para que se envíe a la bandeja de entrada del destinatario.
- Liberar e informar : Libera el mensaje de la cuarentena para que se envíe a la bandeja de entrada del destinatario y repórtalo como un falso positivo (un correo electrónico que se marcó incorrectamente como spam).
- Eliminar : Elimina el mensaje de la cuarentena. El mensaje no se entregará al destinatario y no se podrá recuperar.

- Para actuar en varios mensajes, junto a cada mensaje, selecciona la casilla de verificación. Encima de la lista de mensajes, selecciona Acciones y luego una de las siguientes opciones:
- Liberar de cuarentena : Entrega los mensajes seleccionados a las bandejas de entrada de los destinatarios.
- Liberar y aprobar : envía los mensajes a las bandejas de entrada de los destinatarios y agrega el remitente a la lista de permitidos, para que los futuros mensajes del mismo remitente no se pongan en cuarentena.
- Informar como falso positivo : Marca los mensajes seleccionados como correos electrónicos legítimos que se identificaron incorrectamente como spam.
- Informar como falso negativo : Marca los mensajes seleccionados como spam o maliciosos, aunque no hayan sido puestos en cuarentena.
- Ocultar el correo electrónico de los registros : Oculta los mensajes para que no aparezcan en la búsqueda de registros.
Nota: Informar varios mensajes como falso positivo o falso negativo es una función solo para administradores.
- En Tipo , selecciona si el correo electrónico era saliente o entrante, y luego elige el intervalo de fechas para el envío o la recepción del correo electrónico.
- En Estado , selecciona En cuarentena .
- Selecciona Buscar . Esto devuelve una lista de mensajes en cuarentena para ese usuario dentro de los filtros que especificaste.
- Para actuar en un mensaje específico, en Acciones , seleccione Vista previa . Desde aquí, puedes hacer lo siguiente:
- Informar como falso positivo : informa que el mensaje se marcó incorrectamente como spam.
- Liberar : Libera el mensaje de la cuarentena para que se envíe a la bandeja de entrada del destinatario.
- Eliminar : Elimina el mensaje de la cuarentena. El mensaje no se entregará al destinatario y no se podrá recuperar.

- Para actuar en varios mensajes, junto a cada mensaje, selecciona la casilla de verificación. Encima de la lista de mensajes, selecciona Acciones y luego una de las siguientes opciones:
- Liberar de cuarentena : Entrega los mensajes seleccionados a las bandejas de entrada de los destinatarios.
- Liberar y aprobar : envía los mensajes a las bandejas de entrada de los destinatarios y agrega el remitente a la lista de permitidos, para que los futuros mensajes del mismo remitente no se pongan en cuarentena.
- Ocultar el correo electrónico de los registros : Oculta los mensajes para que no aparezcan en la búsqueda de registros.
Un correo electrónico liberado de la cuarentena puede tardar hasta 24 horas en aparecer en la bandeja de entrada. Si ocurre un error, espera 5 minutos y vuelve a intentarlo.
De forma predeterminada, el correo electrónico en cuarentena se retiene o se mantiene en cuarentena durante 30 días. Un administrador puede cambiar el período de retención en su configuración de resumen de cuarentena.
Pasos relacionados
- Actualiza tus listas de remitentes seguros y bloqueados para garantizar que los mensajes específicos se envíen a cuarentena.
- Para cambiar quién puede liberar correos electrónicos en cuarentena, edita tu configuración de spam .