Adicionar produto digital
Na sua loja online do Websites + Marketing, você pode vender produtos físicos que envia aos clientes e produtos digitais, como documentos para download, vídeos ou arquivos de áudio.
Assista ao vídeo abaixo, que aborda a adição de produtos e imagens de produtos, além de preços, impostos, pagamentos e envio para sua loja online. Em seguida, siga as etapas abaixo para adicionar produtos digitais à sua loja online.
- Vá para a página do produto da GoDaddy.
- Role para baixo, expanda Websites + Marketing e selecione Gerenciar ao lado do seu site.
- No seu painel, expanda Loja e selecione Produtos .
- Selecione Adicionar .
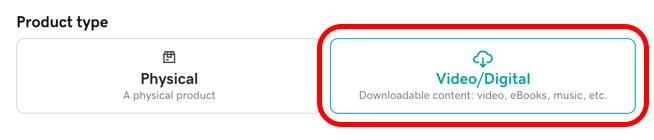
- Em Tipo de produto , selecione Vídeo / Digital .
- Para mostrar aos clientes o que eles estão comprando, adicione uma imagem ou URL de vídeo. Escolha bem seus recursos visuais para garantir que representem seu produto digital corretamente. Observação: Você pode adicionar até 10 imagens. As imagens devem estar no formato .jpg, .jpeg, .jpe, .png, .gif, .webp ou .tiff e não podem exceder 10 & nbsp; MB cada. Enquanto as imagens podem ter até 5.000 por 5.000 pixels, sua exibição máxima será de 1.920 por 1.080 pixels.
- Preencha os detalhes do produto. O nome do produto e o preço são obrigatórios, e você pode preencher os campos opcionais restantes conforme necessário:
- Preço de venda : Mostra o preço de venda, com o preço normal riscado.
- Categoria de produto : Adiciona o produto a uma categoria criada por você , como documentos para download, planilhas digitais ou jogos online, para que os clientes possam encontrá-lo com mais facilidade.
- Categoria de imposto : Escolha a categoria de imposto mais adequada para o seu produto. Se necessário, adicione ou altere as taxas da categoria de imposto .
- Visível na minha loja : Use o botão para mostrar ou ocultar o produto em sua loja. Você pode definir como Não para ocultar itens sazonais ou se planeja exibir vários produtos simultaneamente mais tarde.
- Role para baixo e use as guias para adicionar mais detalhes ou opções para o seu produto.
- Descrição : Adicione informações do produto manualmente ou selecione Sugerir descrição para ter uma gerada automaticamente por inteligência artificial (IA). Você pode definir o tom e a duração da descrição gerada automaticamente e, em seguida, copiar o texto ou gerá-lo novamente selecionando Mostrar outro rascunho . Quando estiver satisfeito com o resultado, selecione Inserir .
Isenção de responsabilidade: ao usar ferramentas de IA, evite inserir informações confidenciais e sempre revise a saída para verificar a precisão.
Observação: Ter pelo menos uma imagem de produto e um título de produto ajudará a IA a gerar uma descrição mais precisa. - Conteúdo para download : Selecione Adicionar arquivo . Após adicionar e nomear o arquivo do produto, selecione Salvar para carregá-lo. Observação: Você pode carregar até 10 arquivos por produto. Quase todos os tipos de arquivo são permitidos (.mp3, .mp4, .m4a, .zip, .csv, .xls, etc.) e cada um não pode ser maior que 2 GB. Seu cliente obtém um URL exclusivo para cada arquivo e pode baixar o arquivo até 3 vezes.
- Mecanismos de busca : Adiciona automaticamente um link direto para este produto, que você pode editar.
- Descrição : Adicione informações do produto manualmente ou selecione Sugerir descrição para ter uma gerada automaticamente por inteligência artificial (IA). Você pode definir o tom e a duração da descrição gerada automaticamente e, em seguida, copiar o texto ou gerá-lo novamente selecionando Mostrar outro rascunho . Quando estiver satisfeito com o resultado, selecione Inserir .
- Quando terminar, selecione Salvar ou selecione Salvar e adicionar outro para adicionar mais produtos. Observação: Você pode fazer upload em massa de até 100 produtos por vez com um arquivo .csv.
- Para colocar suas alterações no ar, publique seu site .
Etapas relacionadas
- Redefinir o limite de download em um pedido de produto digital
- Reenvie o link de download de um produto digital