Create a product catalog
Create a product catalog for your GoDaddy Smart Terminal, and add the products that you sell. Your product catalog works hand in hand with the Register app on your Smart Terminal, where you use the products to build orders and process transactions.
- Sign in to your In Person Overview page (use your GoDaddy username and password).
- Select Catalogs from the top-nav.
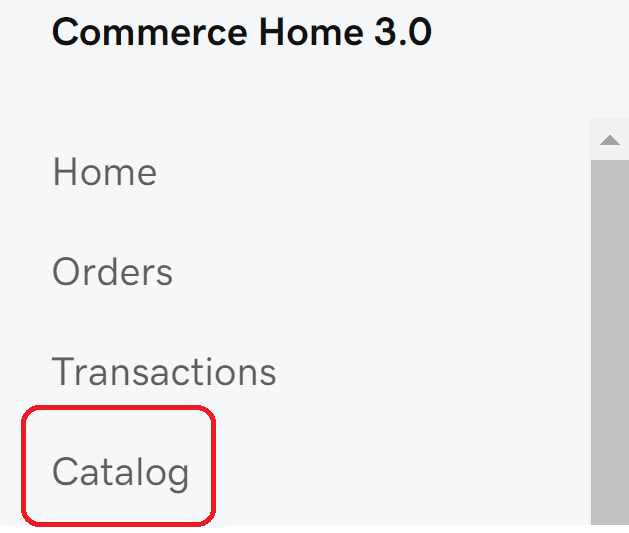
Note: If you see a Catalog option in your left-nav like the image below (instead of the top-nav), you don’t need to create or assign a product catalog. Skip this step and go straight to adding products to your catalog.
- Select Create New Catalog.
- Add a new or existing catalog:
- To create a new catalog: Select Create New and enter a Name for the catalog. Select Save.
- To use an existing catalog: Choose Select existing and check the box next to the catalog(s) to add. Select Add.
- Add products to your catalog by importing, uploading or manually entering them. You’ll need to add at least one product to the catalog before you can assign it to your device.
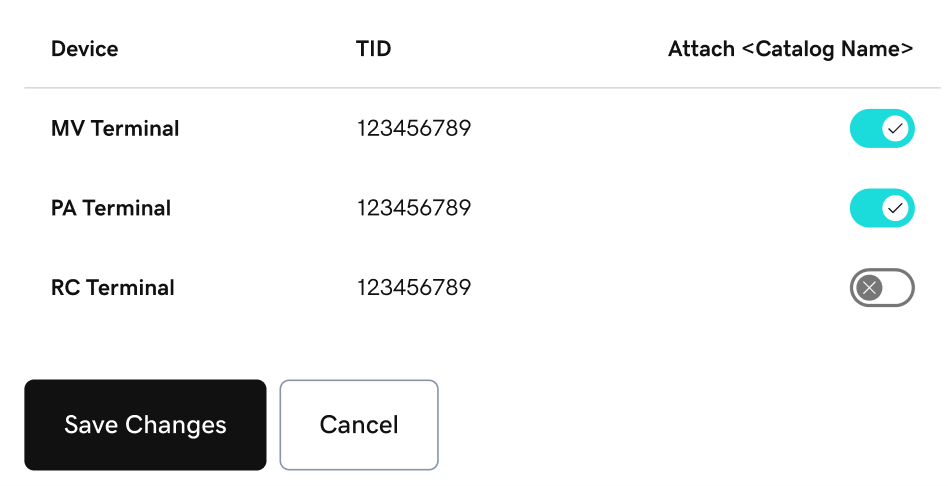
- Select the catalog that you want to assign to a terminal, then select Assign to Device/Terminal.
- You’ll see a list of devices that are associated with your GoDaddy Payments account. Next to the device where you want to assign the catalog, switch the toggle on. This connects the product catalog to your device.
- On your Smart Terminal home page, tap Catalog to see the linked product catalog and all associated products.
More info
- Check out some best practices for creating and maintaining your product catalog.
- Add products to your product catalog from your online store, web browser or Smart Terminal.
- Use the Register app to create an order on the Smart Terminal.