Process Payments in WooCommerce with Virtual Terminal
GoDaddy Payments users on a Managed WordPress plan can use the GoDaddy Payments Virtual Terminal in WooCommerce to manually create orders and process credit or debit card payments from the Edit Order page.
- Sign in to WordPress.
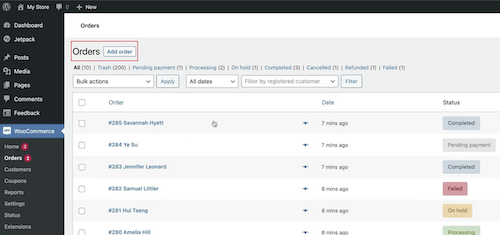
- Go to WooCommerce > Orders > Add order if you’re creating the order on behalf of the customer, or go to WooCommerce > Orders and select the pending payment order.
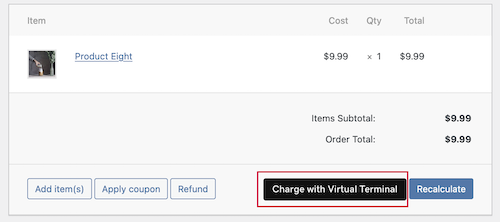
- Add, modify or verify the relevant order details like customer name, billing or shipping address, products in the order, and other settings.
- Select Charge with Virtual Terminal. If you don’t see this option, you still need to create the order.
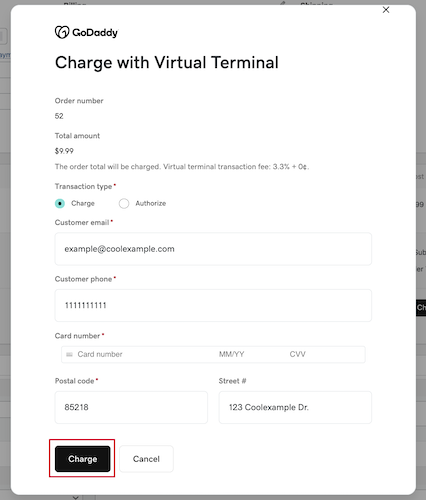
- Select the transaction type: Charge or Authorize. Note: If you select Authorize, you can manually charge later or charge by changing the WooCommerce order status to Completed.
- Enter the customer’s email address, phone number and credit card information, including credit card number, expiry date, CVV, ZIP code, and optionally the street number.
- Select Charge or Authorize, depending on the type of transaction.
The customer will receive the default WooCommerce email related to the transaction. The Virtual Terminal sale will appear under Transactions in the GoDaddy Payments Hub and be deposited into your bank account as soon as the next business day. The fee of 3.3% is automatically subtracted from the payment.
Note: If Address Verification Service (AVS) or Card Verification Value (CVV – the three or four digit code on the back of most cards) verification fails or is mismatched, but the charge succeeds, you can keep the charge or void it. If you think you entered the credit card information incorrectly, you can void the transaction to avoid possible deposit delays.
