Create and manage recurring invoices in GoDaddy Payments
Recurring invoices in GoDaddy Payments let you automate billing for repeat services or products. You can set up invoices to be sent on a regular schedule, share them with customers, and offer secure payment options like credit/debit cards and ACH transfers. This helps streamline your workflow and ensures timely payments.
Create a recurring series
Here's how to create a recurring invoice series. To see what your recurring invoice looks like while you're still creating it, select View Preview at the bottom-right corner.
- Sign in to the Dashboard where you manage your GoDaddy Payments account (use your GoDaddy username and password).
- From the left-nav, select Invoicing.
- Select Recurring Series and then Create Recurring Series.
- Under Customer, type the customer's name or email address and then select it.
- To add a new customer:
- Select Add New Customer, then enter their First Name (required).
- Fill in the optional fields if you like.
- If you want to enter their billing address, select Billing Address, then fill in the fields.
- When you're done, select Save.
- To add a new customer:
- Under Invoice Items, add products and any applicable taxes or discounts:
- Add the Item Name, Quantity and Price for each item in the invoice. To enter more products, select Add Item.
- Under Invoice schedule, select the units (Daily, Weekly, Monthly, or Yearly), and the frequency at which the invoice will be sent.
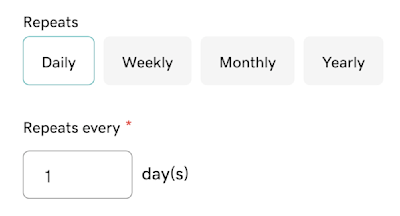
Example: If you select Weekly under Repeats and enter 4 under Repeats every, the invoice will be sent every four weeks. If you choose Daily and enter 2, it will be generated every other day.
- Select Choose Start Date and pick the date when you want to start generating the invoices if you don't want the first invoice to be generated immediately.
- Select Choose End Date and pick the date when you want to stop generating the invoices if you don't want them to be generated indefinitely.
- (Optional) Customers have the option to save their credit card information for the card to be automatically charged for each invoice in the recurring series until the series ends. Select Let customer save their payment info for recurring payments if you want them to have this option available. Bank account and ACH details can't be saved for future use.
- Under Share Options, you can choose to request payment from the customer or charge the saved payment method.
- If you select Request payment from customer, you can choose to share the invoice automatically via email or text (here you can edit the email or phone number), or to share the link manually.
- If you choose to share the invoice automatically, you can select Add Additional Recipient to add up to five additional recipients by entering their email address or phone number. All recipients will receive automated reminders 7 and 3 days before the due date, and 3 and 7 days after the due date (only if the invoice is not paid).
- If you choose Manually share link, once the invoice is created, you you’ll have to follow these steps to share your invoice.
- You'll have to save a credit card for that customer before you can select Charge saved payment method now. Then, below Select Payment Method, you should select the credit card you want to charge. The selected card will be charged on the date you send the invoice.
- If you select Request payment from customer, you can choose to share the invoice automatically via email or text (here you can edit the email or phone number), or to share the link manually.
- In the Subtotal section, you can add a Discount, Fee, or Tax to all items listed in that invoice. Select the corresponding link, enter a unique name, and then enter the adjustment as a Percent or a dollar Amount. If you want discounts and fees to be applied to the amount after taxes, clear the Pre-tax checkbox.
- Select Send Recurring Series.
- If you don't want to send the series immediately, select Save as Draft and have them saved to your list of recurring series marked as draft.
View a recurring series
You can access all your existing and draft invoices from a recurring series.
- Sign in to the Dashboard where you manage your GoDaddy Payments account (use your GoDaddy username and password).
- Select Invoicing.
- Select Recurring Series to see all current recurring invoice series.
- To find a specific recurring series, enter the invoice details (Invoice ID, Customer or Summary text), Date, and the invoice Status, then select Search. All invoices matching your filter will appear on the list.
- For the series where you want to see individual invoices, select All Invoices from the
 Menu. Then, an overview of your invoices by status is provided. The number of invoices in each category is indicated in parentheses.
- Paid: The total value of invoices paid over the last 30 days.
- Sent: The total value of all sent invoices that have not yet been paid.
- Past Due: The total value of all overdue invoices.
- Drafts: The total value of draft invoices that have been created.
- (Optional) To find a specific invoice, enter the invoice details (Invoice ID, Customer, or Summary text), Date, and invoice Status. Then, select Search. All invoices matching your filter will appear in the list.
Cancel a recurring series
Here's how to cancel a recurring series.
- Sign in to the Dashboard where you manage your GoDaddy Payments account (use your GoDaddy username and password).
- Select Invoicing.
- Select Recurring Series to see all current recurring invoice series.
- To find a specific recurring series, enter the details (Recurring Series ID, Customer or Summary text), Date, and the invoice Status, then select Search. All invoices matching your filter will appear in the list.
- For the series you want to cancel, select Cancel from the Menu.
- If you have unpaid invoices, you'll be able to select Cancel Future Only or to Cancel All Invoices, including the ones that are not paid.