Push my staging site to the production site
Step 5 of the Get started with staging series.
Warning: By default, the sync process will only overwrite site files and not the database. If you check the box to Overwrite content, the database will also be overwritten.
- For all sites:
- Make sure the content in your staging site is what you want on your live site before you push the changes to production.
- Any custom code or assets that are not stored in the /wp-content folder will not be moved between staging and production sites.
- For WooCommerce sites:
- You also need to understand the WooCommerce update process before pushing content to your live site.
- Any new orders or customer data on the production site will be overwritten by the older version from the staging site.
After making changes in your staging site, you can push those changes to your live production site.
- Go to your GoDaddy product page.
- In your My Products page, next to Managed Hosting for WordPress, select Manage All.
- For the website you want to push the staging site changes to production, select Settings from the
 menu.
menu.
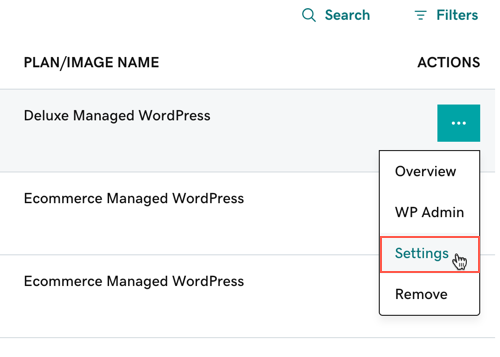
- Under Staging Site, select the Actions menu and then select Sync Sites.
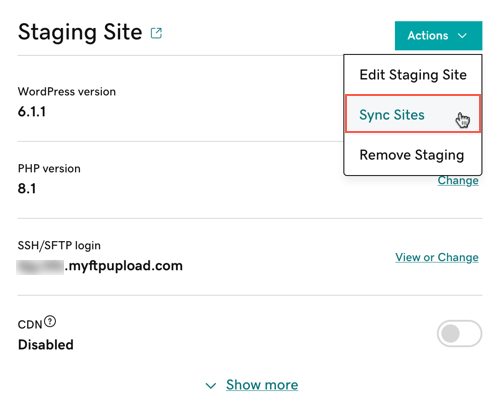
- Select Push staging to production. Only select Overwrite content if you want to overwrite the database as well as the files in your live production site.
- Select Sync.
Syncing your production site from your staging site may take a few minutes based on the size and complexity of your site.
Related steps
- Once you're done, you can remove the staging site.