
Editor’s note: The following article is curated from a member of the GoDaddy community. We’ve made some light edits for formatting and clarity. Looking for help with GoDaddy products or getting your business online? Join the community to get answers from other GoDaddy customers.
Most of the work you do with domains & DNS involves configuring your a domain’s DNS record to point at the right location.
This tutorial goes through the steps of making sure that your.domain.com will point to the correct file of the correct webroot of the correct server. This is an overly simplified tutorial where all the more advanced information that you do not need to know are stripped away.
At the end of this tutorial, you will be able to:
- Configure your domain to point to your website
- Explain how domain/DNS works and why it is important
(Registering and buying domains is outside the scope of this tutorial. This tutorial assumes that you already own a domain and a hosting account.)
First, let’s configure the domain you’re working on. (That’s most likely the reason why you are here anyway. All the more juicy and detailed info will come after the step by step guide.)
Your business needs a website.
Getting your server’s IP address
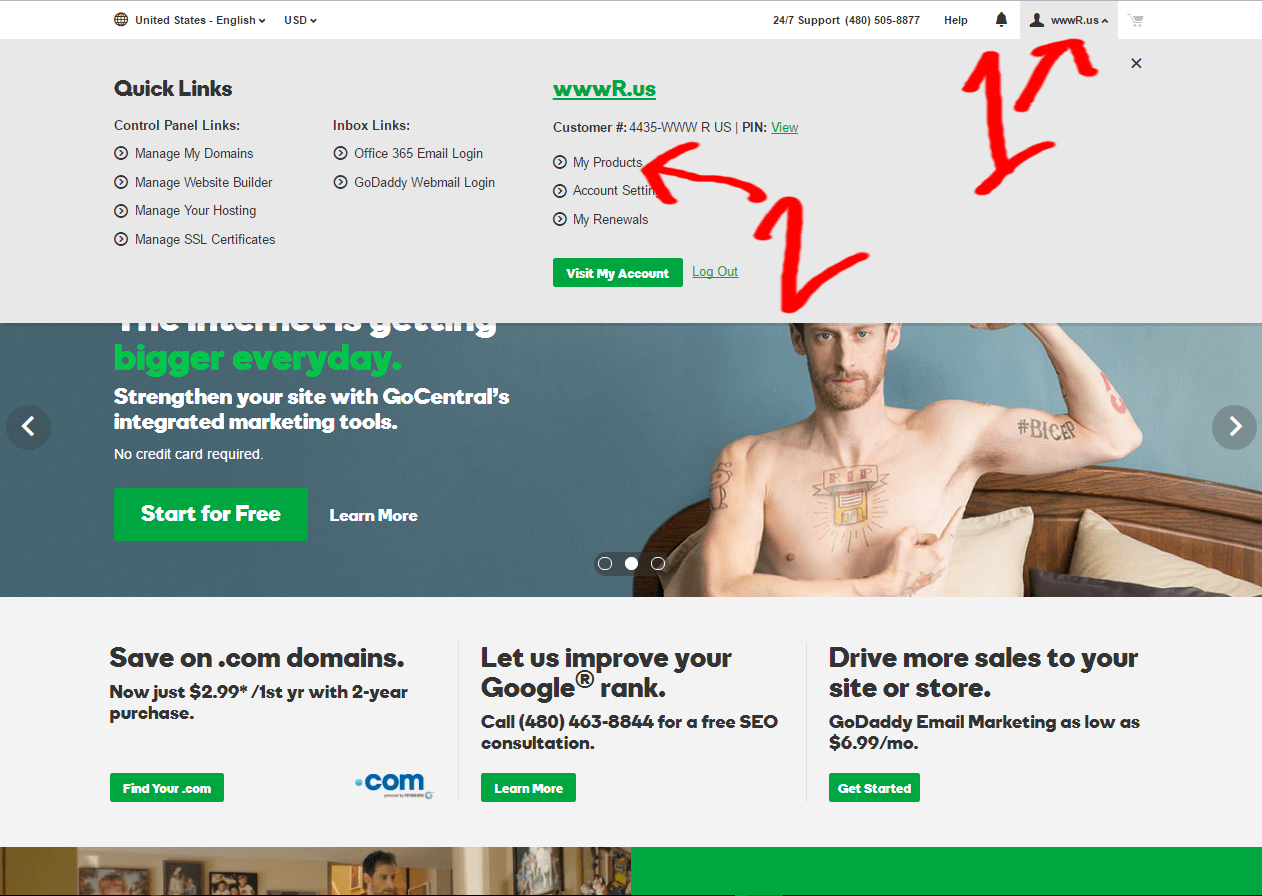
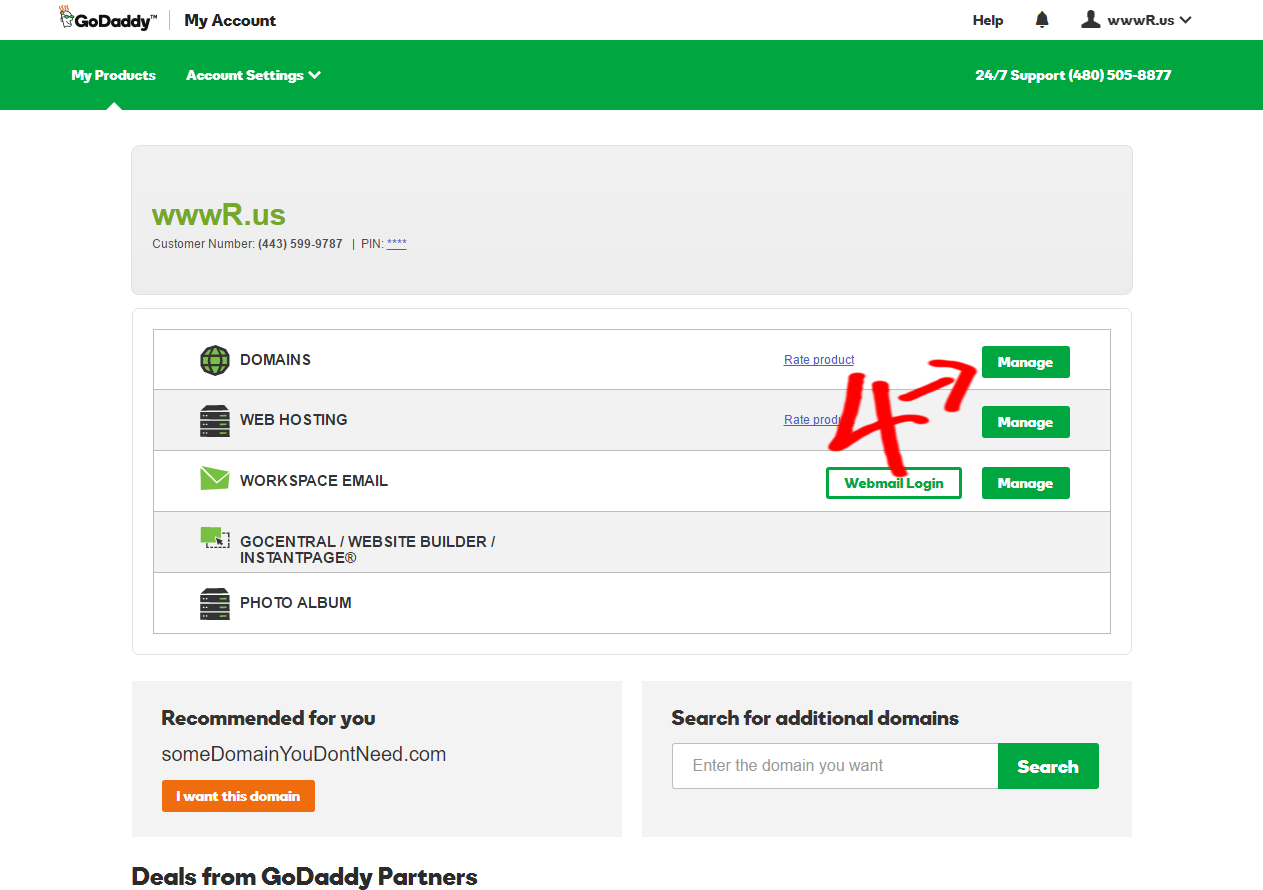
Go to the GoDaddy.com homepage. Click your username to show a dropdown menu, then click My Products.
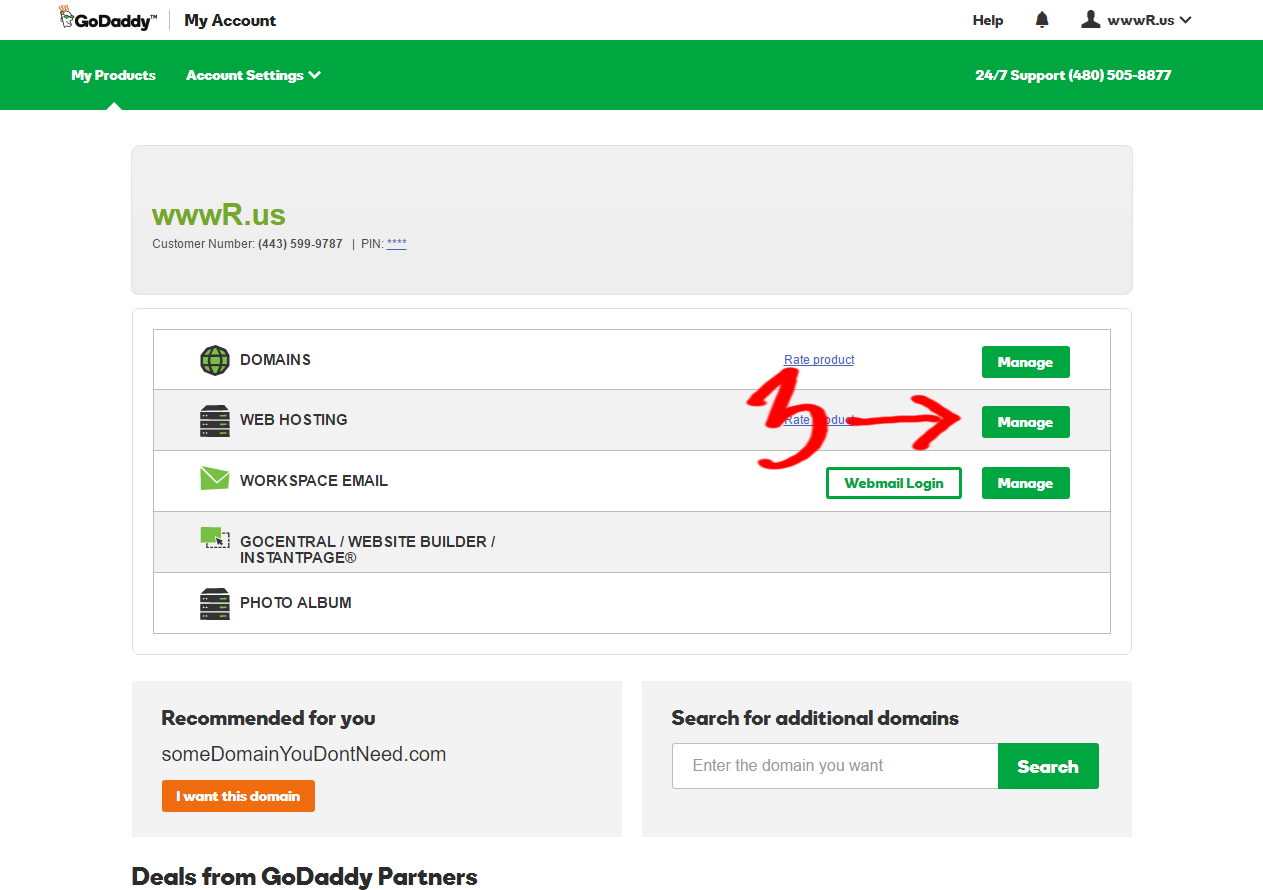
Next to Web Hosting, click Manage.
Boom! There’s your IP address under Server Details.
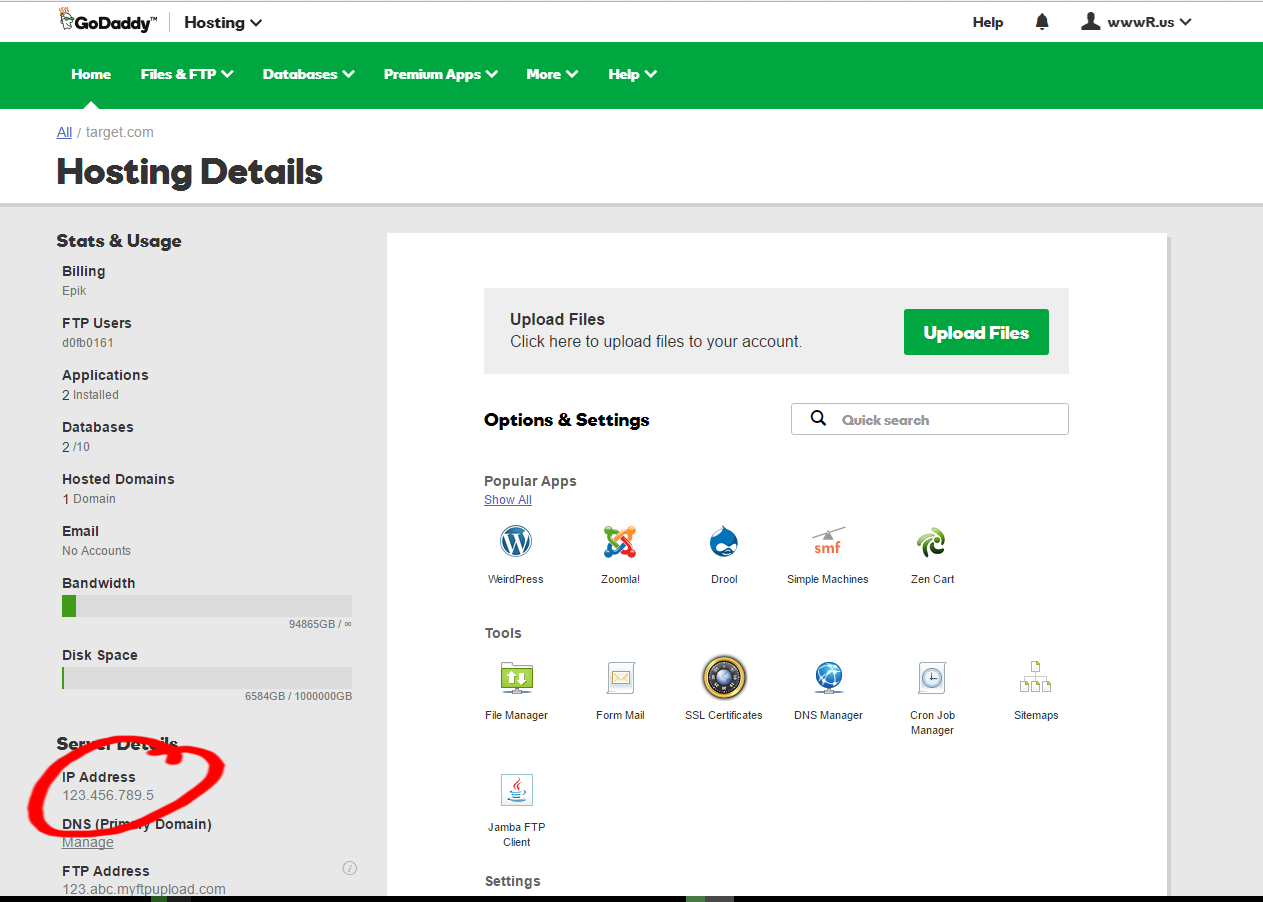
Write down your IP address. You’ll need it later.
Configuring your domain
Go to domain management. Back under My Products, next to Domains, click Manage.
Click the domain you want to manage.
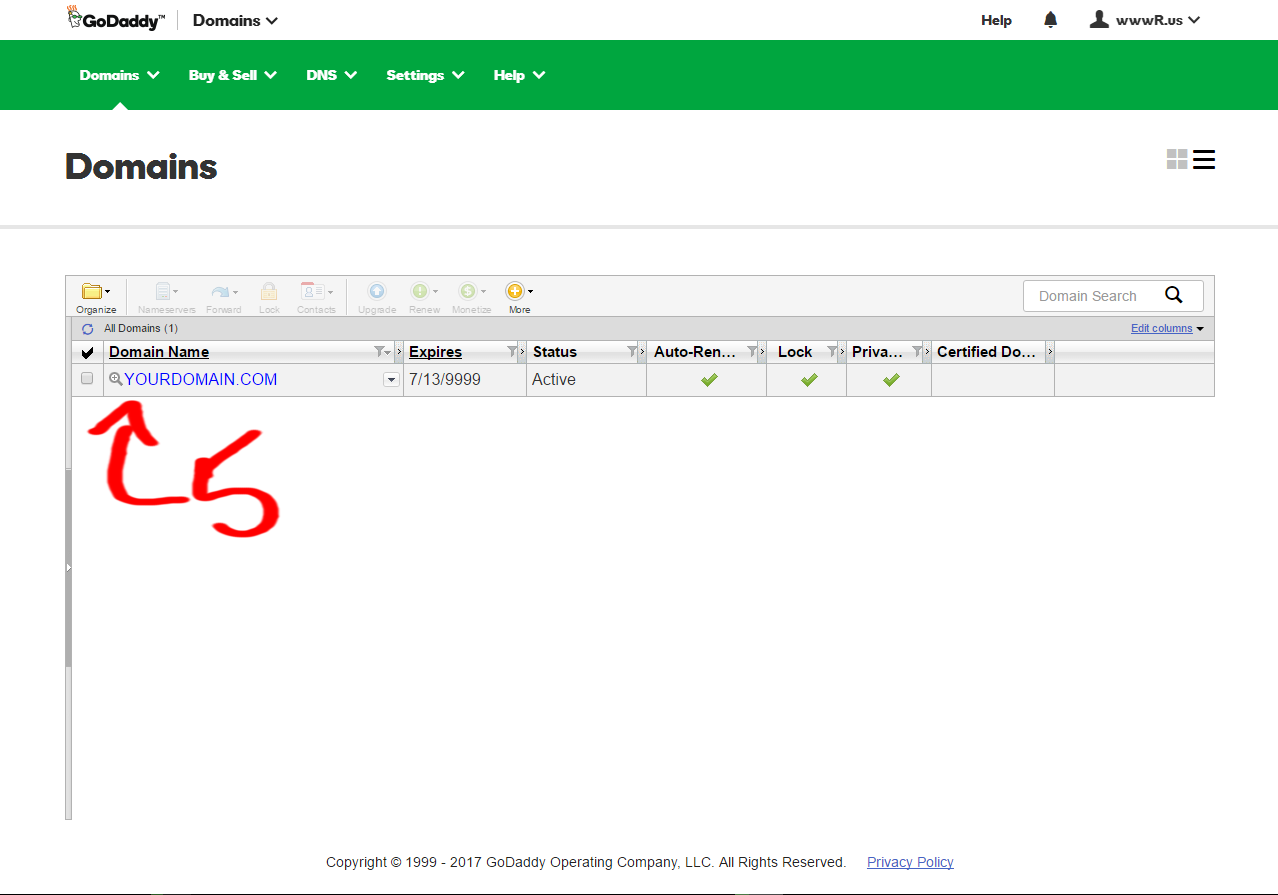
Click DNS Zone File.
Good job making it this far. This part is, by far, the most important part of the step by step guide.
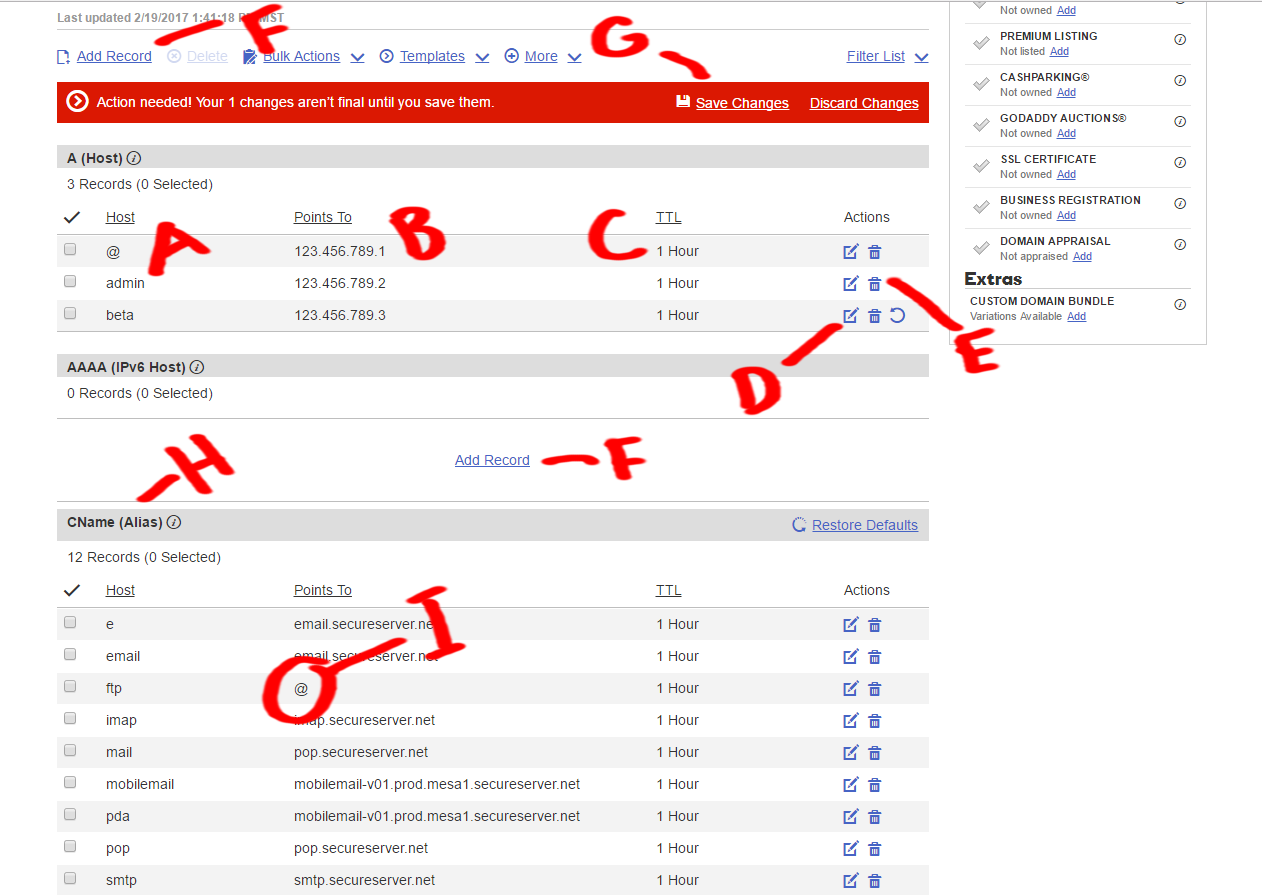
If an @ A (host) record doesn’t exist [see A], you’ll need to click “Add Record” [see F]. Otherwise, you’ll need to edit the existing one by clicking the Edit button [see D].
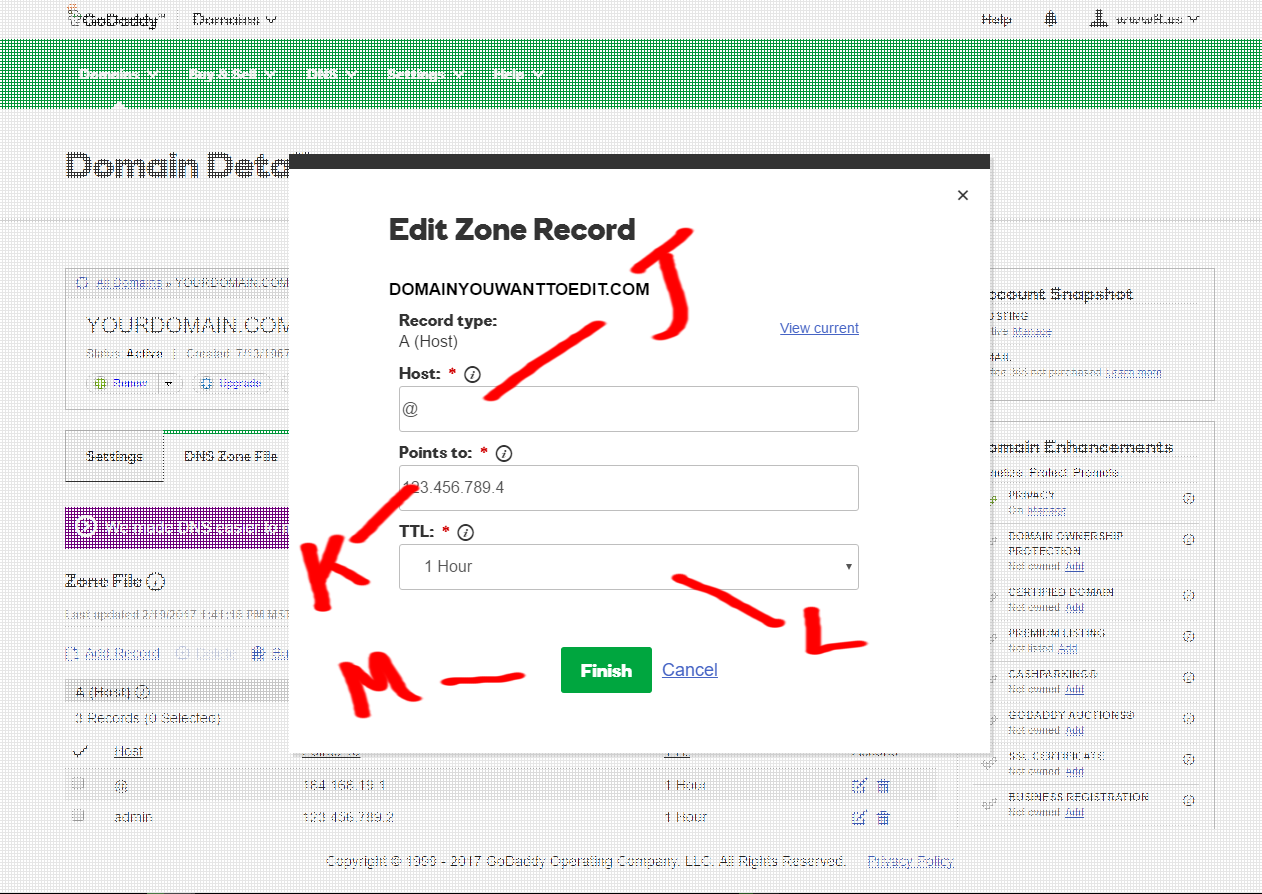
If you click Edit, a modal will appear [Figure 2]. The modal will have 3 fields.
Put @ in the first field, called Host [see J]. Your host IP address from step 1 goes into the second field, called Points to [see K].
The third field, TTL [see L] is a dropdown menu that contains time-to-live (TTL) options. TTL is the average time it will take for your changes to propagate, i.e. be globally available across the internet. You can put anything in here, but the shortest amount of time will make the changes propagate more quickly.
Click Finish [see M]. This will close the modal and you should be taken back to Figure 1, the main DNS records screen, with a red notification bar across the top.
Click Save to save all the changes you made. Now you just need to wait for the DNS update to propagate across the web.
That concludes this step-by-step guide.
A quick reference for the DNS records screen
Wondering what all of those options are for in Figure 1 and 2?
- A: List of all available Host records.
- B: Host IP address. These are the IP addresses of your servers.
- C: TTL, the average time it will take for your changes to take into effect.
- D: Edit button. Clicking this will allow you to edit a record.
- E: Delete button. Clicking this will allow you to delete a record.
- F: Add Record button. Clicking this will open a modal that will allow you to add a record.
- G: Save button. Changes are not applied until you click save. Please make sure you save everytime you make changes.
- H: CName (Alias). CNames are also subdomains. The difference between a Host record and a CName record is that a Host points to the IP address of a server, while CNames points to a URL. For example, CName @ can point to yourDomain.com.
- I: @ is a shorthand symbol for $ORIGIN. It basically points to your base domain, i.e. yourdomain.com.
How does the domain name system (DNS) work?
A domain name is the human-readable representation of an IP address. It’s kind of like a name on your phone’s contact list.
For example, say you want to be able to call your father. Saving his number as “Dad” is easier than remembering his phone number. Now searching for “Dad” on your contact list will give you his number.
Domain names work the same way. So when you enter www.godaddy.com in your browser, you’re actually “dialing” (connecting to) 208.109.4.218, the IP address for godaddy.com.
Your computer doesn’t automatically know the connection between domain names and IP addresses. Instead, it acquires that information through the Domain Name System, or DNS.
This is how usually how it goes:
- You enter a domain on your browser like: www.godaddy.com
- Your computer checks if already knows the IP for www.godaddy.com
- If it does, it connects to the server.
- If your computer doesn’t know the IP, it looks up the DNS record.
- The DNS provides the IP address to your computer.
- Your computer connects to the provided IP address.
Note: If a domain has not been registered, your browser will return a “ERR_NAME_NOT_RESOLVED” error. You can check the status of a registered domain through GoDaddy’s WHOIS tool.
Configuring a server’s virtual hosts
At this point, DNS has done its job. Now, it’s time for the web server to do some work. If you’re working with WHM or cPanel, you’re in the clear - those tools handle server configuration for you.
It’s not so easy if you’re not using a management tool like cPanel, however. In this situation you’ll need to configure virtual hosts.
Virtual hosts are basically a set of instructions telling the server how to handle incoming requests for certain domain names. (That’s how multiple websites share a single IP address.) Each virtual host will define a domain and a port that it will listen to. Each virtual host will also define the path of the web root to serve if a browser requests a certain domain.
An example of a virtual host entry in Apache could be:
<VirtualHost *80>
   DocumentRoot "/var/www/html/domain/"
   ServerName domain.com
   ErrorLog "logs/domain/error_log.txt"
   TransferLog logs/domain/access_log.txt
   <Directory "/var/www/html/domain">
      Options FollowSymLinks
      AllowOverride All
      Order allow,deny
      Allow from all
   </Directory>
</VirtualHost>
You’re only likely to run into virtual host configuration on advanced hosting (VPS and dedicated hosting plans). You can find more documentation for working with advanced hosting in our Help section.
Learn more about VPS hosting from GoDaddy.
*AI-assisted full website including all of the premium features like online store, appointment scheduling, and marketplace selling to name a few, requires paid subscription.
Social media marketing calendar available with GoDaddy Airo, some features will require paid subscription.
Professional Email through Microsoft Office 365 30-day free trial with an option to renew into a paid subscription beyond the promotional period.
While the LLC starter plan is free, there are likely some state and/or local filing fees associated with your filing which will be determined during the filing process.