When someone wants to find something on your ecommerce site they will likely go to one of your category pages. These archives of your product catalog are key to seamless shopping and a valuable tool for converting more visitors into sales. In this post, we will look at how you can customize your WooCommerce category pages to create a great experience for your customers.
Save time getting online
With GoDaddy Managed Hosting for WooCommerce, you save time getting online. It includes the features to help you with the strategies we’re about to cover — it’s not just about getting a domain and hosting.
This high-performance platform optimized for WordPress also includes tools for security, shipping, payments and site performance.
Once your WooCommerce store is up and running, it’s easy to track orders with customizable sequential order numbering, keep an eye on profitability with native COGS tracking, and monitor store performance using advanced and integrated Google Analytics.
Why are category pages important?
Category pages are one of the most important parts of an ecommerce store. When customers visit your shop looking for a specific type of item, they need a way to find what they want without having to sort through what they don’t.
If you were shopping for a T-shirt you wouldn’t want to scroll past pants while making your search.
Category pages make it easy for users to navigate your site by compiling items by type into a single consolidated listing. This not only leads to efficient product discovery but also helps shoppers quickly compare similar items.
By scrolling through a category page, they can review prices and features to find the best option. Category pages can serve as a tool for quick checkouts depending on your site’s functionality.
It is for this reason that the majority of sales on all online stores come through category pages.
The homepage is good for setting a tone for your brand. It is also useful for showcasing your key items or any ongoing promotions. For product detail pages, Most people only click through when they are interested in the item and close to making the purchase.
What makes a good category page?
Category pages tend to have simple, highly structured layouts. The best pages are easy to use while also providing an engaging user experience. Some of the most common components of an ecommerce category page include:
- Featured images
- Sorting
- Filtering
- Search
- Buy now/Add to bag
- Breadcrumbs
- Category menu
Let’s take a closer look at how a few of these impact the customer experience:
Filtering
While it’s good to make all your items accessible to visitors, the task of having to sift through countless items to find what you are looking for can quickly drive people away from your site. With filters, users can select the traits they seek in the product.
Any items that don’t match the criteria won’t appear.
Filters are commonly used for product attributes such as size, color, material, and specifications. There are also manual filters that let users specify a particular price range.
Where you place your filter can impact the customer experience. Common practice is to place the filters in the sidebar navigation menu. Because most shoppers are the most familiar with this layout, it is often the most convenient for those looking to find items quickly.
Making the filters visible by default can increase the chances they catch the customer’s attention. However, if your pages require a lot of filters it can be helpful to collapse them as to not clog the page.
Informational copy
Descriptive text can help bring more life to your category pages. General practice is to include a short, one- to two-sentence description near the page’s header.
Content is also important from an SEO perspective. Adding more copy to your page will increase the overall word count and the usage of related keywords. Because Google wants to rank the most informative pages, this can help boost your rankings relative to competitors who are not adding content.
If you choose to add expanded copy to your pages, it is often best to place it below the product assortment. People come to your site to shop. And while useful, having to scroll past blocks of text to see products detracts from the ultimate goal of driving sales.
Customize WooCommerce category pages with native settings and theme editor
The platform itself provides a few options to customize WooCommerce category pages. However, they are not extensive. You only have the ability to change the category name, description, URL slug, display type, and thumbnail.
The default layout for your WooCommerce categories is determined by your theme’s template.
Depending on your theme, there may be many options for customizing your pages or you may have limited control. Some have themes that have a drag and drop builder that give you complete flexibility for arranging your pages.
There are also some simple plugins you can use. One example is the Category Editor plugin. After you download the plugin, you can go to Products > Categories to select the product category that you want to customize.
With the plugin, you’ll now see that the Description section has an expanded editor field. You can use this to modify the font and styling for the text at the top of the page. The editor also allows you to add images or other elements by adding code to the editor.
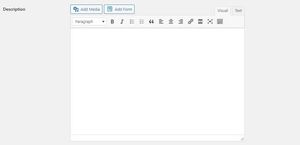
This is still a rather limited method but it gives you the ability to design your pages to your needs without having to get a dedicated page builder solution or replace your WordPress theme.
Customize WooCommerce category pages using a page builder
If you want unlimited control over the appearance and function of your category pages, the best option is to use a WordPress page builder. They provide the most robust functionality and are also easy to use once you learn your way around.
Some of the more popular page builder plugins to customize WooCommerce category pages include Elementor, Divi and Thrive Architect. Below we will walk through an example of how you can quickly create a custom page for your categories using Elementor and Divi.
Customize WooCommerce category pages with Elementor
The Elementor page builder allows you to customize every area of your WordPress site. To customize your WooCommerce category pages you will need the Pro version of the software. This will give you the Theme Builder feature necessary to build the pages.
Once you have installed and activated the plugin, you’ll want to start by creating a template for your custom categories.
Go to Templates > Theme Builder > Archive and select Add New.
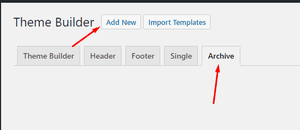
Enter a name for your template and click Create Template.
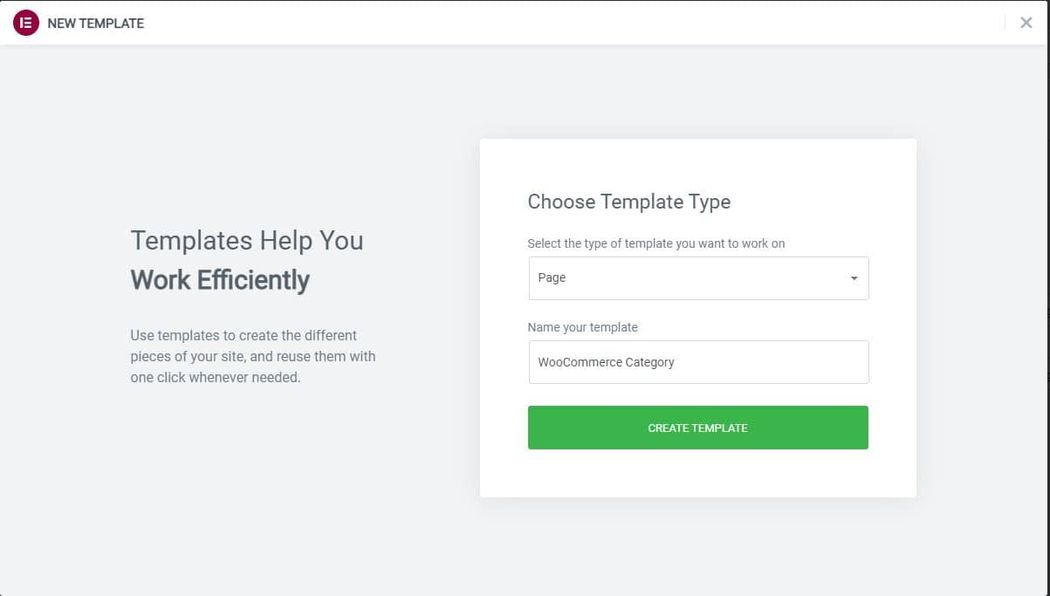
Now, you will have the option to build the template from scratch or to use a pre-built template from the Elementor library. After you choose, you can begin building or editing the new template.
If you are building from scratch, determine which elements you need to achieve your intended design. Elementor offers a solid number of WooCommerce elements you can use when crafting pages:
- Product title
- Woo breadcrumbs
- Product image
- Product rating
- Short description
- Product price
- Add to cart
- Product meta
- Product data tabs
- Product related
- Upsells
You can use the other Elementor widgets to further improve your pages. For example, you could extra banners and calls to action or add your Instagram feed to feature user-generated content.
Once you have made all the changes to the template, click Publish. This will make the template live on your site. By default, it will show for all categories. If you only want it to show for certain categories, you can do so by setting display conditions.
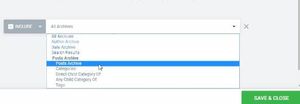
After publishing, click Add Condition to specify the display rules.

If you want the template to show for all categories, select Categories and set the field to the right at All. To select specific categories click into the field and select the ones you want. Save and close when you are finished.
Once you have saved the changes, it can be helpful to preview the template with several of your categories to ensure that everything is consistent. Find the eye symbol in the left-hand panel and click Settings. Under Preview Settings, choose the category you want to sample and apply the changes. You can view the template to see how everything looks.
Customize WooCommerce category pages with Divi
Next, we will look at how you can customize WooCommerce category pages using the Divi page builder. Like, Elementor you will need to sign up for a plan to use the page builder.
After you download them from the Divi website, go to Appearance > Themes > Add New to upload and activate the theme.
Installing the theme will also install the Divi Builder which you will use to customize your product category pages.
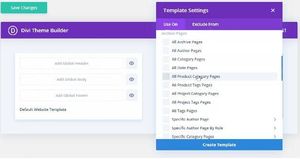
Once you have installed the theme and by extension the page builder, go to Divi > Theme Builder to begin constructing your category page template.
From the builder, select Add New Template. To create a template for all of your category pages, look for the Archive pages section and select All Product Category Pages. If you want to create a template for a specific category select, Specific Category Pages.
From the template builder, you will then select Add Custom Body and then Build Custom Body to begin designing the block that will be used for the template.

You will have the option to build the template from scratch, use a pre-built template from the Divi library, or clone one of your existing pages. In our example, we will show how to create the template from scratch.
Next, you can begin formatting the structure of the page by adding new rows. Click New Row, select the number of columns to include. You can have as many rows and columns as needed. If you want a simple category page, you can select a two-column layout, one for the sidebar the other to contain the header and product catalog.
As you add your rows to the template, you can start to populate the sections with the Divi modules used to add the necessary content and functionality to your category pages.
Start by creating the header for the page. You’ll want to add the page title at the very least. It can also be helpful to include breadcrumbs as it will enable your customers to navigate your site with greater ease.
To add the tile, click the + icon and find Post Title. You don’t need to enter the title as it will automatically show the dynamic post title. You also have the option to add the meta and featured image beneath the title.
To add the breadcrumb navigation, click the + icon and search for Woo Breadcrumb.
To display your WooCommerce products, you will want to use the Shop module. After you add the module, click on Content to specify its display options. By default, the module will order the products by name.
By changing the view type, you can adjust the order in which your products appear. You can also use the product count and column layout settings to determine how many items appear on the page and how they are arranged.
Additionally, the Design and Advanced sections of the Shop module allow you to edit much more aspects of the collection’s display. Like Elementor, you can use the non-WooCommerce Divi modules alongside your products to help create an even more optimized page.
Custom product sorting for category pages
WooCommerce includes several options in the core plugin for sorting your products on the Shop page. However, most people don’t realize that there’s actually an option for WooCommerce custom product sorting. By default, you’re given 6 options:
- Default Sorting (custom + name)
- Popularity (sales)
- Average rating
- Most recent
- Sort by price (ascending)
- Sort by price (descending)
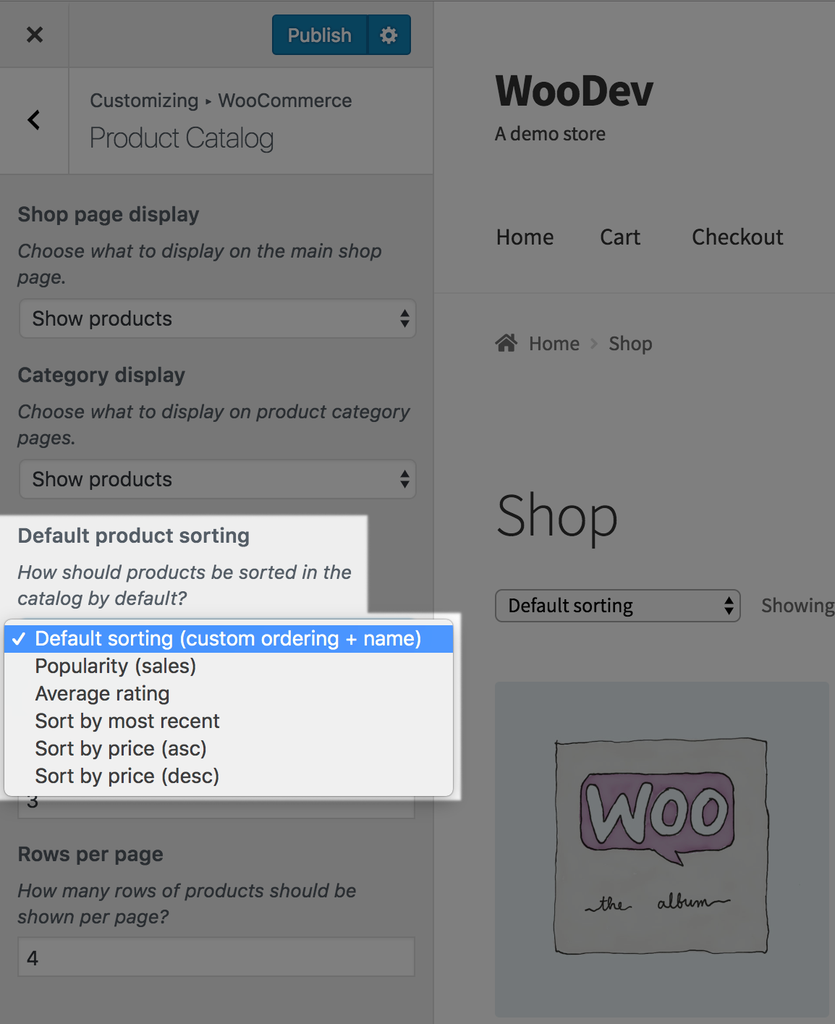
We’re going to focus on the first option for setting up a customized order. If you go to Appearance > Customize in your WordPress admin, you can change some of your display settings.
In the Customizer, go to WooCommerce then Product catalog change the “Default product sorting” to “Default sorting (custom ordering + name)” and we’ll get going from there. (See a gif of how to access this).
This setting will automatically sort products alphabetically in your store. However, you can also use this setting to create an entirely customized order for your WooCommerce products.
If you click on “Sorting” at the top of your product listings page, you can start customizing your product order:
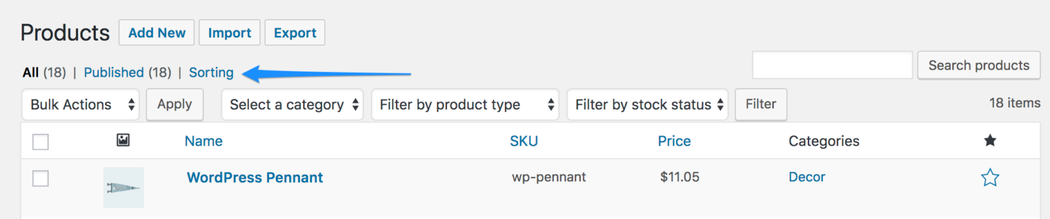
This will change the screen to allow you to drag and drop products into an order that you choose for your Shop page.
Need to see more products? Adjust your screen options and change the number of products per page.

Note that if you start to change product order, you’ll want to completely customize your products into an order that you choose, as alphabetical sorting will now be overridden.
Why is this? Dragging and dropping products will change the “Menu Order” under Product Data > Advanced for each product, and there’s no bulk method to reset all menu orders to 0. If you want to get back to alphabetical sorting, you’ll have to reset the menu order manually for each product to 0, which can be incredibly time-consuming for stores with more than a few products.
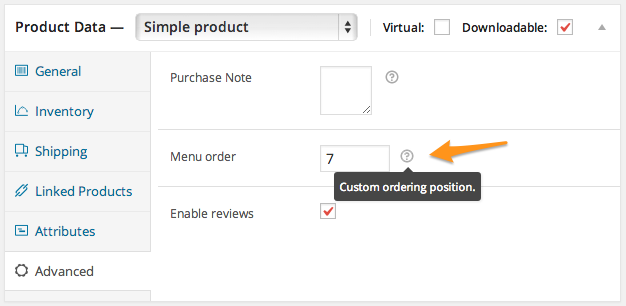
You can also manually edit menu order rather than dragging and dropping if desired under Product Data > Advanced. Products with menu order “0” will be displayed first, then 1, 2, 3, etc.
You can use this to create your own ordering or groups of products that will be ordered together alphabetically. For example, if multiple products have menu order = 1, then they’ll be displayed alphabetically together after any products with menu order = 0 and before those with menu order = 2. The default for all new products is 0.
Closing thoughts on customizing WooCommerce category pages
This post scratched the surface of what you can do with your products using WooCommerce and other third-party solutions. Take a look at the tools and insights from this post to see how you can optimize your category pages. You’ll create a great experience for your customers and enjoy more sales as a result.