
Your community event deserves a home online. A dedicated website gives people one reliable place to learn about your food festival, volunteer drive, street fair, or annual celebration before they make plans to attend.
Let’s explore how to build a community event website that feels organized, credible, and easy to use. You’ll learn which pages and details matter most, then follow practical steps to turn your event idea into a polished site that helps bring your community together.
GoDaddy Airo AI Builder
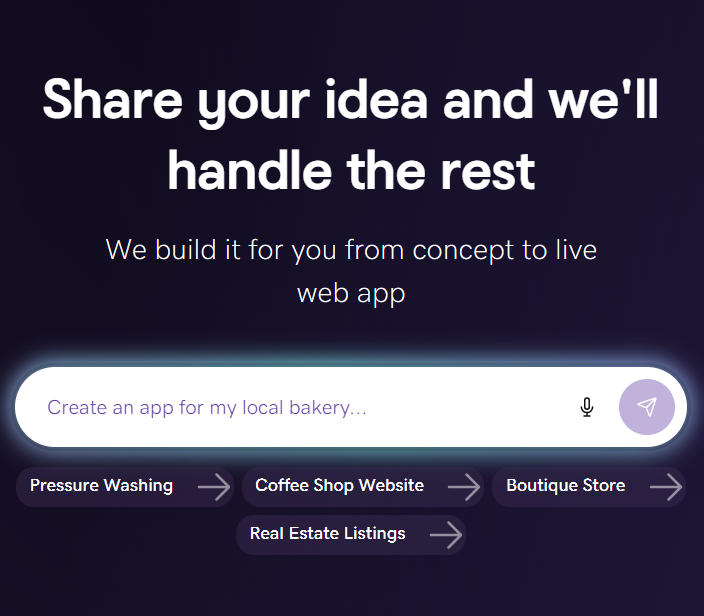
Describe your idea. We'll build your live website in minutes.
With a few prompts, Airo AI Builder generates your website, web app, pages, databases and logic in minutes — no coding required. Start for free with 50 AI credits a month. No credit card required.
Build for FreeWhat is a community event website?
A community event website is a dedicated online hub for one local event. Unlike a business’s primary website, it focuses entirely on helping people discover and participate in a specific occasion, such as a food festival, handmade market, community service, block party, or farmers' market.
The site can create excitement ahead of the event while keeping essential information in one easy-to-find place. It can also support registration, introduce vendors and makers, and help attendees feel prepared before they arrive.
If you’re new to creating websites, read this article on starting a website from scratch for more guidance.
How to build a community event website
A community event website works best when it answers the questions people have before they decide to attend. Follow the steps below to shape the event’s online identity and publish a site that’s genuinely helpful for attendees.
1. Define your event and audience
Your website needs a clear point of view before it needs a color palette or homepage image. Nail down what makes the event worth attending, then consider what each visitor needs to feel ready to go.
A street fair built around local music might speak to young adults looking for a weekend outing, while a food festival may need to help families plan around admission, parking, and kids’ activities.
That understanding should guide the site’s content and tone. The clearer you are about the experience you are creating, the easier it will be to decide which details deserve the spotlight.
2. Choose a domain name
Your domain name should make the event easy to recognize, remember, and share. Use the event name when possible, and add a city or neighborhood if it helps distinguish your event from similar ones. If your event is recurring, don’t include a year in the domain name so you can use it over and over again.
Start choosing a domain name as soon as you have a strong event name in mind. Registering it early gives you a consistent address to add to your promotional materials and use throughout the planning process.
3. Choose a website builder
You don’t need to build every part of an event website from a blank page. A website builder gives you a workable structure, so you can spend your energy on the pieces that make the event feel local and distinct, such as the vendors, performers, photos, and event-day information attendees care about.
The Airo AI website builder helps you turn a short, plain-language description of your event into a customized website. Share details about your food festival, maker market, or street fair, and Airo can generate a site with relevant content and a coordinated look. You can then make it yours by adding the schedule, vendor lineup, ticket details, and other information that will help people plan their visit.
4. Pick a website design
Your website design should give visitors an immediate sense of the event. A handmade market could lean into a warm, creative feel with strong vendor photography, while a large community festival may need a bright, energetic design that keeps a lot of information easy to find.
Treat the homepage as an invitation, not a brochure. Make the event name, date, and location visible right away, then use photos and short copy to help visitors picture themselves there.
5. Create your key website pages
The most effective community event websites give people a clear path to the information they came for. The homepage can introduce the event and direct visitors to deeper details, while pages for the schedule, vendors, tickets, location, and contact information prevent the main page from becoming crowded.
Think about the moments that may prompt someone to visit. A potential vendor may want application details, a family may want to know about accessibility or activities for children, and a local sponsor may want to understand partnership opportunities. Build pages around those needs as they arise.
6. Add your event details and schedule
Event information is the heart of these websites, so it needs to be complete and dependable. Share the date, hours, address, admission information, and any details that could affect a visitor’s plans, such as rain dates, bag policies, or parking limitations.
If your event has performances, demonstrations, or timed activities, a clear schedule is crucial. Organize it in a format that lets people quickly see what is happening and when, then update it if the lineup changes.
7. Set up registration or ticketing
Registration and ticketing should match the kind of event you’re running. A free neighborhood block party might only need an RSVP form to estimate turnout, while a ticketed food festival may need a simple checkout experience that explains what admission includes.
Give people the information they need before they commit. Clear pricing, age policies, refund terms, and confirmation emails can reduce confusion and help attendees feel more prepared.
8. Add maps, contact details, and social media
Getting to the event should be the easy part. Add a map that opens easily on a phone, then share the details people need before they pull out of the driveway. Parking tips, the best entrance, and nearby public transit information can save attendees a lot of guesswork.
Include an email address so people know exactly where to send questions. Link your event’s social accounts, too, so visitors can follow vendor spotlights and stay in the loop if plans change before the big day.
9. Make your website mobile-friendly
Event-day visitors often pull up a website while they are traveling, parking, or standing at the entrance. That means the schedule, map, ticket information, and contact details need to work just as well on a phone as they do on a laptop.
Use your own phone to test the site as an attendee would. Check that the navigation is easy to tap, the text is comfortable to read, and the map and schedule can be used without constant zooming or scrolling.
10. Test and publish your website
A quick review before launch can prevent a frustrating experience later. Visit every page, submit each form, and follow every link. Pay close attention to dates, times, locations, and ticket details, since these are the pieces people will rely on most.
Once the site is live (publishing will require a paid plan), make it part of every promotional effort. Add the URL to your flyers, local listings, email campaigns, and social posts, then return to the site whenever new information needs to reach your community.
Important note: If you're using Airo AI Builder to create your community event website, then your domain's DNS settings will be configured automatically when publishing. If your domain is registered in a different GoDaddy account, or at a different domain registrar, then additional steps will be required before your site can be live online. See our help guide on how to connect a domain to Airo AI Builder for the steps needed for each domain scenario.
Essential pages for a community event website
Each page on your event website should make planning easier for someone who is deciding to attend or already on the way. Start with the essentials, then add pages that reflect the size and personality of your event. Check out these wireframe examples to help you map out the visitor journey before you begin building.
Home page
Your home page is the quick introduction. Make the event name, date, time, and location easy to spot, then give visitors a feel for the experience through a strong image and a short description. Before the event, the page can build anticipation with featured vendors, performer announcements, or ticket information. On the day itself, shift the focus to practical updates, such as a reminder about parking, the day’s schedule, or a weather notice.
Event details/schedule page
This page helps attendees decide how to spend their time once they arrive. Share start and end times for performances, demonstrations, workshops, or children’s activities, and organize the information so it is easy to scan. A simple event layout or map can also be helpful, especially when vendors, stages, food trucks, and activities are spread across a large area.
If any of your events are ticketed, consider adding an online booking system to this page. Or, if tickets can be bought in person, you can learn how to use QR codes for payments.
Vendors, makers, or sponsors page
Give the people and businesses behind the event their moment. A makers market can feature a photo, short bio, and a preview of what each vendor will offer. A food festival might use this page to highlight menus, dietary options, and local favorites.
Sponsor logos and thank-yous belong here, too. Recognizing sponsors helps show visitors who makes the event possible and gives partners a useful place to share with their own audiences.
About the event
The about page explains the story behind the event. Share how it began, the community it supports, and the people who organize it. That context can turn a casual visitor into someone who feels invested in showing up. No matter the reasoning for your event, keep the tone on your site personal and specific.
Location page
A location page helps visitors make a plan before event day. Include the address, a map, parking instructions, and public transit details. Information about accessible entrances, restrooms, and seating can also make the event feel more welcoming. If it’s a multi-day event, consider including nearby amenities, like hotels and restaurants for any out-of-town visitors.
Contact page
A contact page gives attendees, vendors, and potential sponsors a clear way to reach the right person. Include an event email address and separate contact options if different teams handle vendor applications, sponsorships, or press inquiries.
FAQ page
An FAQ page saves your team time and helps attendees feel prepared. Cover the practical details that tend to come up before a community event, including pet policies, weather plans, kid-friendly activities, and accepted payment methods.
Keep this page current as plans develop. Clear answers about things like cash and card payments, reentry, and what guests can bring can prevent confusion before it reaches your inbox.
How to keep your community event website updated
An event website is not a set-it-and-forget-it project. Plans come together in stages, and your site should reflect the latest version of the event people are excited to attend.
Update the basics as soon as anything changes, including the date, hours, location, admission details, and schedule. Add vendors and exhibitors as they confirm, too. A growing lineup gives visitors a reason to return to the site and can create extra momentum for your event.
The final days before an event are a good time to make the homepage especially useful. Add a countdown if it fits your style, and post clear updates about weather, parking changes, or other day-of details. Check registration and ticketing links regularly so attendees don’t run into problems when they’re ready to sign up.
Keep the website working for you after the event ends. Share a few photos, thank your vendors, sponsors, and attendees, and invite visitors to sign up for updates about next year. This gives your community a reason to stay connected long after the last booth packs up.
How to promote your community event website
Your website gives every promotional effort a place to land. Share the link anywhere your potential attendees already spend time, and make it easy for them to find the schedule, tickets, vendor lineup, and latest updates.
- Social media: Post the website link early, then return to it throughout the planning process. Vendor spotlights, performer announcements, and behind-the-scenes content can each point people back to a relevant page on the site. For more tips, learn how to do social media effectively for your event.
- Email marketing: Send updates to past attendees, local supporters, and anyone who signs up through your website. A short email with a clear reason to visit, such as an early ticket deadline or a newly announced vendor, can bring people back at the right time.
- Local partnerships: Ask chambers of commerce, local media outlets, libraries, neighborhood associations, and community boards to share your event website. Give partners a short description and a ready-to-use link, so it takes little effort for them to spread the word.
- Search engines and local SEO: Use your event name, city, and event type naturally throughout the site, especially in page titles and descriptions. These local SEO strategies can help more nearby people find your event when they search for things to do.
- Online community groups: Share the event website in relevant Facebook Groups, Meetup communities, Nextdoor neighborhoods, and local subreddits. Follow each group’s posting guidelines, and make the post useful to members by including a brief event description along with the link.
Build your community event website today
A community event comes together one detail at a time. Your website keeps those details organized and gives attendees one easy place to find what they need before they head out.
The Airo AI website builder can help you move from a simple event concept to a customized website without getting bogged down in the technical details. Get your site online, share it with your community, and focus on creating an event people will remember.
Frequently asked questions
Can I use a website builder for a community event website?
Yes, a website builder can help you create a polished community event website. Choose a builder that makes it easy to add a schedule, vendor information, registration links, and event-day updates.
How do I sell tickets or collect RSVPs on my website?
Add a ticketing or registration tool to your website, then link to it prominently from the home page and event details page. Keep the process simple, and include clear information about pricing, deadlines, and what attendees receive with their ticket or RSVP.
Do I need a domain name for a one-time event?
No, but a domain name can make a one-time event easier to promote and remember. A short, event-specific domain gives you one professional link to use across social media, flyers, emails, and local listings.
How can I feature vendors or makers on my site?
Create a dedicated vendor or maker page with a photo, a short introduction, and a preview of what each person will offer. This gives attendees a reason to browse before the event and gives vendors a simple link to share with their own audiences.
How can I get more people to visit my event website?
Share your website wherever your community already looks for local plans, including social media, email newsletters, community calendars, and partner organizations’ channels. Give people a reason to click by linking to new vendor announcements, ticket updates, or event-day details instead of posting the same general message each time.