It’s no secret that content marketing can be a powerful and cost-effective alternative to traditional marketing channels like advertising on billboards. Eighty-one percent of marketers see content as a core business strategy for creating customer engagement.
High-quality content that helps people solve problems is a great way to build and maintain authentic relationships with new and existing customers. Most ecommerce sellers feel that the task starts and ends at the sale, but business at its core is often about problem-solving. If you can help and guide your customer through content (and perhaps even entertain them along the way), you're more likely to have a customer that stays with your brand for years to come.
The question is how? How can you leverage the influence of content marketing to propel your brand while also supporting your loyal customer base? Let’s take a look at seven effective ecommerce content marketing strategies that’ll help you succeed.
1. Create blog content that helps your potential customers
Blogs are the foundation of content marketing because they’re easy to create, modify and expand. To be the most beneficial resource available, consider the typical and not-so-typical pain points of your target audience and create blog posts that help resolve their problems. Anticipate the questions your customers might have before they can ask them, and be ready with the answers.
Focus on creating the most helpful content on the topic, combined with a solid understanding of keyword research. The goal is to build a helpful knowledge base for new and existing customers.
To give an example, a portfolio brand of ours, Hepper, designs modern furniture for cats. At Hepper, we realized that many of our customers have problems with pet stains and odors, so we launched a pet odor eliminator spray.
Then, we started our content marketing strategy for this product by publishing dozens of blog posts on topics such as “How to Get Cat Urine Smell & Stains Out of a Mattress”. The content explains and demonstrates how to remove cat pee from a mattress, and—this is the key— showing how Hepper’s product can help customers resolve their problem:
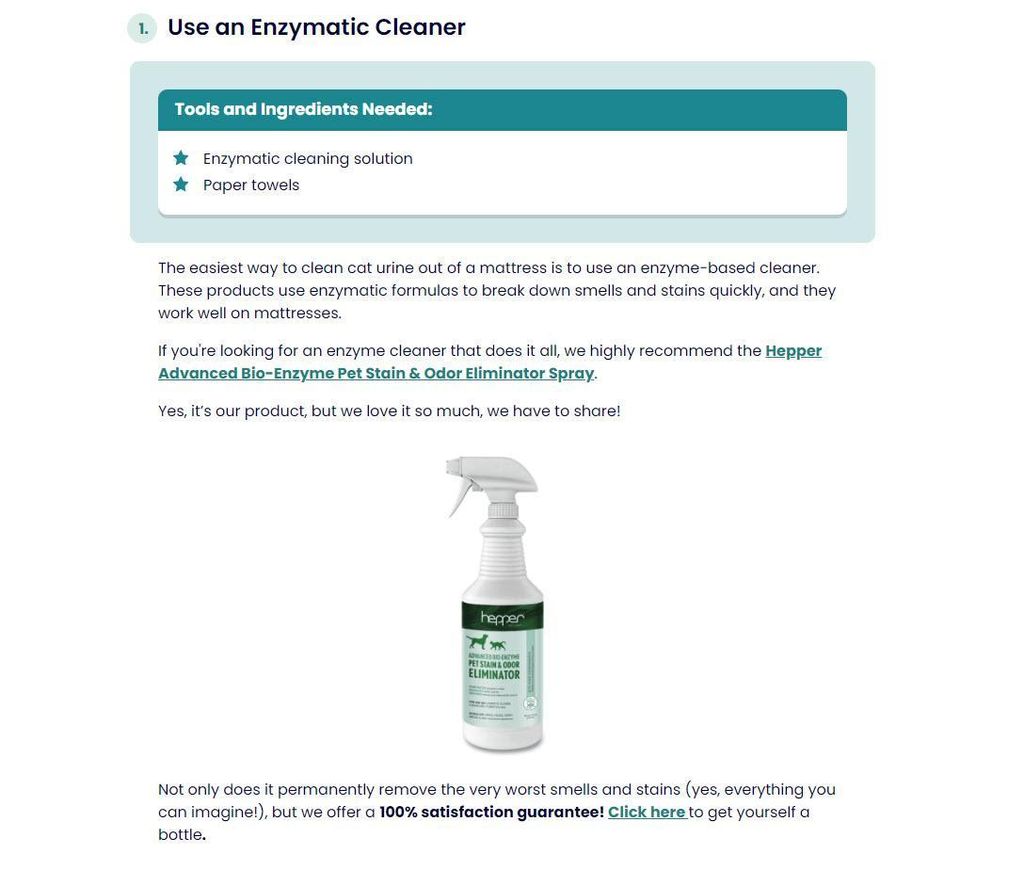
These posts receive lots of organic traffic from Google, which leads to a lot of new potential customers, but they also act as a helpful knowledge base for our existing customers.
All of these blog posts help pet families and have resulted in the sale of thousands of Hepper sprays every month. By assisting our customers fully without asking for anything in return, this then adds trust in our brand and the products we produce.
There are of course a lot of costs associated with publishing blog content. You’ve got upfront costs: paying writers, editors and content managers. These expenses may seem high in a short-term perspective, but frankly, there’s no truer phrase in blogging than “you get what you pay for.”
However, there’s the bright and shiny silver lining that once the posts have been published, they are likely to continue performing well over the next many years. This is especially the case for evergreen content (posts on topics that are unlikely to change from one year to the other).
2. Create digital PR content that attracts press coverage
Digital public relations (PR) is a widely used strategy to increase brand awareness by creating content that has a unique and interesting angle. The PR angle is reaching out to journalists and other media outlets for coverage.iHeartDogs is a dog products company that offered a novel Black Friday “0% off” sale. Instead of giving discounts, iHeartDogs would double the amount of meals they donated to animal shelters for every order.

The campaign far exceeded all expectations, thanks in large part to media coverage of the sales event. Their original goal was to give 100,000 meals to dogs in need. But the company reached thousands of dog lovers on Facebook, and this resulted in an impressive 200,000 meals donated!
Not only does this support an incredibly important cause, but it’s also a great way for iHeartDogs to build brand awareness, and to show that they’re a positive influence for the world of dogs.
Another benefit of digital PR is that it often gets picked up and linked to by online newspapers in the form of backlinks. And backlinks are one of the key ranking factors for Google’s search engine, which means that by attracting all these links your website’s authority starts to increase, which means your blog content often starts ranking higher in search engines. This can lead to a lot of visitors coming to your website organically from search engines.
Digital PR is also a very common tactic for experienced link builders, and many different approaches can be successful.
Related: What is digital PR? Best digital PR techniques and tactics
3. Use email marketing
Roughly half of the global population uses email (3.8 billion), and 99% of email users check their inbox every day, which means that email marketing is a must for any ecommerce brand.
It’s an essential way to stay in contact with your existing customers—to be first on their minds when they think of your niche—but it’s also a great way to ask your customers for feedback so you can create better products for them.
Here are some of the most important email marketing types that all ecommerce brands should have:
- Transactional emails: order confirmations, shipping status updates, etc.
- Shopping cart abandonment emails: these typically have a 39.07% open rate, and a 23.33% click-through rate, thus making them one of the easiest wins when it comes to increasing conversion rates.
- Promotional emails: new product launches, deals & discounts, seasonal promotions, etc.
- Newsletters: This is where you can tell your brand's story, create helpful resources for your customers, and build deeper relationships with your existing customers.
An important aspect of email marketing is that your company owns the email list, so you are in more control. Whereas with social media marketing, you are at the whim of social media networks like Facebook who from one day to the other could change their policies or algorithms.
4. Get busy on social media
There used to be two inevitabilities about life: death and taxes. For an ecommerce entrepreneur, social media has become the third, omnipresent reality.
It’s no longer a question if you should have a social media strategy. It’s essential for your ecommerce brand to have a strong presence and reputation on the social media networks where your customers go, as a lot of them will also check your brand on social media before making a purchasing decision. It’s also a great place to engage with your customers.
The key is to be on the same social media platforms as your target audience. So, all ecommerce brands should have a Facebook, Twitter, YouTube and TikTok presence. But there’s also opportunity in keeping an eye out for which new platforms spring up, as there’s usually a huge advantage in being a first mover on a social media platform before your competitors discover it.
It’s important to mention that social media marketing works better in some industries than others.
People love to watch cat videos and talk about their pets, so for our brand PetKeen, we noticed that we were very quickly able to grow a solid social media following on Facebook and TikTok. Whereas if you’re in an industry where people are less passionate, it can be harder to achieve success with a social media strategy.
Related: Ecommerce marketing — 15 proven strategies to grow your online brand
5. Get familiar with podcasting
Podcasts are one of the most intimate media channels. It’s an immersive experience where the listener forms a bond with the podcasters. By nature, this makes it a great media channel for ecommerce companies to engage with their potential customers, resonate and address topics that are on the listener’s mind. If done right, your podcast can become the voice of your brand, and something that attracts new potential customers, but also strengthens your existing relationships.
Start your own podcast
All this makes podcasting a great platform for introducing products that helps your customers solve their problems, which can ultimately lead to big revenue gains.The Epic Gardening podcast is a great example of an ecommerce and content brand that has formed a community of passionate gardeners and established Epic Gardening as an authoritative voice. So, next time one of their podcast listeners is looking to buy a garden bed, they’re more likely to buy one from Epic Gardening.
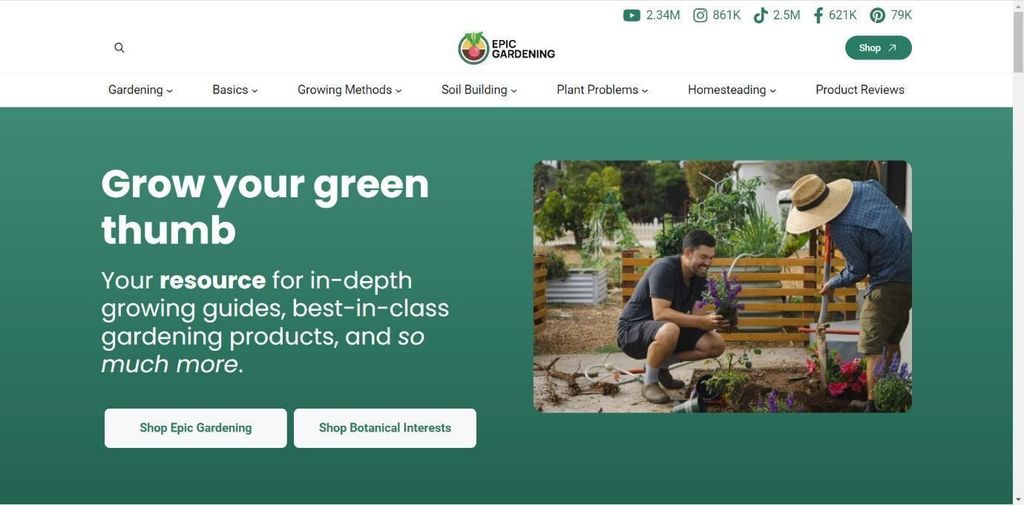
Credit: Epic Gardening
Be a guest on podcasts episodes
You don’t have to start your own podcast to achieve success. Guesting on other people's podcasts can be a very effective way to get in front of potential customers and drive sales.
The trick is landing high-value spots on influential podcasts. While there is no foolproof method of getting booked, you have a couple of options to get started. First, you can use the cold call pitch method. Reach out to popular podcasts in your industry, offer your expertise, and inquire about a guest spot.
Second, and an offshoot of cold calling, is using your existing network to seek opportunities. It’s the old “birds of a feather” cliche. The reach of your social and professional networks can’t be overestimated. You may have a friend with a friend who hosts a relevant podcast, and what better introduction?
Meanwhile, there are podcast booking agents and consultants who may be able to help you — at a cost, of course. But whatever method you choose, you must be proactive. An amazing guest appearance from a top show might drop from the sky, but you can’t count on it.
Sponsor podcasts
There are other ways of building brand awareness through podcast episodes. Lots of huge ecommerce brands have spent millions on sponsorships. An example is Athletic Greens, a company that has sponsored some of the biggest podcasts in the world such as The Joe Rogan Experience and The Tim Ferriss Show. Seeing that Athletic Greens have sponsored some of the same podcasts for months could indicate that this strategy works!
Related: How to podcast — A complete guide to starting and growing a podcast
6. Form a community
Your customers have ideas, questions, and maybe even a passion for your product and the industry. Therefore, you can help your customers and build a stronger bond by creating a space where they can interact.
A great way to achieve this is by adding a forum section on your website where your website readers can create and engage with each other’s forum threads.
Now setting up a forum on your website usually requires a lot of upfront work and ongoing maintenance to keep it running. A great alternative is to start a Facebook group because they’re fast and easy to set up, and a lot of your customers probably already have experience with using Facebook.
A very successful example of this strategy is the popular electric cooker brand, Instant Pot, which created the Facebook group “Instant Pot® Community” which at the time of writing has 3.2 million members. This is a place for international Instant Pot users to post recipes, engage with each other, and share their joy of cooking.
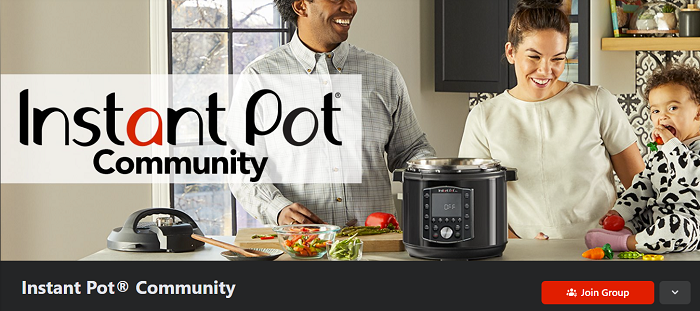
This helps establish Instant Pot as the go-to electric cooker choice. But this is also a great way for a brand to get feedback from their customers and great user-generated content such as pictures, which can be very powerful when used in advertising campaigns.
7. Combine your strategies with paid advertising
Creating great content takes time, effort, and persistence. It’s hard. Therefore, once you’ve created it you should think about the potential of increasing its reach by combining it with paid advertising such as Facebook ads, TikTok ads, Podcast advertising or something else. This could be the difference between your content being viewed by millions of people rather than thousands of people.
Conclusion
In the 21st century, it’s vital to have a content marketing strategy mix that’s tailored to achieve success and customer satisfaction for your ecommerce brand.
Some of the strategies mentioned above will work better in your industry than others, so try them all, see what works, and then double down on the winners.
Building out a successful ecommerce brand is hard, requires persistence and a lot of work. But equipped with a solid strategy, you are already on the right path to take your brand to the next level.