Check Point Software’s unified threat management (UTM) devices are popular for small and large businesses, alike. Why? Check Point’s product line uses the same protective measures and software code in almost a dozen differently sized UTM appliances. This is especially beneficial for small businesses because they can leverage what Check Point puts into making its products secure enough for large enterprises. Read on for more on how to set up a Check Point virtual private network (VPN) appliance.
1. Get started with a virtual private network (VPN).
We will focus here on setting up a virtual private network (VPN) using a representative model, the Check Point 620, for which you’ll administer the devices via a web browser.
This particular model has eight wired ports and a wireless access point, and can be configured to support a single flat network or have each of its ports operate on separate virtual LANs. One of the nice features is that it can support up to four separate wireless networks, each with its own ID. This means you can add a guest wireless network with just a few mouse clicks and with an obvious link on the wireless settings screens. You can also segregate wireless traffic into its own virtual LAN for better protection with another mouse click.
Wondering why VPN? Learn more about the reasons you need a virtual private network for remote network access by employees working from home or other remote locations.
2. Access Check Point’s web-based management dashboard.
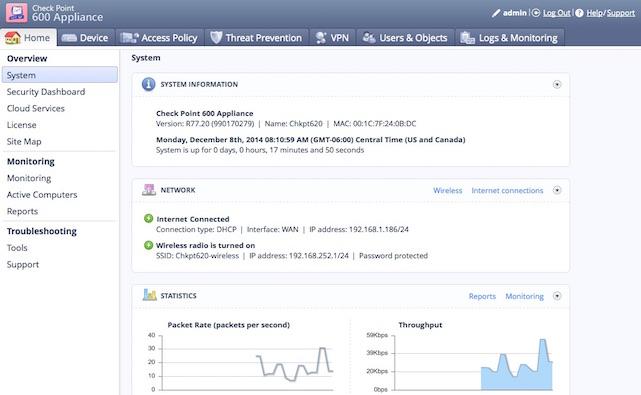
Check Point also offers an online documentation reference. The web-based management dashboard has summary statistics and links to each of its protective features in tabs across the top.
3. Choose your VPN on Check Point’s setup wizard.
Everything for the VPN is found under that labeled tab on the main dashboard. The setup wizard prompts you to check a box to enable administrative access over the VPN link if you plan on administering the device remotely.
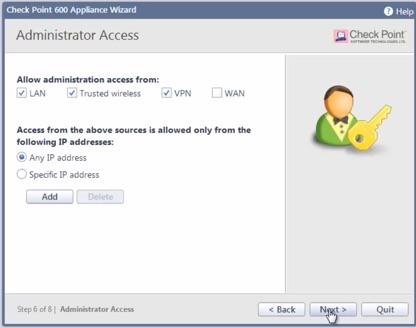
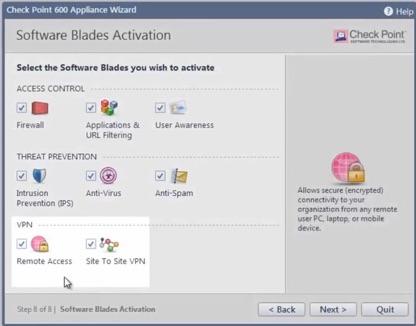
Next, choose which kind of VPN to run. There are two basic types: remote access or site-to-site VPN. Both are accessible from the main menu with a simple mouse click. Remote access is for enabling employees to access the business network from outside the office, such as from home or a coffee shop. Site-to-site VPN is for bridging multiple office networks together, such as to link a remote office to the main business location.
4. Enable or disable the remote access VPN.
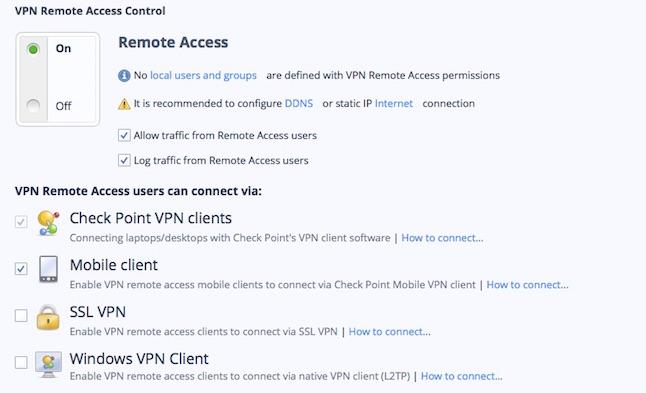
You’ll find the main series of VPN controls on the summary screen, as shown below. Click to enable the remote access VPN, allowing traffic from remote users, or disable. You can also choose whether to log this traffic.
The above screen lists four different types of remote access VPNs:
- Using the Check Point client software.
- Using special mobile VPN software.
- Connecting via an SSL VPN.
- Using the native Windows L2TP VPN client.
Check the boxes for whichever access protocols you want to allow and then click on the link for connection instructions. Start with the first option if you have a Mac or Windows PC for the best balance between protection and configuration hassles.
5. Install your connection regimen.
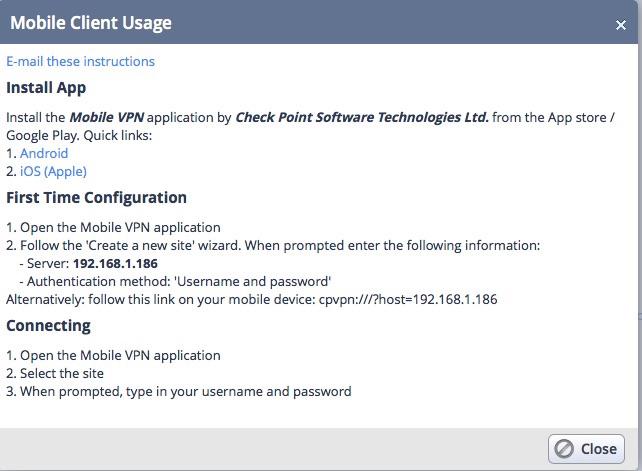
Check Point gives you very specific installation and operation instructions for each type of connection regimen and provides a means of emailing instructions. Here’s an example for installing the mobile client.
Note the links to download the particular VPN clients from Google Play and the Apple App store.
6. Set up a dynamic DNS service.
Finally, if the UTM appliance is not assigned a static IP address from your Internet service provider, you should set up a dynamic DNS service. This makes it easier to access. Check Point supports several different such services. More information is available on the main VPN screen.
Check Point makes setting up a VPN rather easy. But if you run into snags along the way or have something to share with the online community, leave your thoughts in the comments below. Good luck!
Learn about the four types of SSL certificates available.
Wildcard SSL Certificate
Extended Validation SSL Certificate
SAN SSL Certificate
Organization Validation SSL Certificate

