The ability to accept online payments simplifies the process of getting paid for your work. Invoicing and payments with The Hub gives you an integrated user interface for issuing invoices and managing your payments.
You can use it to save valuable time by no longer having to rely on dozens of platforms or manually developing your own tools to manage projects.
After a few steps to set up a GoDaddy Merchant account, you can access the invoicing and payments tools from the unified interface in The Hub. There is no cost to create or send invoices and there is a simple, industry-low transaction fee to process online payments.
By taking advantage of invoicing and payments, you can establish your business as more professional and trustworthy, all while getting paid faster.
Launch your business in minutes with GoDaddy Airo™
Sending invoices with The Hub
There are two methods for sending invoices to your customers. The first is to create the invoice using The Hub’s tool, and then have it automatically emailed to the client. The second is to create the invoice in The Hub and manually send it to the client.
To send an invoice automatically
- Log in to The Hub.
- Go to the left-hand column, and select Invoicing
- Click New Invoice. If you have created any prior invoices, you’ll need to click the + icon followed by New Invoice.
- Choose a Client from your current list. You can also add a New Client directly from the page.

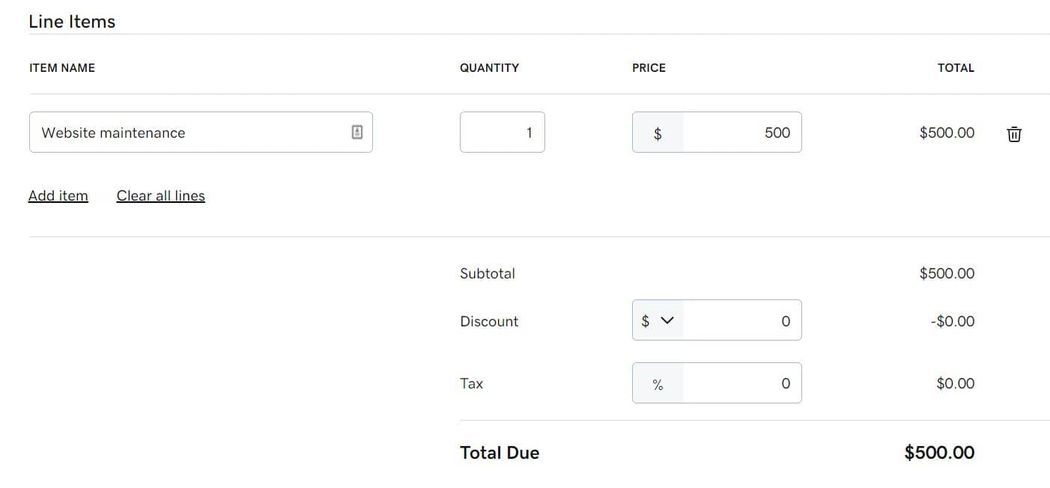
- Add the Line Items including the Name, Quantity, and Price for each service. If you want to apply a Discount or Tax, you can do so in the fields below.
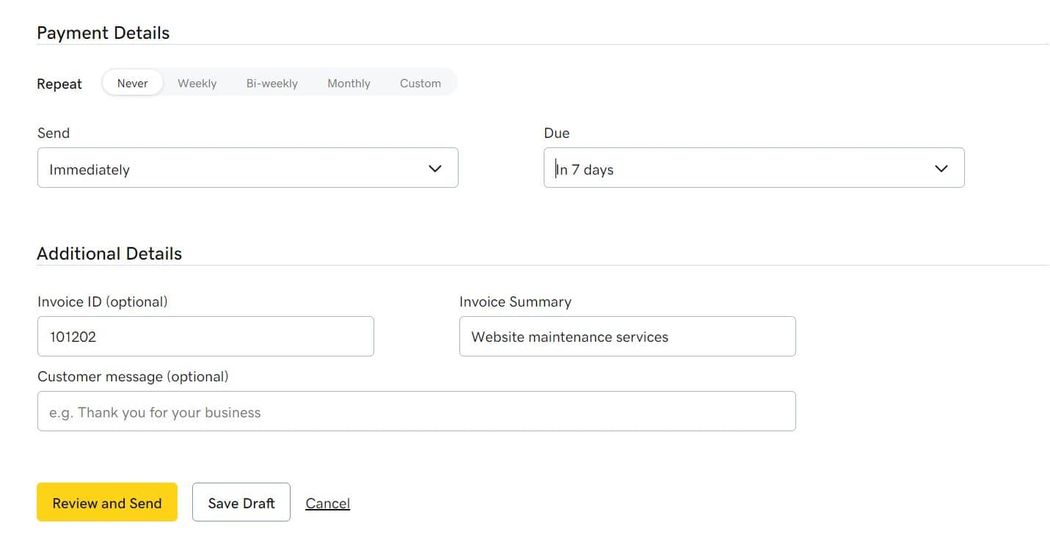
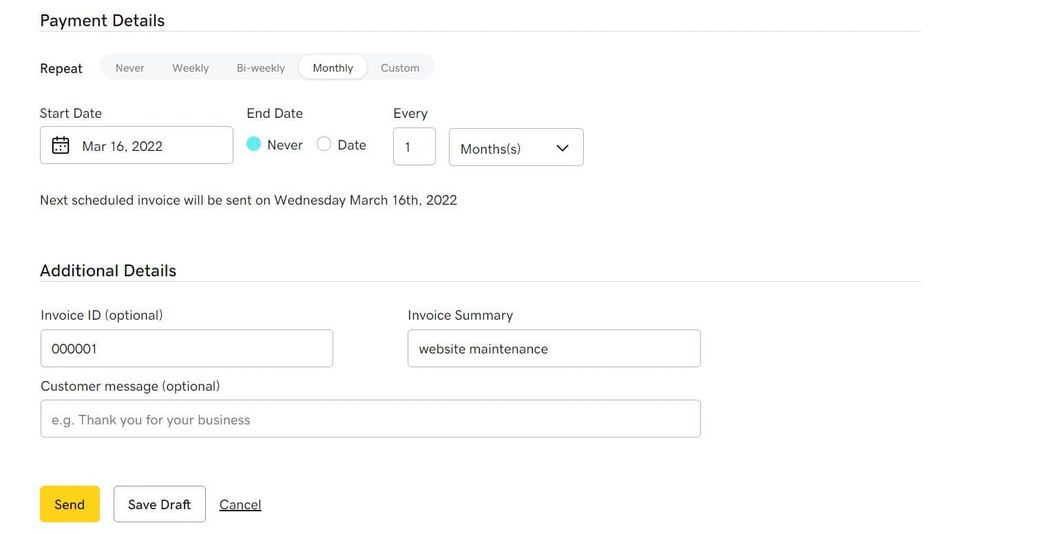
- Next, you need to enter the payment details. The Repeat option lets you set up recurring invoices. Select, Never if it is a one-time invoice. Choose the Send date and the Due date.
- Finally, you can add an Invoice ID, Summary, and optional Customer message. Once, complete, click Review and Send.
To set a recurring invoice
- Log in to The Hub.
- Go to the left-hand column, and select Invoicing.
- Click New Invoice. If you have created any prior invoices, you’ll need to click the + icon followed by New Invoice.
- Choose a client from your current list or create a new client.
- Add the line items including the name, quantity, and price for each service.
- Set the Repeat option to the interval you want to use between invoices. There are default options for weekly, bi-weekly, and monthly. Plus, you can use a Custom period.
- Select the Start Date and the End Date. If you selected Custom in the prior step, you’ll then need to specify the amount of time between invoices.
- Finally, you can add an Invoice ID, Summary, and optional Customer message. Once, complete, click Review and Send.
To send an invoice manually
- Log in to The Hub.
- Go to the left-hand column, and select Invoicing.
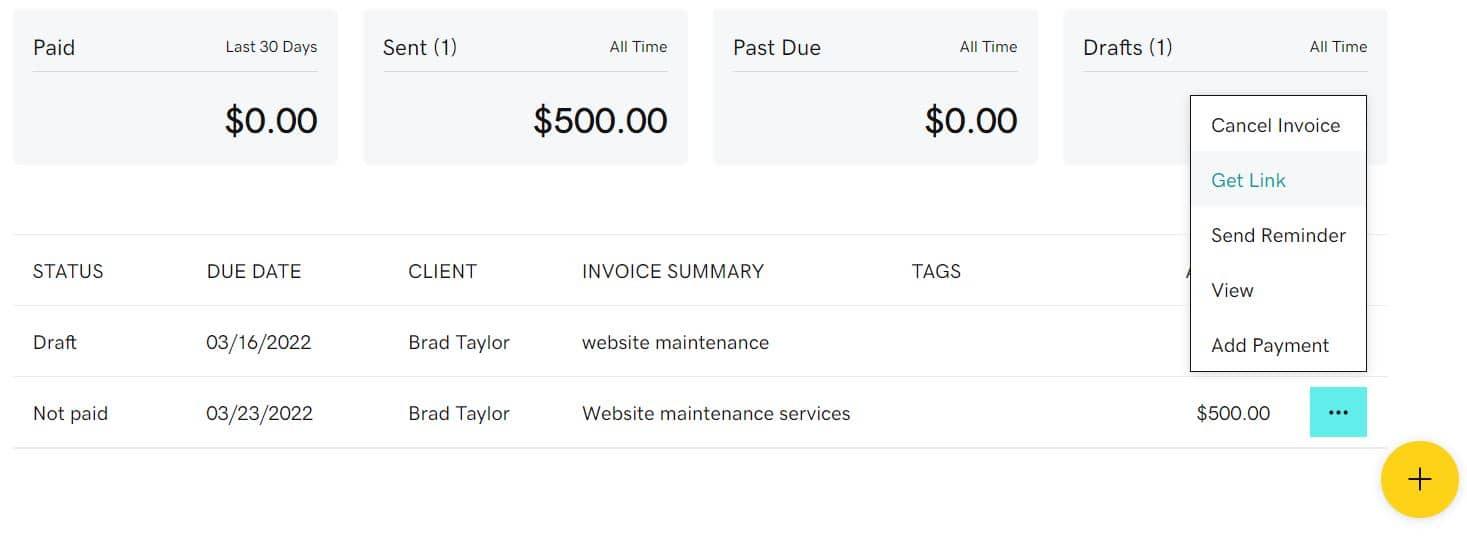
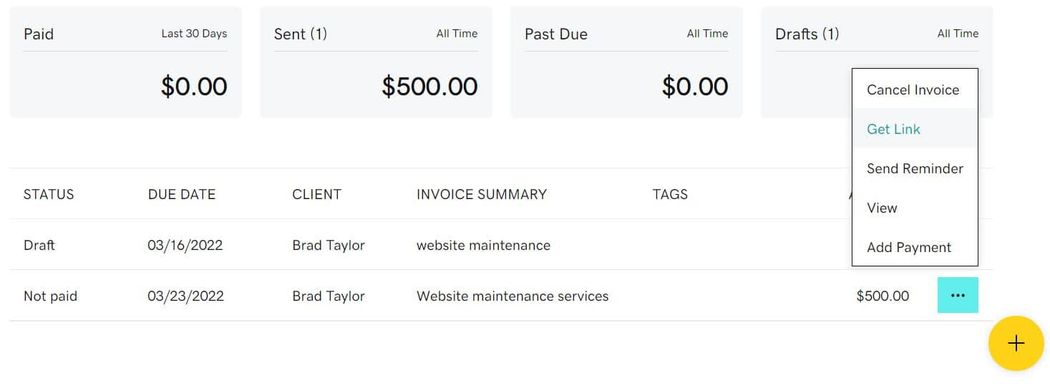
- Find the invoice you want to manually send, and then from the three-dot menu, select Get Link.
- You’ll see a small window appear in the upper right corner with the invoice URL. The link will also be copied to your clipboard.
- You can then share the link with the client whether by email or another communication channel.
Managing invoices and payments with The Hub
The payment process is meant to be easy for clients. All they need to do is click a button in the email or link to go to a GoDaddy Payments site to complete the payment.
Clients receive automated reminders when invoices are three and seven days past the due date. You can also manually send a reminder both before and after the due date.
To send a manual reminder
- Log in to The Hub.
- Go to the left-hand column, and select Invoicing.
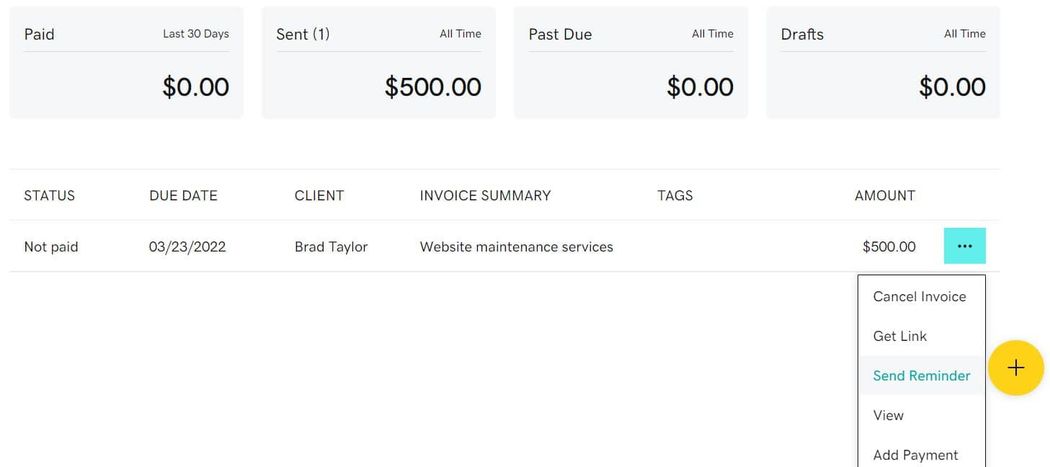
- Find the invoice and then from the three-dot menu, select Send Reminder. This will open a window where you can enter an optional message for the customer.
- Enter your message and click Send.
To cancel an invoice
- Log in to The Hub.
- Go to the left-hand column, and select Invoicing.
- Find the invoice and then from the three-dot menu, select Cancel Invoice
- Click Confirm.

Remove the hassle from getting paid
Getting paid should be simple. With invoicing and payments in The Hub, repetitive admin work and multiple tools are a thing of the past. Spend your time growing your business, not worrying about getting paid.
