

In our last tutorial for GoDaddy, we showed you how to create a WordPress contact form so that visitors can contact you. In this week’s tutorial — creating a contact widget in WordPress — we’re going to make it even easier for visitors to get in touch.
You’re going to see how to create a WordPress widget that shows all your contact information and social details.
If you install a site on GoDaddy’s Managed WordPress hosting, you’ll find several plugins installed by default. The GoDaddy team chose these plugins to make building your site really easy. One of these plugins is “Contact Widgets.”
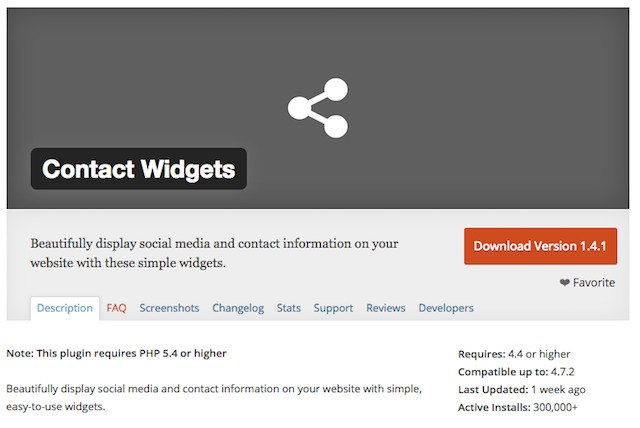
Take a look at the Contact Widgets page in the WordPress Plugin directory. You’ll find a plugin with more than 300,000 active installs and nothing but 5-star ratings.
Creating a contact widget in WordPress
Let’s see how easy creating a contact widget is to do when you use the Contact Widgets plugin. You can watch a video tutorial on Contact Widgets as part of the free WordPress Beginner Tutorial Class on YouTube.
How to install Contact Widgets
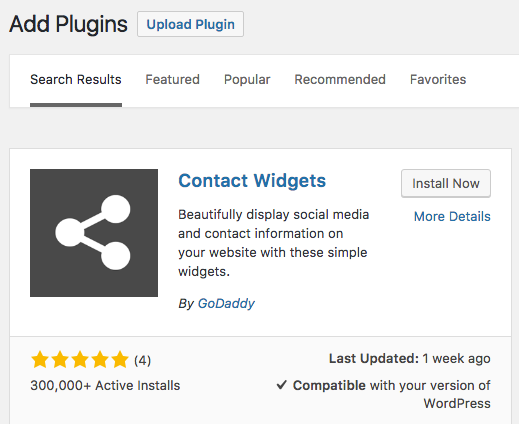
You can install Contact Widgets from directly inside your WordPress site.
- Click “Plugins,” then “Add New.”
- Search for “Contact Widgets.”
- Click “Install Now” and then “Activate.”
How to start using Contact Widgets
Now we can use the plugin:
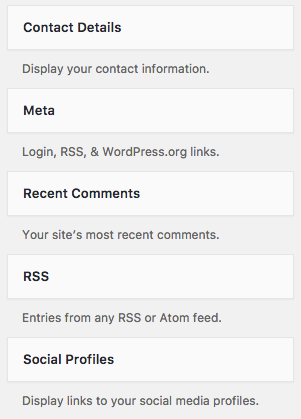
- Go to “Appearance,” then “Widgets.” You’ll now see two new widgets: “Contact Details” and “Social Profiles.”
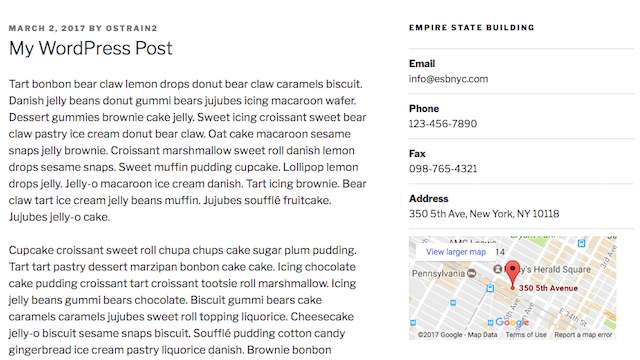
 2. Drag-and-drop the “Contact Details” widget into one of your theme’s sidebars. You’ll now see several fields appear, including Title, Email, Phone, Fax and Address:
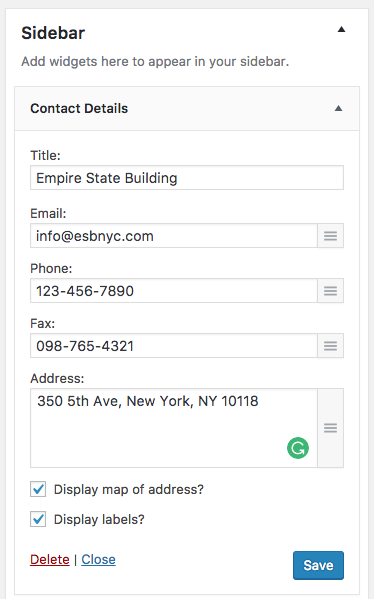 3. Click “Save” and visit the front of your site to see the new widget in action:
How to start using the Social Profiles widget
Let’s repeat that process for the other widget, called “Social Profiles.”
- Go to “Appearance,” then “Widgets.”
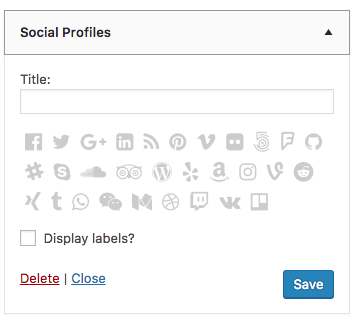
- Drag-and-drop the “Social Profiles” widget into one of your theme’s sidebars. You’ll see 30 different social media sites to choose from:
 3. Click any social media icon, and you’ll be able to enter your username for that site:
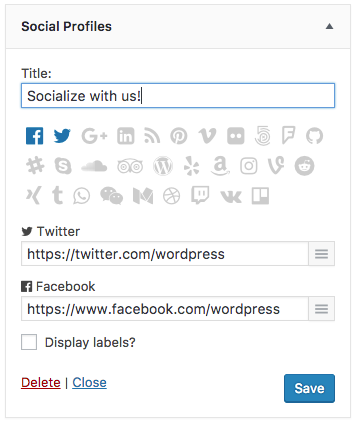 4. Click “Save” and visit the front of your site to see the new widget in action. In the image below, you can see social icons for Google+, Twitter and Facebook.

One thing to note with the social icons is that they will change color, depending on your theme. In the previous image, I was using the Twenty Seventeen theme. In the image below, I’m using the Twenty Sixteen theme and the images have changed color to blue:

That’s it! Just follow these simple instructions for creating a contact widget in WordPress and you’ll be well on your way to sharing your contact information and social profiles.