
From product pages to your homepage, there are many important areas of your WooCommerce store. While it may not get the same attention as something like your checkout, the WooCommerce shop page is crucial to expressing your brand’s image and helping customers find the products they’re looking for.
In this post, we’ll show you several ways to customize the WooCommerce shop page to better highlight your business’ unique offering.
What is the WooCommerce shop page?
The WooCommerce shop page is a default page that holds an archive of your products. When you install WooCommerce, the plugin will add a new page with the /shop URL.
The page’s appearance will be determined by the settings in your WordPress theme.
Most themes feature a grid layout with all the products in your catalog. Some will also include basic options for adjusting the display of the page. If this is the case, you can find them by going to Theme > Customize. From there, the exact location will depend on the theme that has configured the customizer.
Related: Organize your store following our useful tips on managing product catalogs.
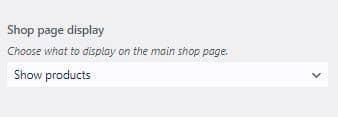
Below is an example of the theme customizer for the OceanWP theme. For the shop page, you have the option to show products, categories, or both. This content will appear in the center of the page. The rest of the page will display the items
WooCommerce has a built-in setting that lets you define the shop page. To use it, go to WooCommerce > Settings > Products. In the General section, you’ll set the URL for your shop page. By default, the page is located at Shop.

Changing this page is but one of the ways to modify your shop page. We’ll look at some of the other methods later on.
Why customize the shop page?
Here are some of the benefits of customizing your Shop page:
Better SEO
Improving the shop page can help improve the overall SEO for your site. Depending on your theme, the default shop page may have limited or irrelevant content. If there is thin content on one of your core pages, the entire site will appear less authoritative in Google’s eyes.
By customizing the page, you can ensure that your primary archive is full of high-quality, relevant content that best reflects your store’s offering.
Unique branding
With the default shop page, your store may appear overly similar to other WooCommerce sites. Instead of this, you want the page to align with your brand and the overall aesthetic of your store.
By customizing the details for the shop page, you can make it match the rest of your site’s branding and you can help your business stand out from your competitors.
Improved customer experience
You want the design of the shop page to pique your visitors’ interest. The shop page can also serve as a useful tool for browsing and finding items. Depending on your theme, the default layout may not achieve these objectives.
By customizing the shop page, you can use a design that makes it easier to find your products, leading to a smoother buying process.
Methods for customizing the shop page
There are several ways to approach customizing the WooCommerce Shop page. When you design the page, the amount and nature of the changes that you can make will depend on the method you use.
For example, you may be only to change the arrangement of the products. For others, you can modify every aspect of the page, adding new features like filters, banners, or quick checkout tools.
Here are some of the different ways you can customize the WooCommerce shop page:
Using a WordPress plugin
The first approach to customizing your WooCommerce shop page is to use a WordPress plugin. With a plugin, you get more control over the design of your store without having to dive into the code. Let’s look at a couple of useful solutions:
StoreCustomizer
StoreCustomizer lets you customize the design for various parts of your store including the WooCommerce shop page. You can use the plugin to edit or completely remove existing elements from the Shop page.
For example, you can change the number of columns displayed on the page or you can adjust the number of products per row.
StoreCustomizer won’t override your current pages or templates. It works by adding additional styling options to your theme for the specific elements that you customize with the plugin.
Storefront Blocks
Storefront Blocks is a plugin that gives you control over your most important WooCommerce Pages to customize them however you want. You can use the plugin to override the default shop page layout determined by your theme by using blocks to rearrange existing sections or creating new sections with additional elements
The plugin comes with a variety of content blocks for WooCommerce. Some of these include:
- Product Category Block
- Product Table Block
- Product Carousel Block
- Product Slider Block
- Square Grid Block
Creating a new shop page from scratch
For a more comprehensive approach to customizing the shop page, you can create a new page from scratch. This will allow you to add whatever details you want to the page.
Once it’s complete, you can then assign this page as the shop page in your WooCommerce settings.
There are a couple of ways you could go about doing this. To start, you could create and build the page using the native WordPress features. To use this simple method, go to Pages > Add new. You can then give the page a title and use the Gutenberg Block Editor or HTML editor to design the page.
Using a page builder
If you want to create a new shop page from scratch, you can also use a page builder. This will give you drag-and-drop functionality for setting the layout and determining what types of products to display.
Below, we will look at how to design the page using Elementor. It is one of the best page builders for creating content for ecommerce sites. It will help you create an attractive shop page quickly.
There are two ways to use the app to create a shop page. The first is to create an archive page template and then set a condition in Elementor to have it display as the shop page. The other option is to simply create a new page in Elementor and then set it as the shop page in the WooCommerce general settings.
To create an archive page template with Elementor, you’ll need the Pro version. Below we will look at how this process works.
To create a product archive in WooCommerce, go to Templates > Add New. This will open a window to choose your template type. Select Product Archive and give the template a name.
After that, you’ll be taken to the Elementor editor to build the page. You can start completely from scratch or you can automatically insert pre-made archive blocks. I recommend choosing the latter as it will help you design your page faster.
Once, you’ve added the blocks to the page, you can customize the design by editing and adding widgets from the left-hand menu. Elementor has several WooCommerce widgets that you can add to your pages. These include:
- Archive title and description
- WooCommerce Breadcrumbs
- Custom add to cart
- Archive product
- Products
- WooCommerce pages
- Menu cart
- Product categories
When you’re finished with the customizations, click Publish. Elementor will then prompt you to set the conditions that determine when the template is used.
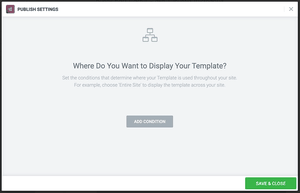
Click Add Condition and set the value to Include. Then, in the dropdown menu select Shop. Alternatively, you can use the template for other categories or you can set it to cover all of your product archives.
Once you’re done, click Save & Close to finalize the changes.
Creating a standalone page
The other way to use a page builder like Elementor to customize the shop page is to create a standalone page in WordPress using the Elementor editor. After you design the page, you can then return to WooCommerce > Settings > General to set the new shop page.
Customizing the shop page programmatically
Now, let’s look at how to customize the WooCommerce shop page programmatically. This will save you from needing to any additional software like a page building plugin.
However, for this method to work, you’ll need a bit more coding knowledge as it requires you to modify your themes files.
Before you start, create a child theme. This will ensure that you do not lose any changes when you update your theme. Go to your site's files and find /wp-content/themes/your-theme.
Copy the folder and then paste a duplicate in your themes folder, You’ll need to change the name of the folder to something like yourtheme-child-theme.
Disable the default page
Before you create the new page, you’ll also want to disable the default shop page in your WooCommerce theme. The specific file that renders the shop page is named archive-product.php. It is located in your WooCommerce templates folder at WooCommerce > Templates > archive-product.php.
To overwrite the file, copy it to the WooCommerce folder for your child theme.
Next, open the archive.product.php file using an integrated development environment (IDE). In the file, you’ll see various do_action() functions that are used to create the WooCommerce hooks for the shop page.
To disable the shop page, delete the loop responsible for displaying products:
if (wc_get_loop_prop('total')) {
while (have_posts()) {
the_post();
do_action('woocommerce_shop_loop');
wc_get_template_part('content', 'product');
}
}
Once you delete the loop, you’ll have a blank shop page to customize however you see fit. You have the ability to make additional changes to the file but be aware that if you remove certain do_action() functions, any corresponding shortcodes will no longer work across the site.
Program the content
After you’ve disabled the default shop page, you can begin programming the content for your custom page. The code you add in the text editor for the archive-product.php file is what will appear on the shop page.
To start with a blank canvas, create a new file, name it archive-product.php and delete the previous archive file. If you don’t want to create the WooCommerce shop page from an empty file, you can use an existing file as a template.
To find a file to use as a base, go to the files for your parent theme and find the single.php file. Copy it to the WooCommerce folder for your child theme. Next, delete the current archive-product.php file and change the name of the single.php file you’ve just added to archive-product.php.
Now, you’ll want to edit the details in your archive-product.php file to customize your page. The best way to do this is to use shortcodes. Some of the shortcodes that you might useful for adding content include:
- [products]
- [best_selling_products]
- [top_rated_products]
- [product_table]
- [recent_products]
Closing thoughts on WooCommerce shop page customization
Customizing the WooCommerce shop page can have a big impact on your store. By displaying and organizing your products according to your needs, you increase the chances that customers are able to find what they are looking for when browsing your site. In the end result, is increased sales and more satisfied buyers.