Shipping labels may not seem like a big part of running an ecommerce business, but they are vital to logistics and a well-run order fulfillment process. The absence of clear and organized shipping labels for WooCommerce would lead to delivery errors and a poor experience for your customers.
Launch your business in minutes with GoDaddy Airo®
When you only process a few orders, how you handle your shipping labels won’t have a big impact. But as business grows, you need an effective way to create and manage the labels for all your orders.
In this post, we’ll look at the different ways to print shipping labels for WooCommerce orders and the steps you can take to streamline the process.
Shipping labels in ecommerce
Shipping labels are an identification sticker pasted onto any package transported by a carrier. Each label contains information about your ecommerce package and its contents.
The purpose of the label is to relay the information needed to guide packages to the proper destination while enabling tracking through the delivery process.
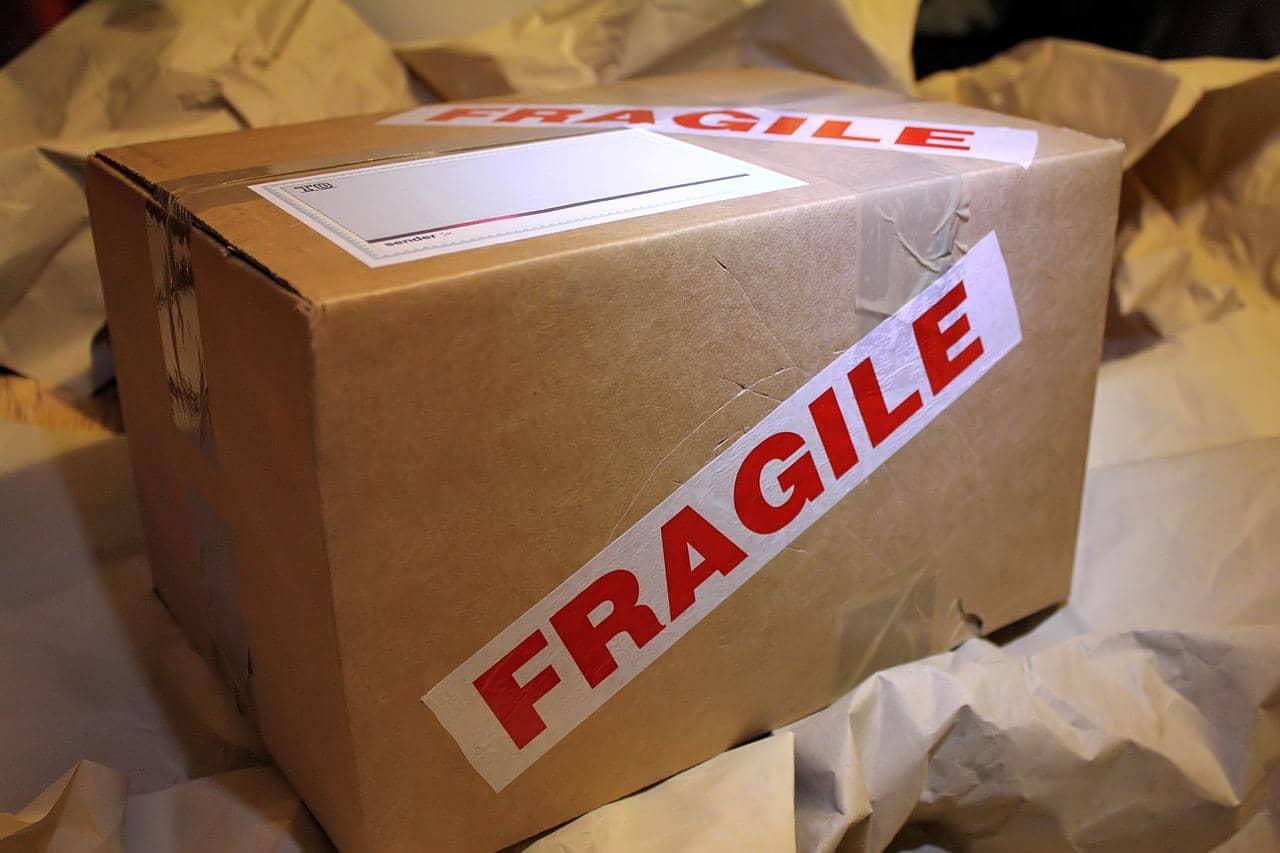
They can also contain special instructions, for example, if the package contains fragile items.
For the physical label, the precise details and design will vary depending on the carrier, but the essential information is pretty much the same. This includes names, addresses, weight, and the shipment barcode.
Every shipping carrier requires each label to adhere to a precise set of requirements if they are to be used in the fulfillment process.
Ways to print ecommerce shipping labels
There are three main ways to create shipping labels: going directly through a shipping provider like USPS or UPS, using an ecommerce platform, or using a third-party shipping and order management solution.
Generating a shipping label through a shipping provider
Getting the label directly through the shipping provider is a straightforward process. However, it isn’t the most efficient method as there is a fair amount of manual input required.
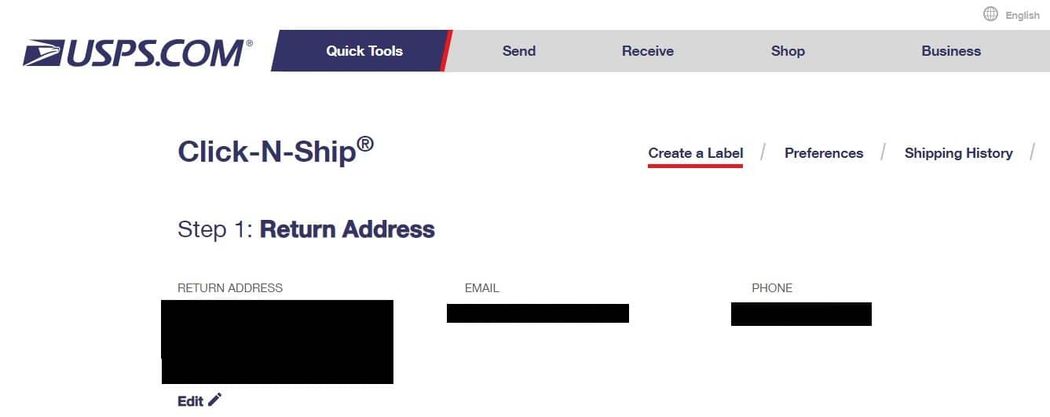
Below, we’ll look at how to generate a shipping label from the USPS site using the Click-N-Ship® feature.
Creating a USPS shipping label
First, you’ll need to provide the Return Address. USPS will automatically populate the address, email, and phone number from your account to use as the Return Address. If you need to change any of these, click the Edit button.
Next, you’ll enter the Delivery Address. You can use your Address Book to quickly import any delivery destinations that you have previously used and saved. However, if you’re shipping to a new location, you’ll need to manually enter the address details.
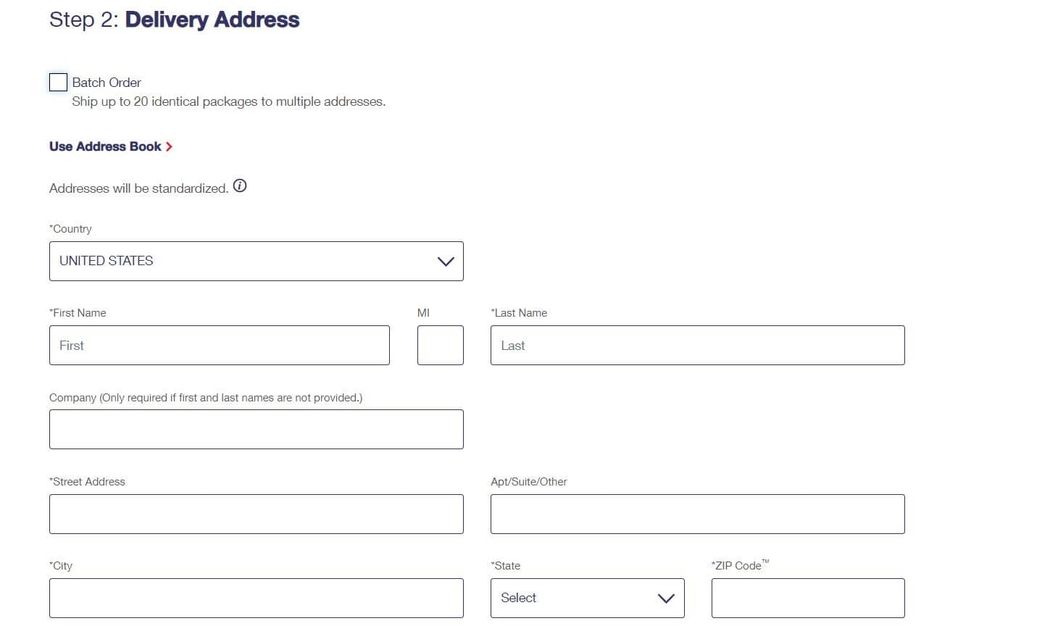
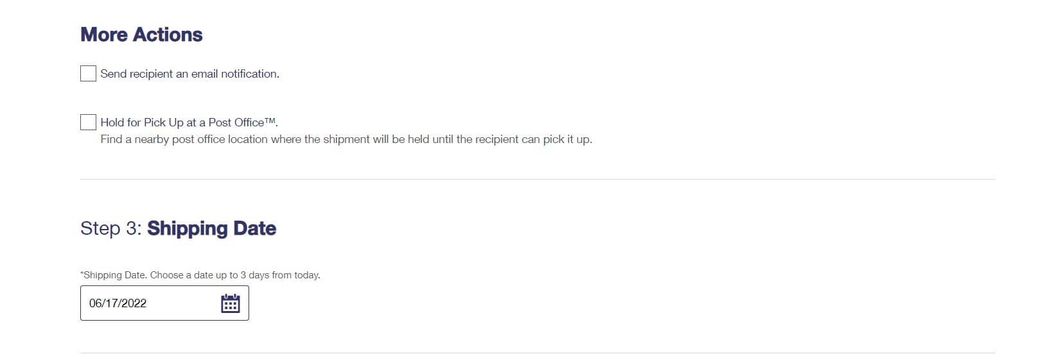
Below the address fields, you’ll see the option to send the customer an email notification. You can enable this if you want to have USPS notify them of the incoming delivery.
However, it’s a better practice to send your own branded emails for transactional messages like shipment confirmations.
When you’re done with the Delivery Address, the next step is to choose a Shipping Date. You can pick any of the dates up to three days from the current date.
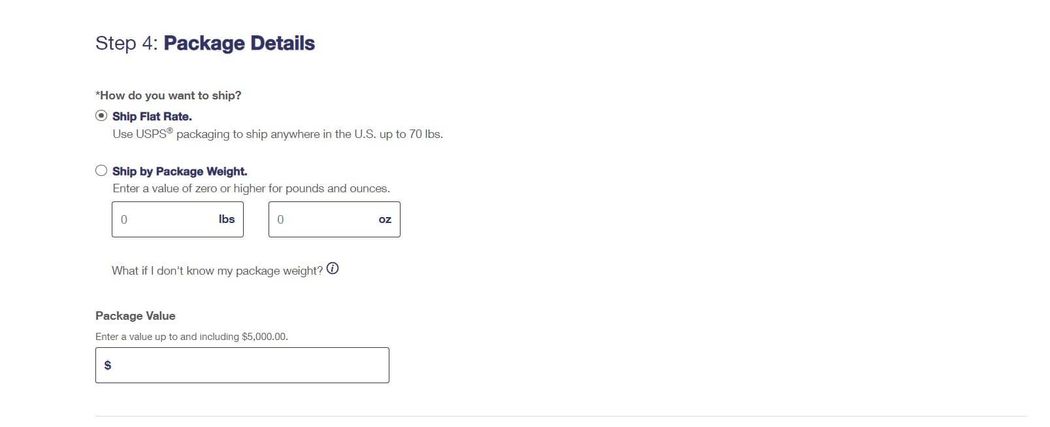
Next, you’ll enter Package Details. Start by picking whether you want to use flat rate or by weight shipping. If you choose to Ship by Package Weight, you’ll need to enter the package’s weight.
After that, you’ll enter the value for the package.
Lastly, you’ll choose your preferred Service Method, whether it’s Priority Mail, Priority Mail Express, or First-Class. Click Select Service and Packaging after you’ve made your choice.
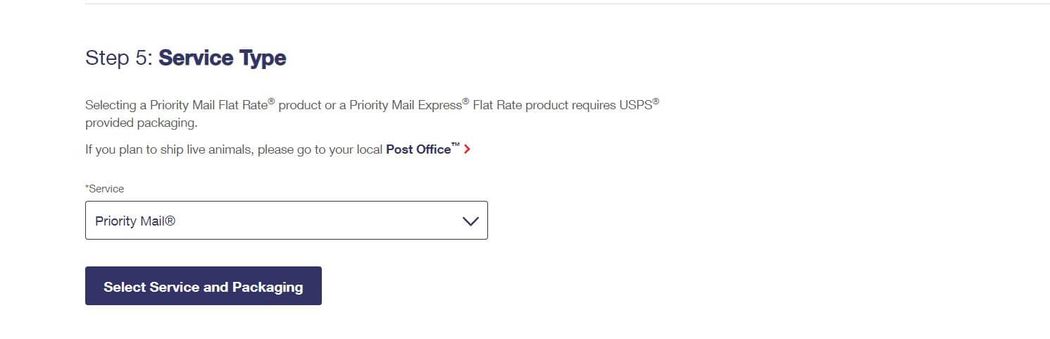
USPS will then take a moment to calculate different shipping costs based on the size and type of packaging that you will use.
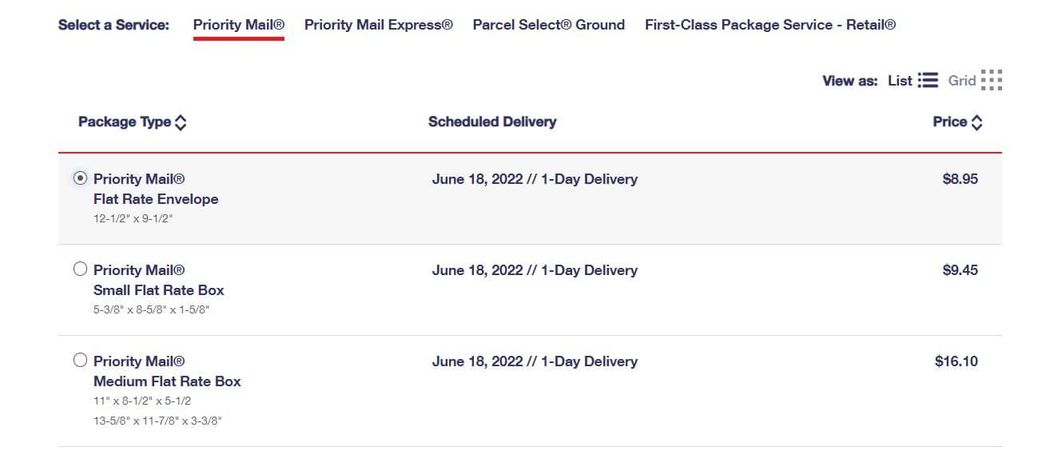
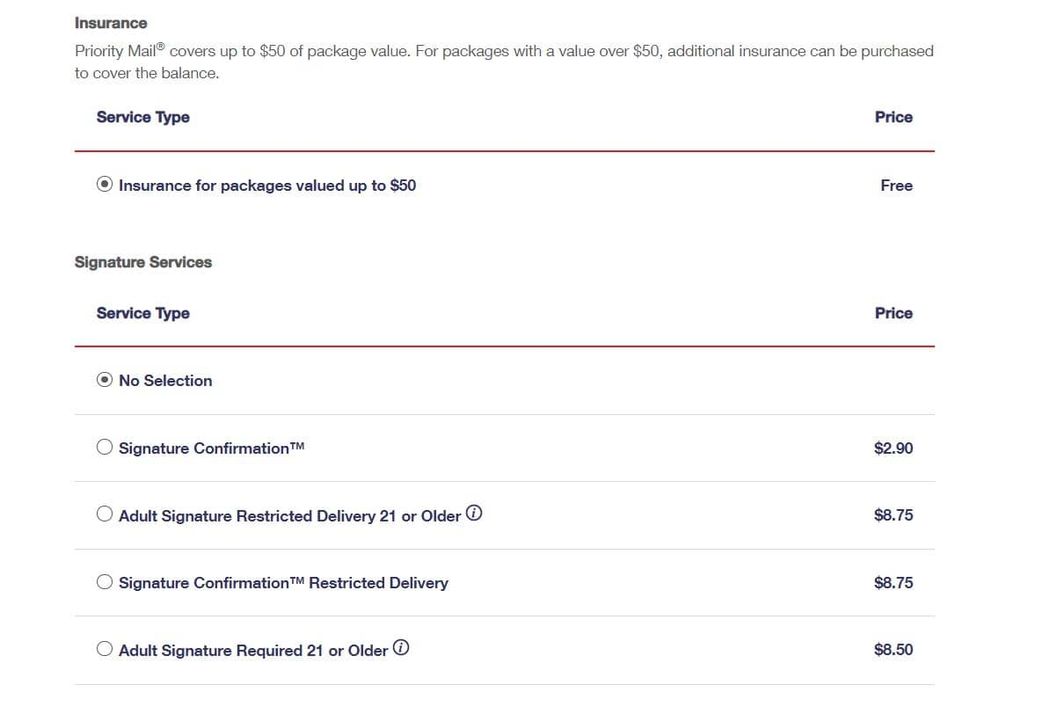
Pick the appropriate Package Type and scroll down the page. There, you’ll see the option to add insurance for the delivery. Depending on the type of shipping you chose, this may be included for free.
Below, there are additional options for Signature Services. These come with a small fee and allow you to require that the customer sign to receive the delivery.
When you’re ready to purchase the label, select Add to Cart. If you want to buy multiple labels at a time, you can select Add to Cart & Start New Label to begin creating another shipment.
After you go to the cart page and complete the order, you’ll be able to print the label from the payment confirmation page.
Other shipping providers
Other popular shipping carriers provide similar online tools that you can use to generate shipping labels for individual orders. This includes.
- FedEx - FedEx Ship Manager Lite
- UPS - Create a Shipment
- Canada Post - Ship-in-a-Click
- DHL - My DHL Express (US only)
Again, these tools are helpful if you have low sales volume and don’t mind repeatedly typing delivery information.
In addition to having to enter the details for each delivery, using the shipping provider’s site limits how quickly you are able to print your labels. For instance, with USPS you can only print 20 labels at a time.
Use an ecommerce platform
The next method is to print your shipping labels from your ecommerce platform. This comes with many advantages as your ecommerce site will already have the delivery information.
The platform can automatically populate details like the customer’s address and the product weight so that you don’t have to manually do it with each order.
Automating this process can save you a considerable amount of time especially as your store grows and you need to fulfill a lot of orders.
Use a third-party shipping software
The final way to print your shipping labels is to use a shipping software like Ordoro or Clickpost. These tools integrate with major shipping carriers so that you can generate, print, and manage your labels from a single place. They also connect with ecommerce platforms, allowing you to sync your order information to help automate the label creation process.
Printing shipping labels from WooCommerce
WooCommerce Shipping
WooCommerce Shipping is a free extension built directly into the WooCommerce platform. With it, you can streamline the process of generating and printing shipping labels directly from your WooCommerce dashboard.
With WooCommerce Shipping, you get discounted rates for popular carriers, and the extension also integrates with the USPS Shipping Method extension. You can use this to automatically calculate the shipping rates for orders sent via USPS.
To download the extension go to WooCommerce > Extensions. From there, find and select WooCommerce Shipping. This will take you to the plugin’s website. Add the plugin to your cart and complete the free checkout.
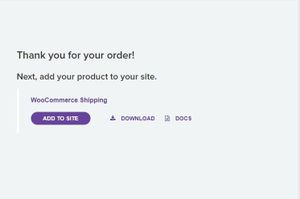
On the thank you page, click the Add to Site Button.
The following page will show a list of WordPress sites connected to the WooCommerce account used to complete the order. Click the tab for your site. If you don’t see your site, you can connect it by clicking the Add a new site button.
After you select your site, the page will take a moment to complete the installation and activation process. Alternatively, you have the option to download the extension from the thank you page. Once you have the file, you can then add it to WordPress manually.
Connect Jetpack
Next, you’ll need to install and Jetpack (if you haven’t already) to be able to use the automated label printing. Upon activating the extension, you should see a banner notification asking you to install Jetpack.

Click the button to install Jetpack and complete the steps to get your account set up. Once Jetpack is active, the WooCommerce Shipping extension will be fully functional. You can then start creating labels for your WooCommerce orders.
Creating a shipping label with WooCommerce Shipping
Start by going to your Orders page from your WordPress dashboard. Find and click on the order that you want to print a shipping label. On the order detail page, you’ll see a section indicating that an item needs to be fulfilled. Click Create shipping label.

For your first label, you’ll need to enter your origin address (the address where you’re shipping from). With future labels, this value will be populated for you automatically.
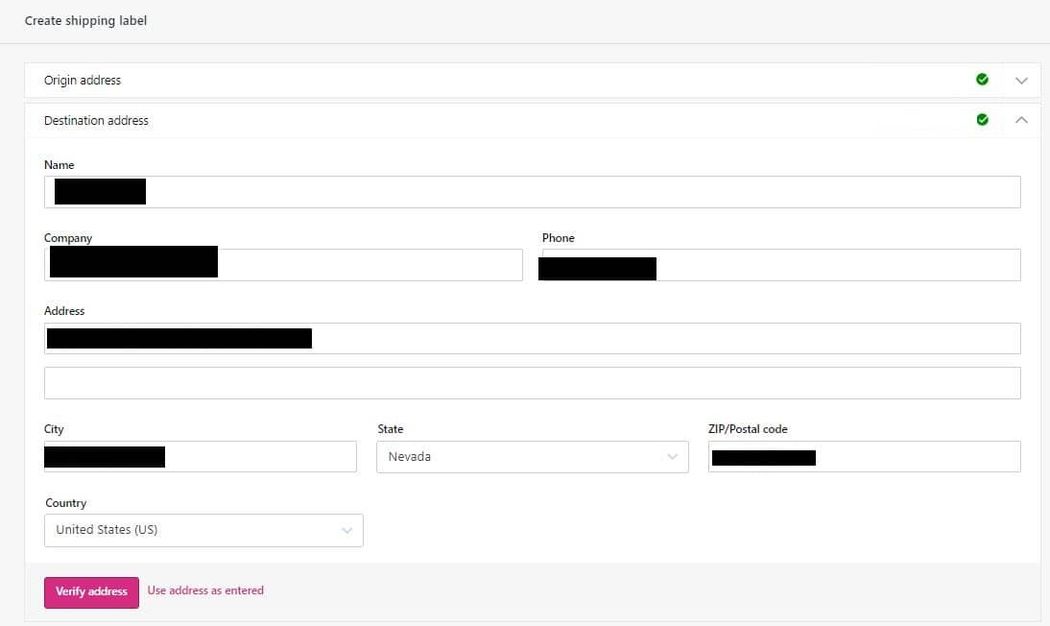
Next, comes the Destination address. The plugin will add this automatically based on the shipping address given by the customer. If you’ve edited the address for any reason in the order editor, the plugin will ask you to type it in again.
After you’ve provided the addresses, you’ll see an option to verify them. With this, the plugin will run the addresses against official address data to see if the formatting and details are correct. If you want, you can skip this verification and simply use the address as entered.
The next section of the form is where you will choose your package type. You’ll see options for standard packaging from carriers like USPS and DHL as well as the option to add a custom package with your own sizing.
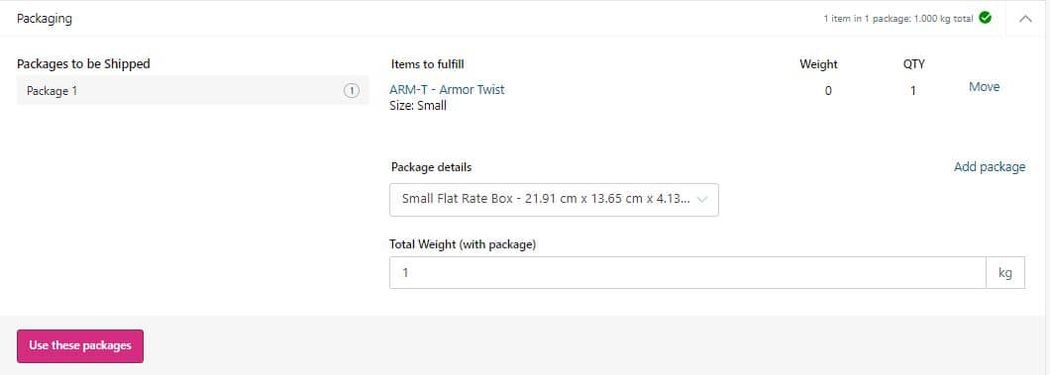
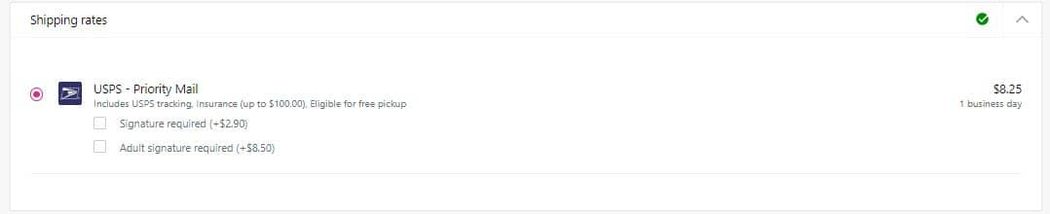
After you select the package details, enter the total weight for the shipment and select Use these packages. The plugin will then automatically calculate the shipping rate.
Now, you’re ready to buy the label. If you have added any payments to your WordPress account, you’ll see them listed beneath the order total. If not, there will be a button to add a card to your account.
When you’re ready, click Buy shipping labels. After the payment is processed, a window will appear for you to view and print the shipping label. Or, you can save the label to batch print it with other orders.
ELEX EasyPost
ELEX EasyPost is another WordPress plugin capable of providing shipping rates and generating shipping labels for your WooCommerce orders. It can also display real-time rates on your cart and checkout pages and customers can use it to track their deliveries from their account.
With ELEX EasyPost installed, you can create new shipments and labels by clicking Create shipment button on the right side of the Edit order page. There are options to select the package size and shipping service before automatically calculating rates and generating labels.
Once you finalize a shipment, the details are automatically pushed to your EasyPost which will pay the postage while the label is generated for you to print directly from WordPress.
Shipment labels and tracking information
Shipping carriers monitor every package so tracking information is a natural part of the shipping label. This is true whether you create the label through the carrier site or if you do it straight from WooCommerce.
However, there is a difference in how the tracking details are communicated with your customers.
If you generate your labels using the carrier’s tool, you’ll have to manually get the tracking details from the carrier and then email them to the customer.
A little earlier we noted an option to email the recipient a notification in the USPS create a shipment tool — but again, this generic message won’t come from you or include your branding.
Alternatively, generating your labels through your platform makes it easier to pass tracking details on to customers. Since the platform already knows the customer’s email address and can store and send tracking information to customers, fewer steps are needed once you generate the label.
Closing thoughts on shipping labels for WooCommerce
When you have a business to run, you don’t want to waste unnecessary time printing labels for your deliveries. This guide will help you generate your WooCommerce shipping labels more efficiently — so you can focus on winning new customers.