When it comes to branching out to online marketplaces, Walmart may not be the first site that comes to mind. More established sites like Amazon or eBay may be your first consideration for third-party marketplaces. However, there are many advantages to linking WooCommerce and Walmart.
Like any other sales channel, a sound integration between your ecommerce system and the external platform is key to maximizing your results and streamlining the way you manage operations. This post looks at several ways to connect WooCommerce and Walmart to ensure multichannel retailing success.
Why you should list your products on Walmart
Growing audience and new customers
Selling on Walmart is a great way to tap into a new customer base. The marketplace gets over 120 million visitors each month as shoppers peruse the site to find low-cost items in a wide range of categories.
Additionally, Walmart sellers enjoy less competition when compared to other online marketplaces.
For example, Amazon has over 2 million third-party sellers compared to Walmart’s ~70,000. So, whether you need to win the buy box for your retail products, or if you're a brand that wants to grab a large share of the market, you’ll find great opportunities on Walmart.
Strong features for third-party sellers
Walmart stands out among other third-party marketplaces for the tools and resources that it provides to sellers. In fact, with its increased focus on its online marketplace, Walmart is even starting to rival Amazon and its robust offering to sellers.
One of the most impactful resources provided by the commerce giant is its fulfillment service. Like Amazon, Walmart has a complete logistics service that third-party sellers can use to handle every aspect of order fulfillment.
With Walmart Fulfillment Services, you ship your inventory to Walmart who then stores it.
As customers place orders, Walmart will use its vast logistics network to ship the goods to customers. This saves you from needing to handle the operational burden yourself and it ensures that your Walmart listings are eligible for speedy two-delivery guarantees.
Walmart also has an advertising service that you can use to get more people in front of your products.
The main type of ads are Sponsored Product ads. These ads show your products in line with organic listings including at the top of search results and within the related product carousels towards the bottom of product pages.
Keep in mind, these benefits come at the cost of abiding by Walmart’s marketplace rules. These aren’t overly stringent, but you’ll need to stay on top of the Price Parity and Price Leadership rules.
The Price Parity rule prevents you from listing your products for a lower price on another marketplace. The Price Leadership rule allows Walmart to remove any listings where the same product is priced lower on a different marketplace.
How to integrate your WooCommerce and Walmart stores
Now that we’ve looked at the reasons and benefits of connecting WooCommerce and Walmart, let’s explore some of the different approaches you can take to bring the channels together.
By connecting the two platforms, you can automate management for pricing, inventory, and promotions instead of having to manually make changes in two different systems. Integrating the two channels also lets you manage your business from a single dashboard. You can view sales statistics and orders from a single dashboard and you can see your available inventory for all channels.
Multichannel selling software
The first way to connect WooCommerce to your Walmart seller account is to use multi-channel selling software. The platform can reduce the number of times you need to input information and you can easily automate repetitive tasks like updating product descriptions or prices.
This will not allow you to not only sync products and inventory between WooCommerce and Walmart, but it will also serve as a central hub for any of your other marketplaces and channels.
Sellbrite
One of the best solutions for multichannel selling is Sellbrite. The platform offers integration for all major marketplaces and social media channels, plus it makes it easy to manage products, listings, inventory, and orders from a centralized interface.
To integrate your Walmart seller account with Sellbrite, you need to provide your API credentials to authorize the connection.
Log in to your seller account and go to https://developer.walmart.com/#/generateKey. Click the dropdown menu for Solution Provider and select Sellbrite.
Set all the permissions as Full Access and generate the key. When it’s finished, copy the Client ID and Client Secret.
Open your Sellbrite account and click Add/manage channels under the Listings icon in the nav menu. On the following page, click Connect a New Channel.

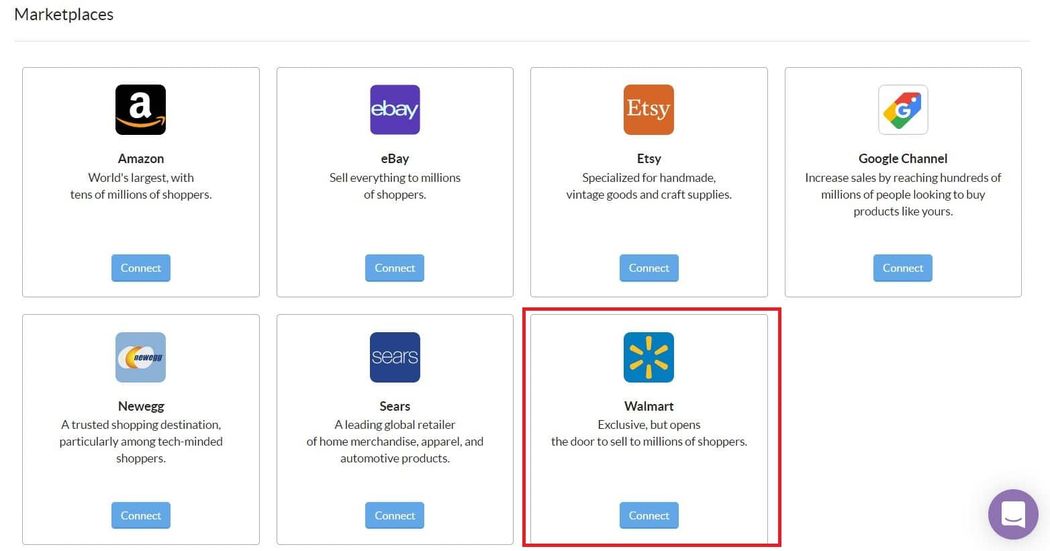
This will take you to a page with a list of all the platforms that you can connect to Sellbrite. Find Walmart at the end of the Marketplaces section and click Connect.
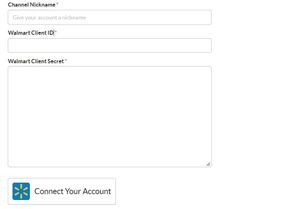
The following page will present a form for you to enter your API credentials. Paste the Client ID and Client Secret that you copied from Walmart into corresponding fields and click Connect Your Account.
Connecting WooCommerce
Once you’ve connected your Walmart account, you’ll need to connect your WooCommerce store to Sellbrite. By connecting your store, you’ll be able to seamlessly push your WooCommerce items to Sellbrite where you can manage your listings for other sales channels
To connect WooCommerce, you need the Sellbrite WooCommerce plugin. Go to Settings > Sales Channel Integrations and select Connect a New Channel. Scroll down to the Shopping Carts section and click WooCommerce.
From there, you’ll select Download Plugin which will take you to the WordPress plugin page. Download the plugin and return to your WooCommerce store. Go to Plugins > Add New to upload the plugin.
Once the process is complete, you should see a green Connected icon next to WooCommerce in your Sellbrite Sales Channel Integrations.

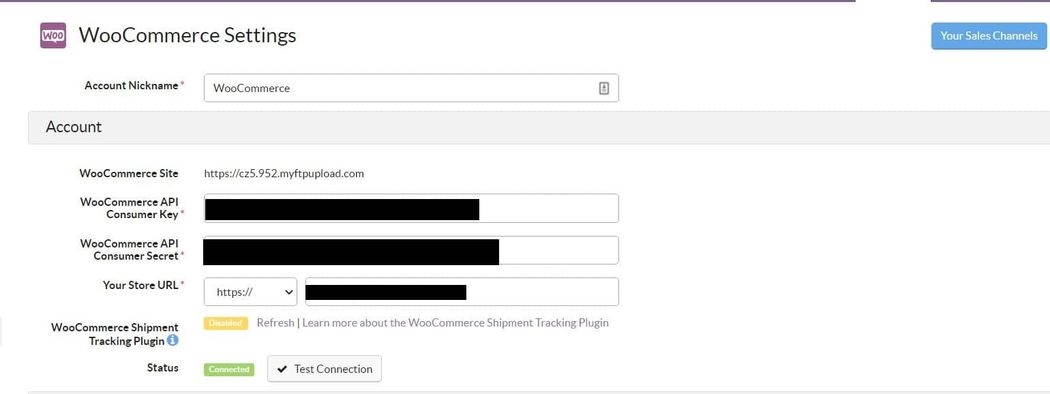
To review the connection or to adjust the configuration, click the gear icon. From there, you’ll see the connection details including the API keys used to establish the connection. There is also a feature to test the connection to ensure that everything is working properly.
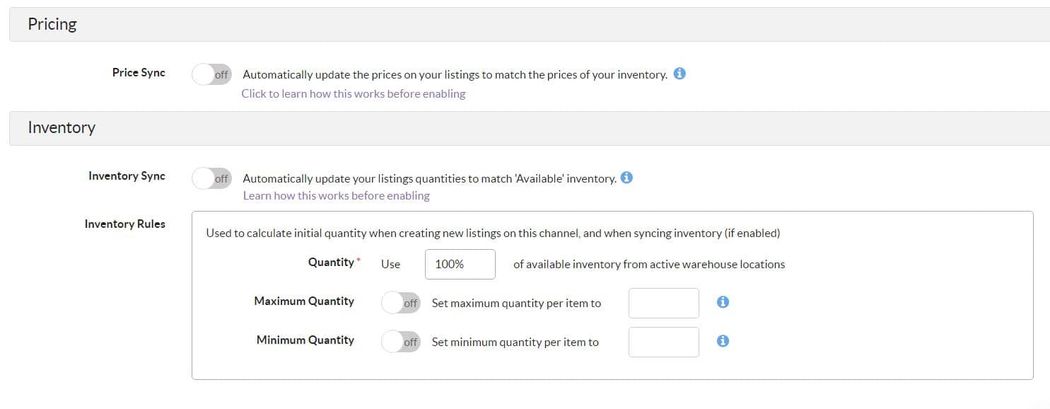
Further down, you’ll have the option to enable syncing for your prices and inventory. By activating this setting, changes to your prices and/or available inventory in Sellbrite will be pushed back to your WooCommerce store.
Syncing your product catalog
Once you’ve set up the integration, you can begin syncing your WooCommerce catalog. For this, it’s important to be aware of how Sellbrite distinguishes between Products and Listings.
Products are a central repository for your items. Listings are directly tied to a sales channel and determine how that item is presented on the channel. Products can be quickly used to create listings that are published on a sales channel.
To bring your WooCommerce items into Sellbrite, you’ll start by importing your Listings. You’ll then want to use these listings to generate a corresponding product in Sellbrite. Once you have the products, you can publish the items on Walmart.
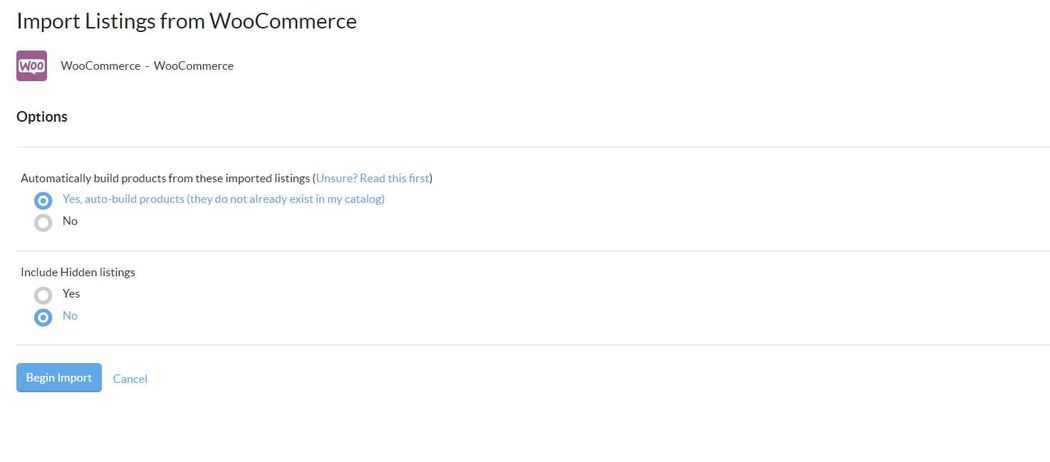
Go to Listings > WooCommerce and select Import From WooCommerce. This will open a window to have the software pull the items in your WooCommerce catalog.
On this page, you’ll see the option to have Sellbrite automatically create Products for each item that you import. If you plan to add all these products on Walmart, you can save time by enabling this option.
The second setting you can configure for the import is to include or exclude hidden listings. After you’ve determined both of these settings, click Begin Import to begin adding your WooCommerce items to Sellbrite.
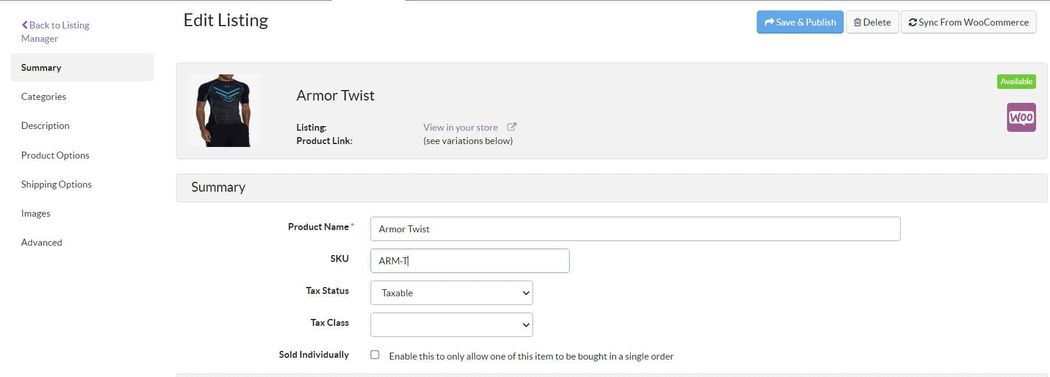
Once the import is complete, you can review your listings at Listings > WooCommerce. There you’ll see the listings, segmented by in stock and out of status.
Each listing has key product information such as the product name, description, SKU, variations, and images. You can edit these values in Sellbrite and publish the changes to WooCommerce.
Similarly, you can use the Sync From WooCommerce button to update the listing to reflect any changes you’ve made back in WooCommerce.
Listing on Walmart
Go to Products > All Products to view a list of all your products from every sales channel. In the far right column, you’ll see all the places where the product has an active listing.

To list a product on Walmart, open the Edit Product page. Click the dropdown for List Product on Channel.

Select Walmart and the software will take a moment to push the item to the marketplace. When it’s finished, you’ll be redirected to Listings > Walmart, where you can manage how the product appears on Walmart.com.
You can list your products in bulk from Sellbrite > Products. In the table, check the far left box for each of the products that you want to add. After you’ve made your selection, click List Products on Channel and select Walmart.
Walmart Integration for WooCommerce plugin
Another way to connect WooCommerce and Walmart is to use a WordPress plugin. This won’t provide a hub for managing your other sales channels, but you can still establish a real-time sync between the two platforms to ensure inventory and prices are congruent between channels.
There are several good options available.
One packed with features and easy to set up is Walmart Integration for WooCommerce. The extension can automatically upload your WooCommerce products to Walmart in bulk. Plus, you can set up fulfillment rules for your Walmart listings based on your WooCommerce inventory data.
Setting up the extension
To connect the plugin to your Walmart Seller account, you need to input your API Credentials into the plugin’s configuration page. The steps to retrieve the API keys will be the same as in the Sellbrite example above.
You’ll need to Locate the Client Id and Client Secret and then copy and add these values to your WooCommerce store in the appropriate fields on the configuration page. After you’ve added the details, click Update and then Validate to confirm that the integration was set up successfully.

Next, go to the Global Settings page to finish configuring the plugin. There you can set up the automatic sync between Walmart and WooCommerce.
The Global Settings is also where you can map your product attributes to Walmart attributes. This is an important step to ensuring your items are properly classified on Walmart and able to show up for relevant searches.
To map your attributes go to the Product section of the Global Settings. There you’ll find a list of metakeys and attributes divided into the following sections
- Product specific
- Price specific
- Shipping specific
- Key features

Attributes that require mapping will have a Required label next to them. In the far right column, you can select the appropriate WooCommerce metakey for the value that you want to map to Walmart.
Category mapping
After you complete the Global Settings, the next step in configuring the integration is to go to the Category Mapping page to map your WooCommerce product categories to the most appropriate Walmart category.
Setting up the mapping will ensure all of your products are automatically included in the correct category on Walmart.
On the Category Mapping page, you’ll see a list of all your categories. To map a category, you simply need to check the box next to the category and click the dropdown menu at the bottom of the list. Clicking the dropdown will open a list of all Walmart categories which you can search to find the best category.
After you’ve picked the mapped category, hit Save. After this, you’ll see the new mapped category in the Mapped to Walmart Category column for that WooCommerce category.
If you want to map multiple categories at once, you can do so by selecting the various categories before selecting the Walmart category from the menu.
Managing products and orders
The Products tab is where you’ll manage the WooCommerce items that you want to sync to Walmart. On this page, you can update stock levels and prices, and publish products to Walmart. You can perform these functions in bulk and there are filters that you can use to quickly search your product list.
In the far-right column of the table, you’ll see a Walmart Status. This indicates whether the product has been sent to Walmart or not. Items that are not live on the marketplace will have a value of Unpublished.
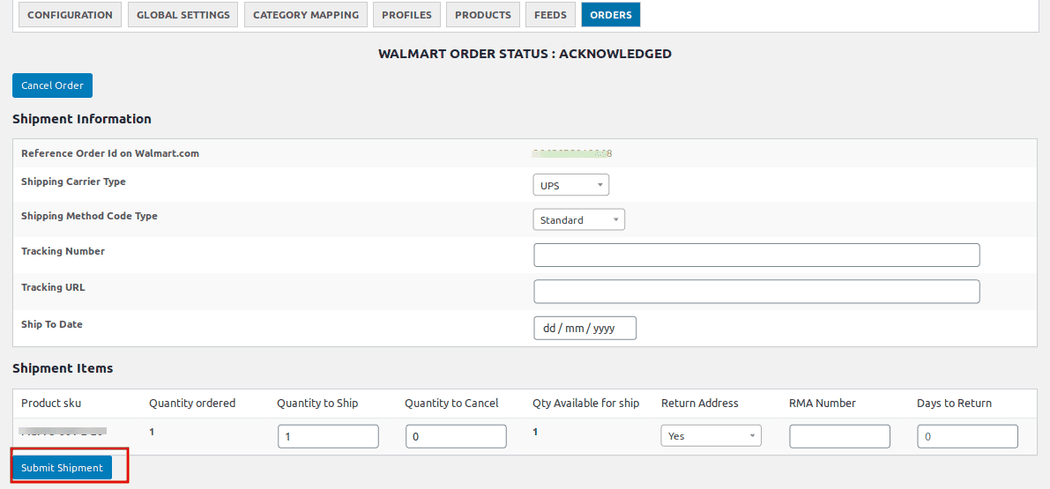
When you start to get orders from Walmart, the Orders tab is where you can view and manage the orders. For each order, you’ll see a list of order items, a Walmart Order ID, and the customer’s name.
If you want to process the shipment click the Edit button. This will open a page where you can upload the tracking information. Click Submit Shipment when you are done and Walmart will automatically update your order to Shipped.
Closing thoughts on WooCommerce and Walmart
With its extensive resources and rapid growth, Walmart Marketplace will likely prove to be one of the most valuable sales channels for ecommerce sellers in the years to come. You’ll need to have proven success selling through your own ecommerce site or other marketplaces to get approved, but once you do, you can use the growing marketplace to reach more customers.
Be sure to set up solid integration with your WooCommerce store to not have the added channel become a burden rather than a benefit.


