
Ready to get online? If you’ve chosen to build a website using a non-managed solution like Web Hosting from GoDaddy, you’ll need a couple of things to get started:
- Hosting account
- Domain name
Without these two components working together, your website won't be visible on the internet. You just need to make sure your domain name points where your website files and data will be stored — just like the street address of a house.
But let’s back up a sec. If you’re just starting out, get off on the right foot by choosing an awesome domain name for your business or idea. This will be your address on the internet.
After that’s handled, choose your hosting platform. Think of it as the land you would build a house on.
To get more familiar with this, take a look at GoDaddy’s popular hosting solutions. For example, if you’re keen on a WordPress website, check out Managed Hosting for WordPress. And if you’re short on time or web development skills, GoDaddy Website Builder might be the perfect fit.
Both products leverage the AI-powered experience GoDaddy Airo® to make it easy-peasy to build a robust website.
Got your domain name and hosting platform sorted out? Let’s get started connecting your domain name to your hosting account!
What are domains and hosting?

First, let's make sure we’re crystal-clear on what a domain name and hosting are. A domain name is like the street address of your website, replacing what would otherwise be a string of numbers with words people can understand and remember.
Hosting, on the other hand, is storage on a server for your website files and data. Hosting performance and storage can vary, so it’s important to consider what hosting you need — don’t pay for unnecessary features, but make sure you’ve got your bases covered.
When you connect your domain name to your hosting account, you’re basically telling the internet where to find your website files, letting visitors access your website.
Why connecting a domain to hosting makes your website work
Your website effectively gains an online presence once you link your domain name to your hosting account, opening it up to visitors from all over the world.
Your website won't be accessible to anyone if it doesn't have a domain name and hosting.
And in terms of search engine optimization (SEO), it’s crucial. By tying your domain to your hosting account, you allow search engines like Google to discover and index your website, letting it show up in search results.
Once you link your domain to your hosting, you still have total control over the content, layout, and functionality. For example, you can make updates to aspects like design or content, and the same address will now display your freshened-up website.
In a nutshell, this is the first step in developing an online identity and increasing visibility on the web. But let’s cover a few more of the basics before we walk, step-by-step, through the procedure in the following sections.
Choosing the best domain and hosting provider for your website
Your website's functionality, dependability, and overall success can all be significantly impacted by the quality of the provider you choose.
There are lots of options out there, so let’s keep things simple by using GoDaddy as an example of a top-notch provider.
First off, GoDaddy provides an easy-to-use interface and tools for managing your hosting and domain accounts. You can pick the hosting plan that best suits your needs and budget from a variety of offerings at various price points to line up with the needs of the individual user.
GoDaddy also provides a selection of domain name extensions, such as the well-known .com, .net, .io, and .org — as well as more unique choices like .ai, .guru or .club.
Plus, GoDaddy provides 24/7/365 customer support via phone, email and live chat. Their GoDaddy Guides can work with you to help navigate any issues.
And don’t forget about growing! GoDaddy provides a variety of essentials for creating, securing and expanding your online presence. These include Professional Email, SSL Certificates, Website Security, and Online Store.
How to connect a domain to your hosting account
Now that we’ve gained a solid understanding of the basics, it’s time to get into the nitty-gritty. Ready to walk through connecting a domain to your hosting account? Here are the steps we’ll cover in greater detail:
- Access your GoDaddy account
- Find DNS management or name server settings
- Update the nameservers to your hosting provider's name servers (if needed)
- Verify the connection
- Enjoy your success!
Now, let’s have a look at those steps in detail:
1. Access your GoDaddy account

First, go to godaddy.com and log in to your account by clicking the Sign In button at the top-right.
2. Find DNS management or name server settings
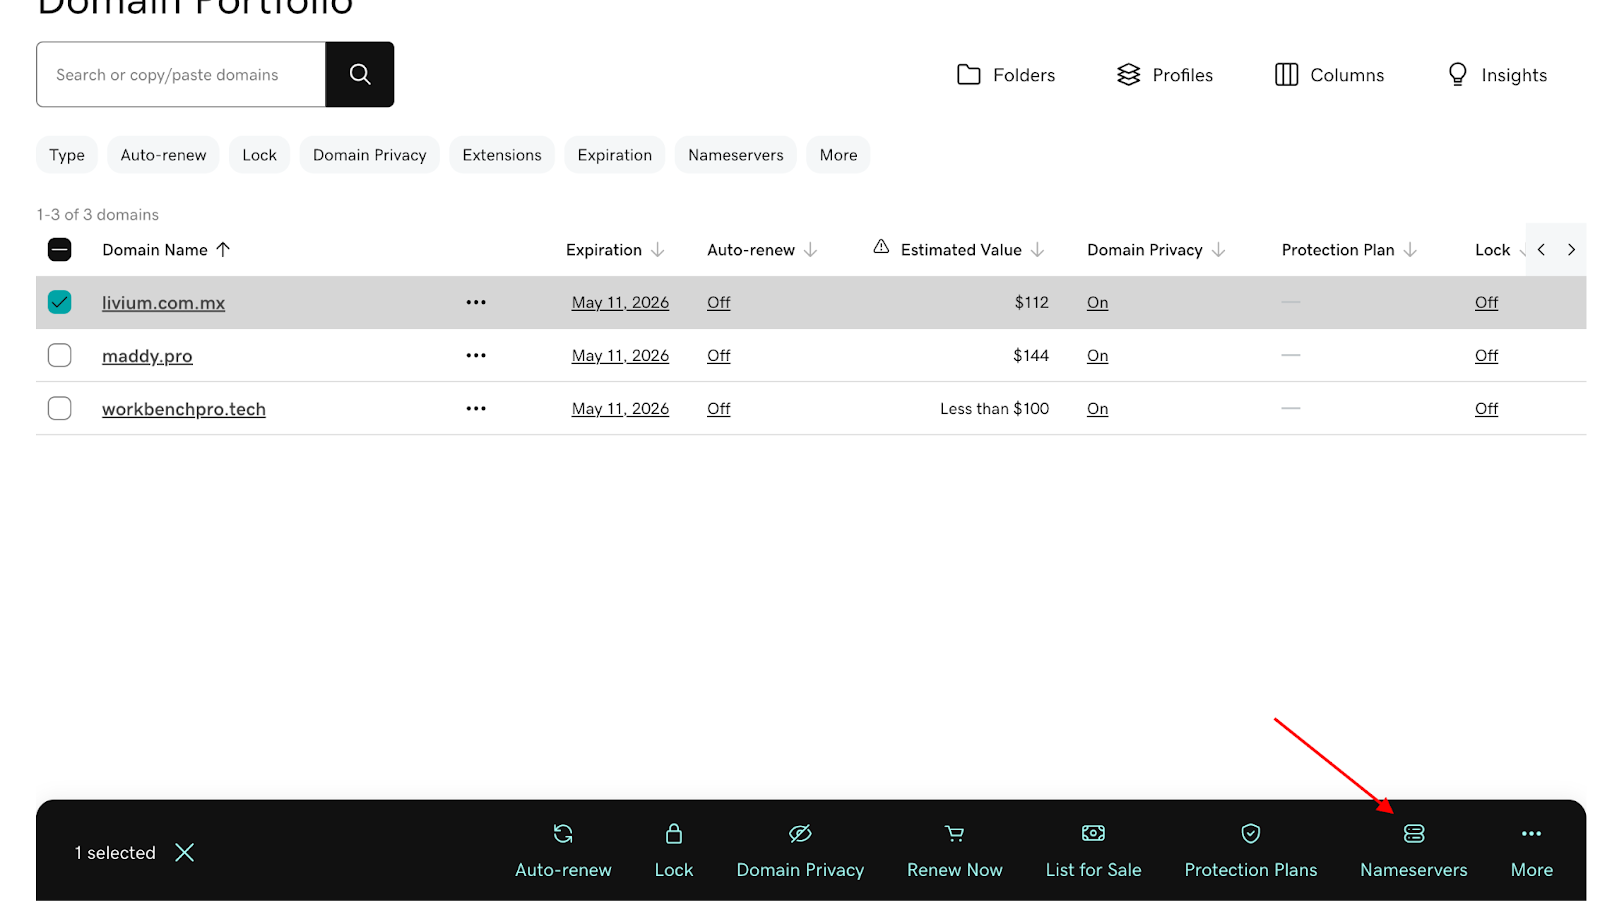
Once you log in, click your profile icon and select My Products. Under Domains, you’ll see a list of domain names you’ve purchased from GoDaddy. Select the domain name you’d like to connect to your hosting account, and then click Nameservers.
This will take you to the control panel page where you can manage settings for that specific domain name. You can also view information related to your domain name, such as auto-renewal status and expiration date.
Pro tip: Make sure your domain is set to auto-renew so you don't lose it when it expires.
3. Update the nameservers to your hosting provider's name servers
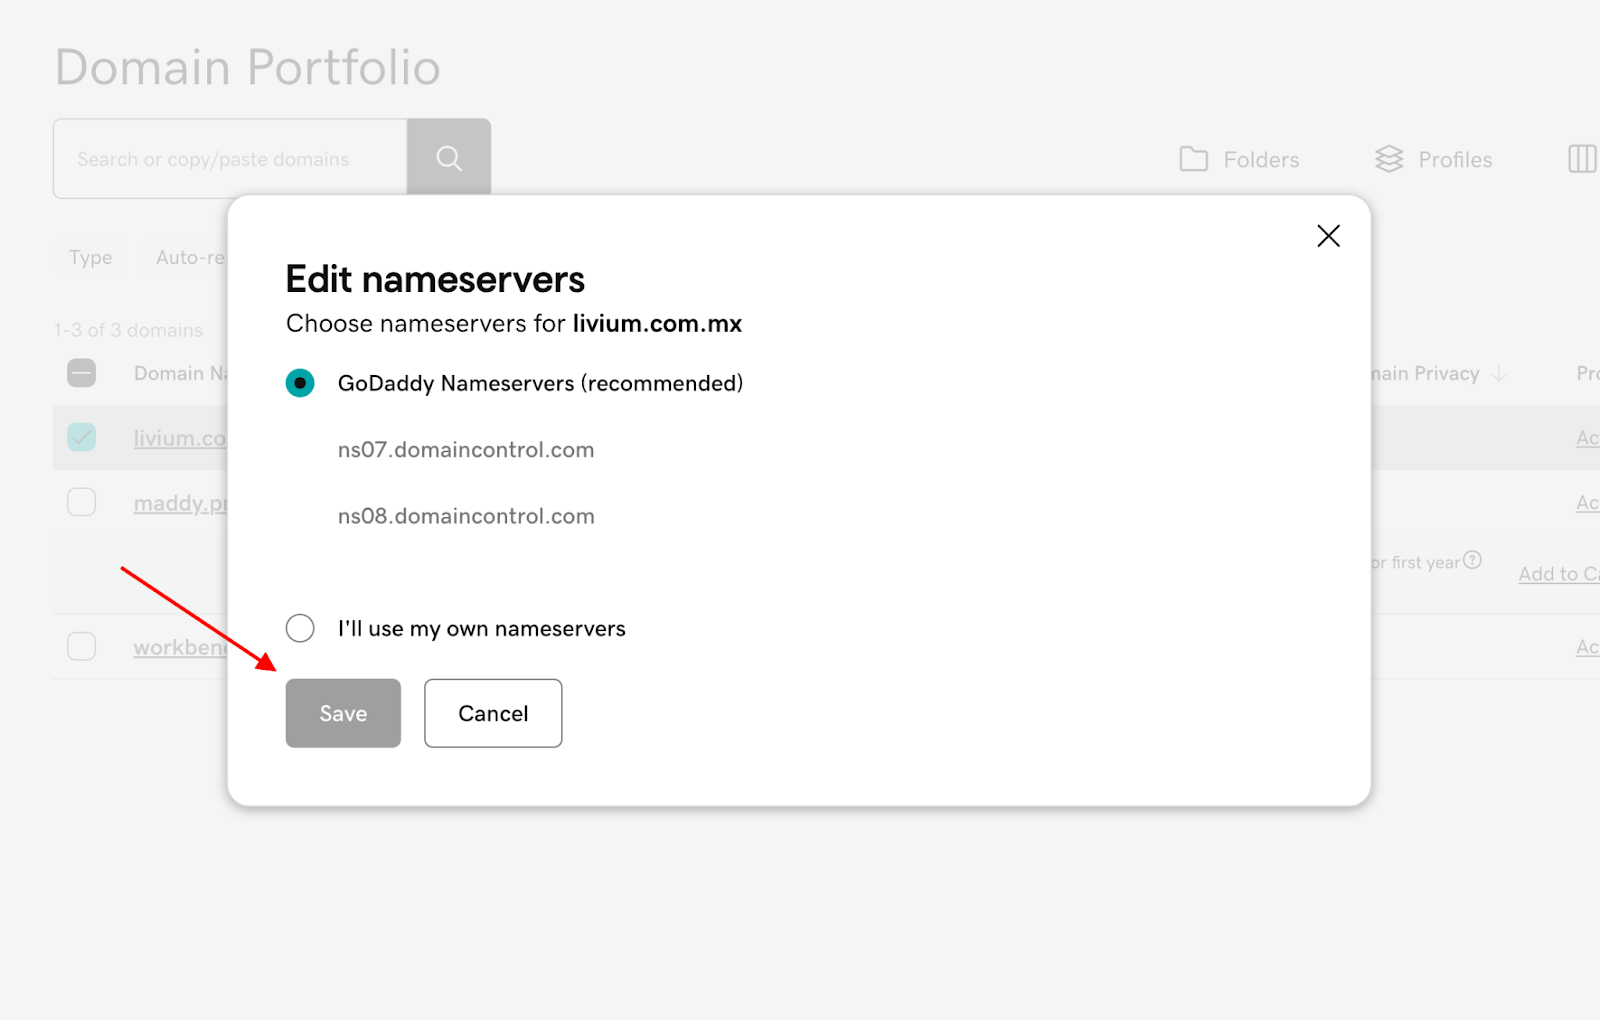
In the nameservers control panel, make your changes, and then click Save.
Important: If you’re using GoDaddy hosting (including Managed WordPress or Website Builder), you usually do not need to change nameservers. GoDaddy connects your domain and hosting automatically during product setup.
If you are using a third-party host, select I'll use my own nameservers and enter the nameservers provided by your hosting provider (e.g., NS1.yourhost.com, NS2.yourhost.com).
4. Verify the connection
After propagation, enter your domain in a browser to check if your website loads. You can also use DNS check tools to confirm that your domain points to the correct hosting.
5. Boom, you’ve successfully connected a domain to your hosting account!
Just be patient. It might take a few minutes to several hours (rarely up to 48 hours) for DNS changes to propagate globally.
Common issues and troubleshooting for connecting a domain name to hosting
If you run into a hiccup as you’re connecting a domain to your hosting account, don’t stress. Here, we’ll look at some of the most common issues and how to fix them.
Incorrect name server configuration
If you enter the wrong nameserver information, your website won't be accessible. Double-check the details from your hosting provider.
Propagation delay
DNS changes can take anywhere from a few minutes to 24-48 hours to be recognized worldwide. This is normal.
Expired domain
Make sure your domain is renewed, or set to auto-renew, to prevent downtime.
If you need help, GoDaddy’s 24/7 support team is available via phone, chat, and email.
FAQs about connecting a domain name to hosting
How do I access my domain registrar account?
If your domain is registered with GoDaddy, log in to godaddy.com, click your profile icon, and then select My Products. From there, you can manage your domains and hosting.
Can I use the same hosting provider for multiple domain names?
Yes! Many GoDaddy Web Hosting and VPS plans allow you to host multiple domains (“Add-on Domains” or “Sites”). Check your plan’s limits in your GoDaddy account.
What happens if I don't connect my domain name to my hosting?
Your website will not be accessible online — the domain won’t know where to find your site’s files.
How long does it take for changes to my nameservers to take effect?
DNS propagation typically takes a few hours, but can take up to 48 hours in rare cases.
In summary
Connecting your domain to your hosting account is essential for making your website accessible to visitors. GoDaddy’s updated platform in 2025 makes it easier than ever, and support is always available if you need it. See you online!