Fortinet has been a major player in the network security appliance field for years. Learn how to install a virtual private network (VPN) on the FortiWiFI — one of Fortinet’s nine different unified threat management (UTM) devices — in the content below. It has both wireless and 14 wired Ethernet ports, four of which can provide power over Ethernet.
Why go VPN for network security?
Not sure whether VPN is the way to go? When it comes to network security, businesses large and small are turning to virtual private networks for remote network access by employees working from home or other remote locations. For further convincing, refer to my introductory post covering why you need a virtual private network.
Installing a Fortinet virtual private network (VPN)
During the installation of a Fortinet virtual private network, keep in mind that you can’t accomplish all tasks from the web interface. In fact, you must tackle some of the more advanced options from the command line. Read on for specifics.
1. Access Fortinet’s VPN setup wizard.
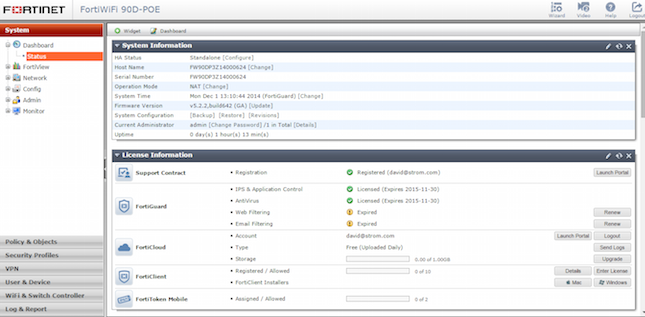
From the main dashboard of the security appliance, locate the menu choices down the left-hand side. That’s where you’ll find the VPN setup wizard. Fortinet supports a variety of VPN configurations, including SSL and IPsec and both remote and site-to-site.
I’ll walk you through the VPN wizard’s four basic steps one at a time. These include:
- General setup.
- Authentication.
- Policies.
- Client options.
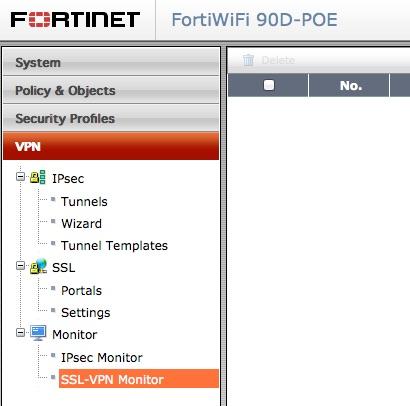
If you forget something or mess up the configuration in the wizard, you can return to the VPN menu settings using the main dashboard menu and fix it later on. There’s also a command line configuration system, required for accessing some features not accessible via the graphical interface. See a list of the submenu choices in the screenshot below, including choosing IPsec or SSL VPN types, and whether to monitor the traffic coming in over the VPN itself.
2. Choose your template from Fortinet’s VPN Setup.
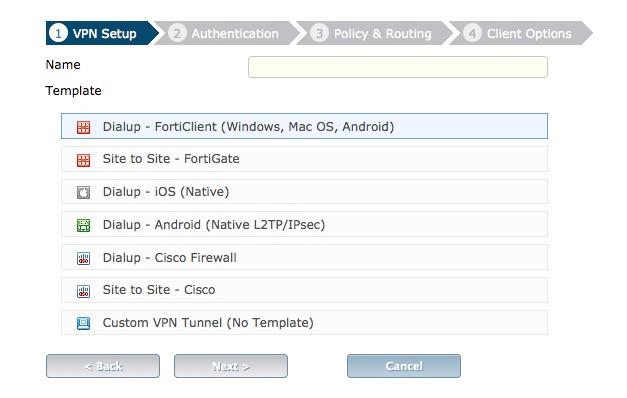
From the General Setup step (as shown below), pick one of six pre-set templates, including dialup (for connecting remote users to the corporate network), site-to-site (connect several remote networks together, such as a remote office to the main office), or other choices that concern mobile connections or making use of Cisco’s proprietary firewalls.
3. Input authentication settings.
Next, input authentication settings to specify particular groups of users that are allowed to use the VPN, the times of day that they may use the VPN, and other similar parameters.
4. Specify how you want the VPN to connect to the enterprise network.
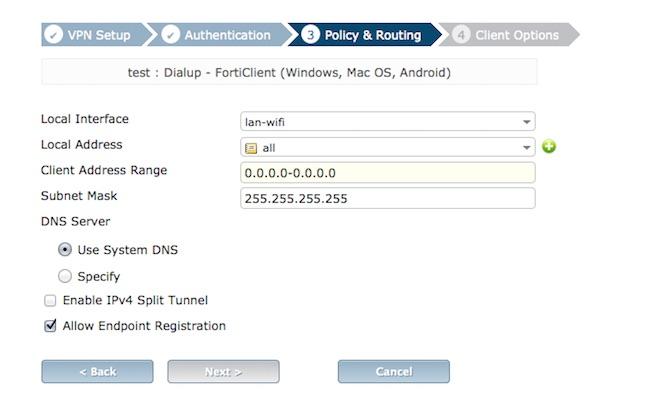
When specifying how the VPN will connect to the enterprise network, you’ll need to designate the IP address you want used and whether you’ll require every remote user to register before gaining access to the network.
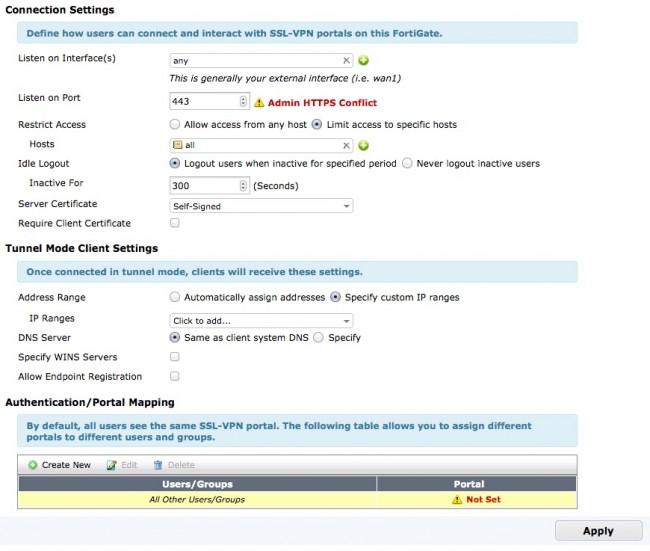
FortWiFi device can provision separate VPN portals for different user groups, such as employees and guests. You can also limit access to particular host Windows PCs, or set an inactivity logout period. Those settings are found in the series of menus below.
For more help with the specifics of the VPN configuration, see the online reference manual for the SSL VPN. It also covers the command line syntax required to set up advanced features not accessible via the graphical interface.
5. Download the VPN client software.
Once you configure the FortiWiFi, download the VPN client software to the computers that will use it. The client, called FortiClient, does more than merely support the VPN connection. It also provides endpoint antivirus protection, an application firewall that works in conjunction with FortiWiFi, and multi-factor authentication. There are versions of FortiClient that support Mac, Windows, iOS, and Android devices.
6. Set your users to rock and roll.
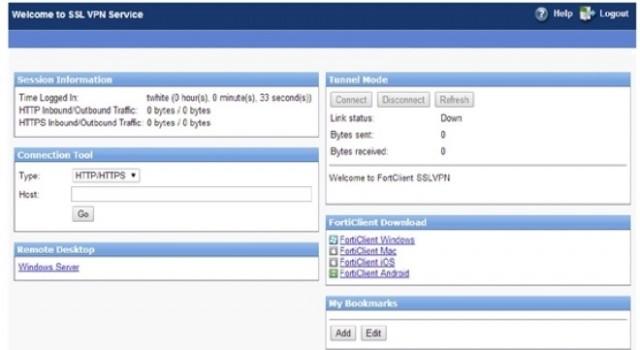
After your end users download and run the installer for FortiClient, they need to enter their username, password, and the IP address of the FortiWiFi. They should see the rather inelegant web portal page (as seen below), and can safely ignore its information.
As straightforward as these steps might seem, you could run into snags along the way. If so, submit your questions or share your experience in the comments section below.

