Rapidly evolving technologies are changing how consumers prefer to shop and pay for products and services — both online and in-store. Accelerated by the global pandemic, it’s “leading to a payments ecosystem that is almost unrecognizable in comparison to just a few years ago.”
As a result, small business owners must quickly adapt to provide a seamless experience that supports your customers’ needs today and in the future.
Otherwise, you risk losing business to competitors with better payment solutions. In fact, a recent Weave study found that “41% of customers avoid certain stores because they don’t accept the right payment type.”
Read on to learn how to accept credit card payments in-store and online via the most popular technology solutions to convert more browsing customers into buyers.
1. Does GoDaddy provide credit card payment processing?
Yes. GoDaddy offers multiple ways to accept credit card payments. From ecommerce payment processing to Online Pay Links, Virtual Terminal, and Point-of-Sale (POS) solutions, GoDaddy Payments lets your customers pay the way they want.
It’s the simplest way to take online and in-person payments, quickly and securely, using advanced encryption that is payment card industry (PCI) compliant and uses two-factor account authentication to keep your data safe.
GoDaddy Payment solutions can be set up in minutes. They enable you to accept all types of payment, and seamlessly unify all your selling — retail store, on the go, marketplaces, online, or wherever your customers shop.
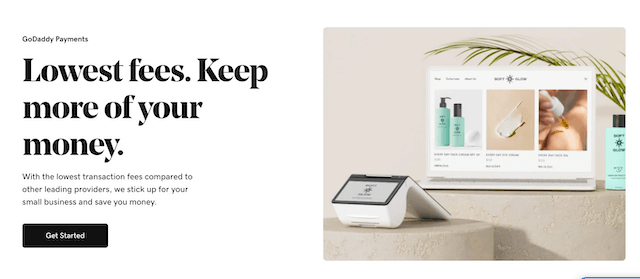
We have your back with the lowest transactional fees in the industry, and there are zero fixed fees for in-person POS transactions.
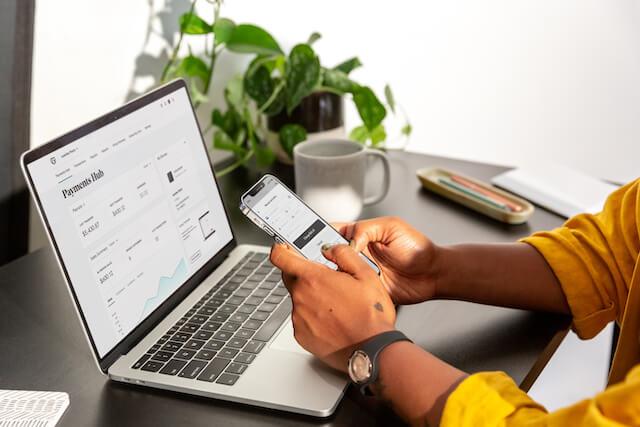
Using an intuitive dashboard, you can easily manage all of your payments in one place, and payment funds will be deposited into your bank account as soon as the next business day.
Learn more about GoDaddy Payments here and compare best payment processors on the market for your small business.
2. How much should I budget for credit card processing fees?
It’s important to know what a merchant’s card payment processing fees are before selecting the one that’s right for your small business. Let’s take a closer look at average fees across the credit card payment industry.
Related: How to cut credit card fees
Average credit card merchant fees
Credit card merchants like Visa and Mastercard charge fees on every transaction processed either online or in-store.
The credit card processing fees depend on a variety of factors, including:
- The type of transaction your customers choose most often (both online and in-person)
- The type of business you run (e.g., a low versus high-risk company)
- The average size of the credit card transactions you process
To make an informed decision, it’s always best to get a quote from any credit card merchants you want to offer on your site. However, it can be a nuisance to have to apply for and add each individual credit card merchant account to your site.
Average credit card payment processor fees
The benefit of using a payment processing solution like GoDaddy Payments is that you can add and accept all major credit and debit cards — both online and in-store, using one fast and secure platform that lets you track all of your orders and transactions via a virtual dashboard.
According to the Motley Fool (as of 2021), the average payment processing fees for credit card payments range from 2.9% + $0.30 for platforms like Square and Stripe to 3.49% + $0.49 for PayPal.
So, if you sell a product that costs $100 each, and make an average of $10,000 in sales every month, you could lose at least $3,840 in credit card fees with the above payment processing options, if not more.
When you factor in additional costs like COGS and sales taxes, it’s easy to see that these fees can quickly eat into your profit margins.
GoDaddy Payments offers the lowest fees per transaction for ecommerce (2.3% + $0.30) compared to leading competitors, which is over 20% savings for online credit card transactions. In-person fees are are 2.3% + 0 cents. That way, you’ll keep more of your earnings.
All major credit cards and debit cards are accepted, including Visa, Mastercard, American Express and Discover, and there are no long-term contracts, no monthly minimums, or hidden fees.
3. How do I accept credit card payments in-store or in-person?
Your in-store credit card payment options should include the following three tools:
Get a credit card payment processor
A payment processor like GoDaddy Payments handles all of your credit or debit card transactions — acting as a mediator between your store and a financial institution or merchant account.
The payment process involves authorizing all credit card or debit card transactions via your merchant accounts and transferring the funds, so you receive your payments quickly — helping you to better manage your cash flow.
Learn more about credit card processing.
Invest in a POS payment system
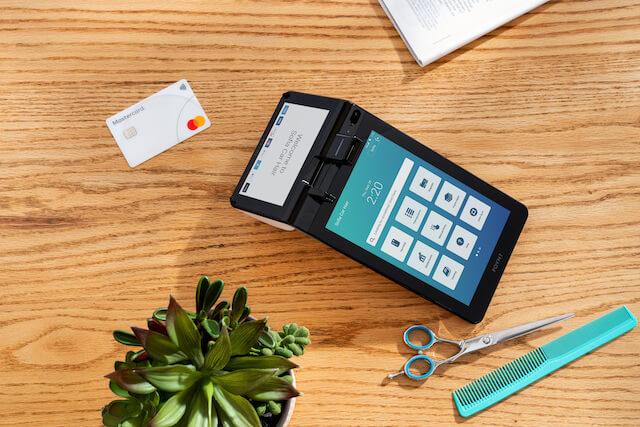
A point of sale (POS) is the location where you exchange your goods and services for payment. It can be done online through your ecommerce-enabled website or using a device in a physical location.
For example, GoDaddy’s POS system offers business owners an easy and fast credit card payment experience to help unify and expand your cross-channel selling.
It seamlessly integrates with your GoDaddy Online Store, so your online and in-person sales are easily organized and accessible in one place. Your customers can buy online and pick up in-store or book online and pay in-person.
Plus, you can easily create digital content and access email and social marketing tools to help you grow and thrive.
GoDaddy’s sleek and powerful Smart Terminal (or POS device) comes ready to use with everything built-in for a convenient in-person checkout process and has a one-year limited warranty and 30-day refund.
It includes GoDaddy Payments processing, a paper receipt printer, and a barcode scanner to quickly scan product UPC codes and QR codes. There is no bulky setup, and it’s lightweight enough for in-store mobility.
It also comes with dual screens — a dedicated screen for you, and one for your customers — to make it faster and easier for your customers to checkout, tip, and sign. And every checkout is PCI secure, with payouts as fast as the next business day.
Additionally, we offer contactless in-person Apple Pay and Google Pay transactions, which are essential because nearly half of “consumers say they will not shop at (or with) a store that doesn’t offer a contactless way to pay.”
Learn about the contactless payment technology.
Consider card readers for selling on the go
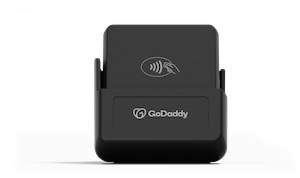
A card reader is a small mobile-enabled device that processes your POS payments from anywhere — both in-store or on the go at events, pop-ups, or farmer’s markets.
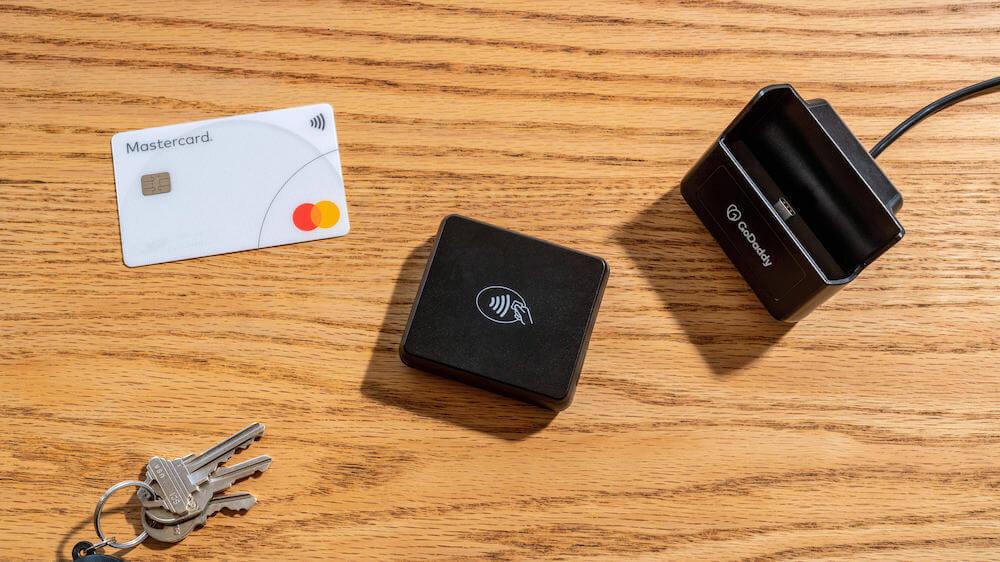
The GoDaddy Card Reader features a full 3-in-1 swipe, chip, and tap functionality that comes with a charging doc and is encrypted with strict PCI compliance. It has a powerful all-day battery life, and the dock can be set up on a tabletop to give you a completely hands-free payment solution.
GoDaddy’s card reader works seamlessly with the GoDaddy Payments app, which you can download for IOS or Android and connect to the reader to accept credit and debit cards, and record cash payments on your phone. As a result, you can manage your online orders and payments from anywhere, which is ideal for selling on the go.
You can also use your mobile phone, tablet or computer
There’s another way to easily and reliably sell anywhere you want by transforming your smartphone, tablet, or computer into a credit card terminal — without the need to buy extra hardware or download software.
GoDaddy Payments offers versatile solutions like a Virtual Terminal that allows you to accept credit card payments right from your computer, smartphone, or another device with an internet connection.
It’s a simple, secure way to get paid when your customers aren’t standing in front of you. GoDaddy’s Virtual Terminal processes payments, quickly and securely, and you’ll receive funds as soon as the next business day.
Simply sign in to your GoDaddy account and open Virtual Terminal on your Payments dashboard. Then enter your customer’s credit card information into Virtual Terminal, and confirm the charge. That’s it!
It’s popular among small businesses that want to let customers prepay over the phone for delivery, such as a restaurant or food truck.
If you run a yoga class or landscaping business, you can also let people book and pay for your services in advance. Or process secure payments over the phone for your freelance business and get paid as soon as the next business day.
Create Pay Links to sell without a website
Finally, if you’re a flower shop owner or non-profit fundraiser and deal with your customers frequently through email, text, or social media, you can also get paid through fast and secure GoDaddy Pay Links.
Through your GoDaddy account, you can create a Pay Link and share it with customers, who will then be directed to a web page. From there, they can input their payment details for the payment to be processed.
Additionally, you can generate a QR code that customers can scan using their mobile phone for contactless in-person payments.
4. How can I accept credit card payments online?
Let’s look at your online payment options next. To begin, you’ll need an ecommerce platform that enables you to easily set up an online store to manage all of your orders in one place and sell across multiple channels like eBay, Etsy, Amazon, Facebook, or Instagram.
Use GoDaddy Online Store to build your own site
GoDaddy’s Online Store builder lets you set up an ecommerce store for free using one of over 100 mobile-friendly customizable templates. Simply add your products, descriptions, images, and prices with a few clicks and edit everything on the go, from any device.
It also comes with ecommerce marketing upgrades, like email marketing, social media, and search engine optimization tools so customers can easily find your store across all of their preferred channels.
You can also build a WordPress-managed WooCommerce store
Alternatively, our managed WordPress ecommerce platform with WooCommerce enables you to quickly set up a customized, fully-featured WordPress store for only $20.99 per month. You can sell anything, anywhere online — from physical products to digital downloads, services, and subscriptions.
WooCommerce is the world’s most popular open-source ecommerce solution — with over 50,000 WordPress plug-ins and 10,000 themes. With a streamlined WordPress setup, it’s built with a REST API which makes it scalable and able to integrate with virtually any service.
You can choose from free, exclusive WooCommerce Storefront extensions included in your plan. You also get a domain, SEO optimizer, daily backups, and top-notch security.
Set up your mobile-optimized checkout process
Once you’ve set up your online store, it’s time to streamline the checkout process and simplify the customer experience.
Both GoDaddy Online Store and WordPress with WooCommerce checkouts are mobile-optimized and let you customize the look of your checkout screens, then select shipping, payment, and tax options.
That’s crucial because mobile commerce is projected to grow from 54% of all e-commerce sales to 79% over the next two years.
Your site’s mobile checkout flow should be simple and use as few screens as possible before arriving at the confirmation page. Otherwise, “40% of users will go to your competitor after a bad mobile experience.”
To learn how to simplify your online checkout process, refer to the post: “How to optimize mobile checkout for small businesses.”
Set up your online payment services
Next, you’ll need to integrate an online credit card payment processing solution, like GoDaddy Payments, which seamlessly integrates with our Online Store platform and our managed WordPress Ecommerce site with WooCommerce.
That gives your customers more ways to pay for your products and services online and provides you with a fast way to get paid.
GoDaddy Payments is also PCI compliant and uses two-factor account authentication, so your site is always up to date on the latest payment security protocols — helping you build trust with customers.
Ensure your customer data is secure
In addition to using encrypted payment methods, you must add a Secure Sockets Layer (SSL) to your website. It’s a security protocol that creates an encrypted link between your customer’s web browser and your website.
You’ll know if an ecommerce site has SSL enabled when you see a tiny padlock icon on the left-hand side of the site’s URL in your browser.
GoDaddy offers a variety of SSL certificate options and website security plans to choose from.
For more information, read about the 5 Benefits of SSLs for Small Businesses. You can also learn about the four types of SSL certificates you can use via these links:
- Wildcard SSL Certificate
- Extended Validation (EV) SSL Certificate
- SAN SSL Certificate
- Organization Validation (OV) SSL Certificate
Don’t forget about sales tax laws
Chances are you’ll need to collect tax on the goods you sell online. Before you do this, contact your local state tax office to ensure that you’re collecting and filing this information correctly.
You must also comply with local tax laws in every state where you sell and ship a product online. Otherwise, you might be required to pay unexpected fees when you file your income tax at the end of the year, which could seriously impact your cash flow.
See here how to calculate your sales tax.
Disclaimer: This content should not be construed as legal or tax advice. Always consult an attorney or tax professional regarding your specific legal or tax situation.
Get paid faster with our Invoicing Software
Late payments can cripple your cash flow and business growth. Our invoicing software is designed to help you get paid faster and more reliably.
5. Evaluate your best options to accept credit card payments
We’ve compiled an overview of the most popular credit card payment processing solutions available to help you make an informed decision.
GoDaddy Payments
GoDaddy Payments is a payment provider that enables you to manage all of your account details, including orders, credit card payments, and refunds, alongside every other aspect of your business, from one intuitive dashboard. No more logging into multiple accounts to handle payments, refunds, and billing.
In-person payment features:
- Easy to use and set up to quickly handle in-person or in-store checkout experiences
- Accepts all types of payment, including Visa, Mastercard, Amex, Discover cards to contactless Apple Pay and Google Pay
- Fast and secure
- The lowest in-person card transaction fees in the industry (compared to other leading providers) at 2.3% + 0 cents
- Includes a one-year limited warranty and 30-day refund
- No setup fee, no monthly minimums or any hidden fees, and no long-term contracts
- Connects offline and online sales to manage all your sales in one place
- Receive your POS device in two days with expedited free shipping
- Create a customized pay link and share it with your customers anywhere you do business
- Take remote or over-the-phone payments to complete transactions whenever a customer is not present
- Money is deposited into your bank account as soon as the next business day
- 24/7 customer support
Online payment features:
- Easy to use and set up quickly handle online checkout experiences
- Versatility to accept credit and debit card payments, including Visa, Mastercard, Amex, and Discover cards
- Checkout is fast and secure
- Keep more of what you make, with the lowest credit/debit card transaction fees in the industry powered by GoDaddy Payments at 2.3% + 30 cents per transaction
- No setup fee, no monthly minimums or any hidden fees, and no long-term contracts
- Integrates with GoDaddy Online Store and GoDaddy-managed WordPress plus WooCommerce sites
- Customers can also buy online and pick up in-store (if integrated with GoDaddy POS)
- Money is deposited into your bank account as soon as the next business day
- 24/7 customer support
Square
Provides small businesses with software and hardware to help you sell products and services online and offline using your Square account.
To accept payments via your phone or tablet, you need a free magstripe Square reader that interfaces with the free Square Point of Sale app.
However, you don’t need a card reader to start using Square with GoDaddy’s Websites + Marketing.
In-person payment features:
- Accepts all major credit cards and debit cards, plus Apple Pay (on supported devices)
- See your money in one to two business days
- No monthly or set up fees
- Accept payments online and in-person
- Quick setup
- Integrates with GoDaddy Payments
- Better suited for small, low-risk businesses (limited “advanced features”)
- Note: Will freeze funds if they suspect fraud
Apple Pay
Apple users can safely store their credit cards, debit cards, gift and loyalty cards, all in one place via the Apple Pay wallet.
It also integrates with many other payment gateways, like GoDaddy Payments, PayPal, Square and Stripe.
Online and contactless payment features:
- Processes most major credit cards and debit cards
- Users can safely store personal credit card info in an encrypted digital Apple wallet
- It can be used for both online and retail mobile payment terminal transactions
- Quick setup
- Easy to use
- Note: You must be an Apple mobile device user, and you need a mobile payment terminal and customers must have their phone with them for in-store transactions
Google Pay
Google Pay works a lot like Apple Pay but is designed for Google account users. You can use it to pay for goods and services online, in-app, and in-store.
Online and contactless payment features:
- Processes most major credit cards and debit cards
- Users safely store credit card info in an encrypted Google wallet
- It can be used for both online and retail mobile payment terminal transactions
- Quick set up
- Easy to use
- Note: It’s not as widely used as Apple Pay in retail locations, and customers must have a phone with them for retail transactions
Paypal
PayPal processes all major credit cards, plus Apple Pay, and is one of the most popular payment processing gateways.
Online payment features:
- Accept credit cards and debit cards from millions of PayPal users
- Fast and secure checkout for customers
- No monthly or set up fees
- Quick set up
- Same-day fund delivery
- Works with many shopping cart platforms
- Integrates with GoDaddy Payments
- Note: Higher fees than other payment processors and account suspensions can freeze funds, impacting your cash flow
Stripe
Stripe payment processing works similar to PayPal and Square and its gateway integrates with your store’s checkout, which is a user experience win.
Online payment features:
- Accepts all major credit cards and debit cards on your site
- Accepts Apple Pay on supported devices
- Quick setup
- Receive funds in two to seven days
- No monthly or setup fees
- Note: Some small businesses complain about frozen or canceled accounts
Anticipate your customers’ card payment needs
As consumers become more comfortable shopping online, their expectations for where and how they pay for products and services will evolve.
That’s why it’s essential to learn how to accept credit card payments in-store and online, safely and securely, across all of your customer’s preferred sales channels.
GoDaddy Payments quickly processes all major credit and debit cards online and manages in-person and online payments via Pay Links, Virtual Terminals, mobile Card Readers, and POS devices. We charge the lowest fees in the industry, with a fast payout as early as the next business day.
Be sure to track how consumer card payment behaviors are regularly evolving, so you can anticipate future needs.
To learn about future digital payment solutions, read: “7 trends in online payments.”
