You’ve finally done it. After hours of design and testing, your website is ready to be launched. But, in the back of your mind, you know you’ve been putting off that one last step: adding an SSL certificate to your website.
Since 2018, SSLs have become required features for Safari, Chrome, and Firefox, so most web designers are very familiar with SSLs by now.
If you’re new to the web design world, however, SSLs can feel daunting. Don’t stress! In this guide, we’ll cover what an SSL certificate is, how you can add an SSL to your website, and tips for getting the most out of your SSL. Let’s go.
What is an SSL?
An SSL (Secure Sockets Layer) certificate is the standard security technology for establishing an encrypted link between a website and a user’s browser. It protects sensitive data such as passwords, credit card information, names, and addresses. Check out this guide on how to protect user data for more information.
The SSL itself is a digital certificate that links a website's identity to a cryptographic key pair, which includes a public key and a private key. The public key allows a web browser to start an encrypted communication session with a web server via the TLS (Transport Layer Security) and HTTPS (Hypertext Transfer Protocol Secure) protocols.
The private key is kept secure on the server and is used to digitally sign web pages.
Here’s how SSL works in simple terms: an SSL tells your visitors that it’s safer to browse, shop, and enter their sensitive information on your site.
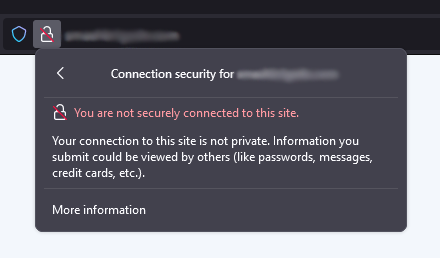
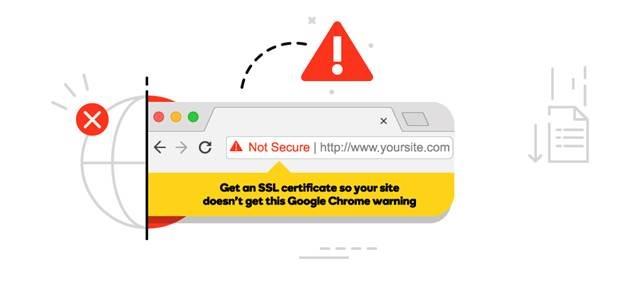
And for websites without an SSL? Here’s the warning that visitors will see:
Related: Common SSL issues
SSL vs TLS: What's the difference?
SSL and TLS are both protocols designed to secure data as it travels between a user’s browser and a website. SSL is the older of the two. It was the original standard for encrypting internet connections, but it has been phased out in many environments due to security vulnerabilities.
TLS is a more modern version of SSL. It offers more advanced encryption algorithms, better authentication, and faster connections. It also includes features that protect against newer types of cyber threats that SSL was never designed to handle. Because of these improvements, most browsers and servers no longer support SSL.
In practice, many people still use the term SSL as a catch-all for website security certificates, even though TLS is what’s actually in use today.
Related: WAF vs. SSL
How to renew your SSL certificate
Every SSL certificate has a validity period, which is the timeframe for which the certificate is considered active and trusted by browsers. Once that validity period ends, the certificate expires, and browsers may flag your site as “not secure.” Visitors can see warnings, and some may leave before the page even loads. To prevent this, renew your SSL before it expires.
Starting in March 2026, certificate validity periods will gradually shrink from about 398 days to as little as 47 days by 2029 to reduce the risks associated with compromised certificates.
Shorter lifespans mean renewals will happen more often. Read this article to learn more about the new SSL validity periods. Staying on top of these updates helps keep your site secure and avoids any gaps in protection.
If managing frequent renewals sounds like extra work, there’s an easier option. The GoDaddy SSL Managed Service Add-on takes care of the process for you by automatically reissuing your certificate at the end of each validity period. Your site stays protected without the need to track expiration dates or handle renewals manually. Check out the SSL Managed Service Add-on section below for more details.
Types of SSL certificates
There are multiple types of SSL certificates. The certificate you need depends on how much validation you need and how many domains you want to secure. These options follow a hierarchy, with each level building on the one before it:
- Domain Validation (DV): Provides basic encryption and confirms you control the domain. This is the foundation of all SSL certificates and a solid choice for personal sites, blogs, or simple projects.
- Organization Validation (OV): Includes everything in DV, plus verification of your business identity. This added layer helps show visitors that your site is operated by a legitimate organization, making it a strong fit for business websites.
- Extended Validation (EV): Builds on DV and OV by completing a more rigorous verification process. It displays your verified business name in the certificate details, offering the highest level of trust for e-commerce sites and other high-traffic or transaction-heavy websites.
- Wildcard SSL: Secures your main domain and all its subdomains with one certificate, making it easier to manage growing websites. You can pair this with DV or OV validation, depending on your needs.
- Multi-domain SSL: Secures multiple domains under a single certificate, which is helpful if you manage more than one site. These certificates are typically available with DV or OV validation.
Free SSL vs. paid SSL certificates
When choosing between free SSL certificates, such as those offered by Let’s Encrypt, and commercial (paid) SSL certificates, it’s important to consider your specific needs.
Free SSL certificates typically provide basic DV, ensuring that you have control over the domain you wish to secure.
They are cost-effective and ideal for personal websites or small businesses that require standard encryption without extensive support.
However, free SSL certificates often come with limitations, including limited technical support and fewer advanced features.
They may not offer the same level of trust indicators as paid certificates, such as OV or EV, which provide additional verification of your business’s legitimacy.
Commercial SSL certificates, on the other hand, offer enhanced features such as higher levels of validation, which can boost user trust and improve your website’s credibility.
They also typically include comprehensive technical support, warranty protection, and advanced functionalities like wildcard or multi-domain coverage, making them suitable for larger businesses or ecommerce sites where enhanced security and customer trust are paramount.
Ultimately, the choice between free and paid SSL certificates depends on the level of security, trust, and support your website requires.
How to get an SSL certificate for your website
Let’s take a look at the process for setting up and installing an SSL on various server types below. This is a technical process, so contact our GoDaddy Guides if you need help!
Step 1: Request your CSR
The first step in setting up your SSL is to request a CSR (Certificate Signing Request) from your hosting provider.
A CSR is a block of encoded text that contains information about your website and organization. It’s generated on your server and submitted to a Certificate Authority (CA) when applying for an SSL certificate. The CA uses the information in your CSR to verify your identity and issue your certificate.
Note: If you're installing your SSL to the primary domain of a GoDaddy hosting account, your CSR is generated automatically.
When generating a CSR, you'll need to provide specific details. Additionally, we recommend removing any self-signed or out-of-date SSL certificates from your server before proceeding.
- Common name: This is the specific domain name you want the SSL certificate to secure. It should be entered as a fully qualified domain name (FQDN), such as www.coolexample.com or coolexample.com, depending on your setup. If you are requesting a Wildcard certificate, add an asterisk (*) to the left of the domain to cover all subdomains (for example, *.coolexample.com).
- Organization: The legally registered name for your business. If you are enrolling as an individual, enter the certificate requester’s name. Note that while this is a required field for CSR generation, the organization field is only vetted with Organizational Validation (OV) and Extended Validation (EV) SSL types.
- City/locality: Name of the city where your organization is registered/located. Do not abbreviate.
- State/province: Name of the state or province where your organization is located. Do not abbreviate.
- Country: The two-letter International Organization for Standardization (ISO) format country code for where your organization is legally registered.
Step 2: Generate your CSR
How you request a CSR varies by server type. Our Help Center has general guides for the most common server types, but if you don’t see your specific server listed, refer to your server's documentation for instructions on generating a CSR.
Step 3: Set up your SSL certificate
Once you have your CSR generated, it’s time to set up your SSL certificate. On a GoDaddy website, this generally involves four steps.
Request your SSL
You’ll need to have your CSR handy for this portion of the setup:
- Go to your GoDaddy product page.
- Next to SSL Certificates, select Manage All.
- Select New Certificate for the SSL certificate you want to use.
- On the Certificate Setup page, select Input a CSR.
- Paste your CSR into the box and select Continue to open the Prove Domain Control page.
- Leave everything as it is and select Continue.
- On the Additional Options page, select the Certificate Issuer you want to use. The only change is who issues the certificate. Your certificate will function the same regardless of your choice.
- Read the Subscriber Agreement, select the checkbox for I agree to the terms and conditions of the Subscriber Agreement, and then select Continue.
Verify your SSL request
Before GoDaddy can issue your certificate, we need to verify that you control the domain you’re using for your SSL request. This is to ensure that the SSL request is being made by an approved entity.
How you prove domain ownership depends on whether your certificate and domain are in the same GoDaddy account.
Here are in-depth guides for both options:
- My certificate and domain are in the same GoDaddy account
- My domain isn’t in the same GoDaddy account as my certificate
Download your SSL files
If you’re manually installing your SSL certificate on your hosting account or server, you need to download your primary and intermediate certificates from the SSL dashboard.
If the option to download your SSL certificate is disabled, the certificate has already been installed for you.
- Go to your GoDaddy product page.
- Select SSL Certificates, and then select Manage for the certificate you want to download.
- Under Download Certificate, select a Server type and then select Download Zip File.
Managing multi-domain certificates:
A multi-domain SSL certificate gives you the flexibility to secure multiple websites under one certificate. As your needs grow, you can update your domain coverage without having to start from scratch.
You can add domains in two ways:
- During your initial setup: Include all known domains when you first request your certificate
- After issuance: Add more domains anytime through your certificate management dashboard once your certificate is active
This approach makes it easy to scale as your business expands without needing to purchase a new certificate each time you add a site.
Step 4: How to install your SSL certificate
Now that you have your SSL files, it’s time to install your SSL. This process differs by server type.
We have instructions for the most common server types in our Help Center, such as cPanel, Apache (CentOS and Ubuntu), and Microsoft Exchange Server 2016, to guide you through installing your SSL, but you’ll need to contact your hosting provider if your server configuration isn’t listed.
Step 5: Redirect HTTP to HTTPS
With the SSL installed, the next step is to redirect your site to HTTPS. For those using Managed WordPress, this update will be automatic.
If you’re using a non-managed version of WordPress or a different type of server, you can find the steps to redirect HTTP to HTTPS in our Help Center.
Once you’ve added the redirect, you can use our SSL Checker tool to ensure that everything is working as intended.
How to check your SSL certificate
You can check your SSL certificate by clicking the padlock icon in your browser’s address bar and viewing the certificate details. This shows whether your certificate is active, who issued it, and when it expires. If your site shows a warning instead, review this article on how to fix not secure warning.
How to configure your SSL certificate
Configuring your SSL certificate starts with installing it on your server and making sure your site loads over HTTPS. The exact steps depend on your hosting setup, but the general process includes:
- Generating a certificate request
- Installing the certificate files
- Updating your server settings to use secure connections
For step-by-step instructions, check out this guide on how to manually install an SSL.
Visual indicators of SSL in browsers

Web browsers display specific visual indicators to inform users that a website is protected with SSL. The most common indicators include:
Padlock icon
A padlock icon appears in the address bar, signaling that the connection between the user’s browser and the website is encrypted.
HTTPS prefix
If a website’s URL begins with "https://" instead of "http://", the SSL is active, and the data transmitted is encrypted.
Understanding certificate identity verification
Just seeing a padlock in the address bar is no longer enough to guarantee a website's trustworthiness. The padlock confirms that your connection is encrypted, not that the website itself is trustworthy. That’s an important distinction, especially as more malicious sites use basic SSL certificates to appear secure.
Today, many phishing sites use DV certificates and display the same padlock icon as legitimate businesses. That means encryption alone isn’t enough to confirm who you’re interacting with. Taking a closer look at the certificate details can help you make a more informed decision before sharing any personal information.
Here’s how to check a website’s identity:
- Click the padlock icon in your browser’s address bar
- Open the certificate details
- Look for the organization name listed in the certificate
You should also look for certificates with higher levels of validation, such as EV. When available, this added verification helps you quickly see who you’re dealing with and decide if the site is one you trust.
Note: If a website doesn’t provide verified business information, it’s worth thinking twice before entering sensitive details.
How to verify which subdomains are covered by a Wildcard SSL
A Wildcard SSL certificate is designed to secure your main domain and all first-level subdomains under it. For example, a certificate issued for *.yourdomain.com will cover subdomains like blog.yourdomain.com, shop.yourdomain.com, and mail.yourdomain.com.
To confirm what’s included, check the certificate details in your browser or your SSL dashboard and look for the common name (CN) or subject alternative names (SANs). If you see a wildcard entry like *.yourdomain.com, it means all first-level subdomains are covered.
Keep in mind that Wildcard SSL certificates don’t extend to deeper levels, meaning subdomains like store.blog.yourdomain.com won’t be included and may require additional coverage.
Potential SSL installation issues
After installing your SSL and redirecting to HTTPS, it’s time to test your website for some common issues. Here are the top issues to check and resolve:
SSL certificate not found
If your SSL is installed incorrectly, your visitors may see a “certificate not found” error.
HTTPS redirect failure
A site not properly configured for SSL can display a redirect failure error message to visitors trying to access your site.
SSL certificate mismatch
An error message appears if the site isn’t properly validated before completing your SSL certificate installation.
Mixed-content errors
If your website’s source code is pulling in other resources with an insecure HTTP protocol (such as images, videos, stylesheets, or scripts), your site may not load correctly.
Save time and hassle, and have us do it for you
If the steps to add an SSL to your website feel overwhelming, or you just have better things to do with your time, try the Managed SSL Service from GoDaddy.
GoDaddy offers both a one-time installation service and fully managed SSL services, depending on your needs. Not sure which would best fit your purposes? Here’s a breakdown of each:
GoDaddy Managed SSL Services
Getting your SSL certificate set up correctly is key to keeping your site secure and running smoothly. GoDaddy offers a one-time SSL Setup Service to handle the technical work for you, so you don’t have to manage it yourself.
This service includes:
- Installation and configuration of your SSL on the server
- HTTPS redirection to ensure secure connections
- Fixing mixed content so the padlock displays correctly in browsers
- Updating your sitemap so search engines recognize your site as secure
- Adjusting firewall (WAF) settings when needed to support full encryption
A few requirements to keep in mind:
- Your website must be hosted on a server with a control panel
- The service covers a single installation
- Additional servers require additional services
For ongoing support, the SSL Managed Service Add-on includes everything above and helps keep your site secure over time. It adds:
- Ongoing support for site changes, including fixing mixed content issues as new content is added
- Automatic certificate reissuance at the end of each validity period to avoid gaps in protection
- Access to support through your SSL dashboard, so issues can be resolved quickly
SSL certificates: The bottom line
If you’re a webmaster or anyone who cares about website security (which should be all of us), it’s important to understand the various types of SSLs: EV SSLs, OV SSLs, DV SSLs, Multi-domain SSLs, and Wildcard SSLs.
Each of these plays a special role in keeping data secure online, from the basic task of confirming that you control the domain to validating your company details to boost your business's credibility.
SSL certificates help keep our sensitive data encrypted by providing a trustworthy shield against prying eyes and protecting customer information.
Your choice of SSL can increase the trustworthiness and authenticity of your site for your visitors.
So, it’s well worth taking the time to choose the right one!