In this article, I’m going to show you how to use Beaver Builder to build a WordPress website. Beaver Builder is one of the most popular and versatile page builders for WordPress, a favorite among web designers and developers for its speed, responsiveness and intuitive interface.
There are a lot of ways to use Beaver Builder to build a WordPress site.
Beaver Builder offers three major tools: the Beaver Builder plugin, Beaver Themer and the Beaver Builder Theme.
Each tool gives you varying levels of control. For example, you could use an existing theme and only use the Beaver Builder plugin (the page builder itself) to edit the content, but only the content. If you want to have full control, from the header to the footer of every page, you’ll want to use the other tools in the Beaver Builder suite.
How to use Beaver Builder
Let’s walk through the Beaver Builder suite and see what we can do.
Beaver Builder plugin
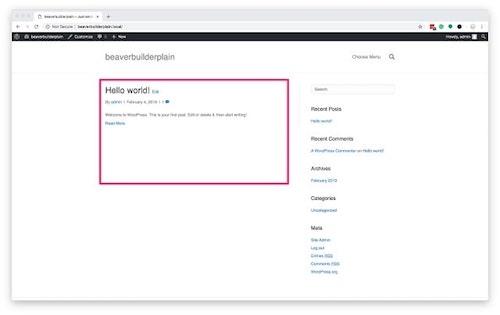
The Beaver Builder plugin allows you to create custom layouts within the content part (highlighted in pink below) of WordPress posts and pages.
Beaver Themer
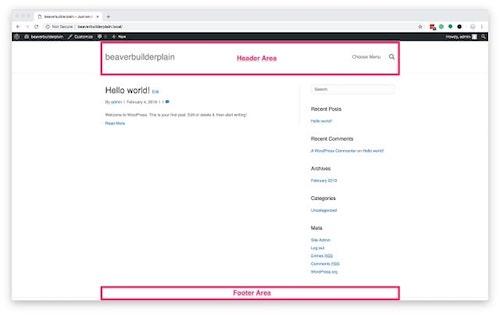
The Beaver Themer plugin, partnered with the Beaver Builder Theme, allows you to control the header and footer (highlighted in pink below). Together with the Beaver Builder page builder plugin, you will be able to modify every part of the site from top to bottom.
Beaver Builder Theme
The Beaver Builder Theme for WordPress gives you full control. You can use the WordPress Customizer to change things like fonts, text color, link colors and much more.
What do you need to purchase?
We will need the entire suite to have full control over every aspect of the site.
- Go to the Themer page and click Get Beaver Themer Now to add it to your cart.
- Go to the plugin pricing page and click Get Started.
Now your cart should have both the Beaver Themer and the Pro version of the Beaver Builder plugin.
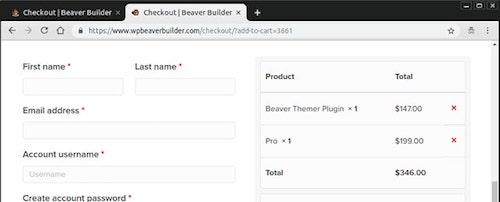
Note: The Pro version of the plugin has the Beaver Builder Theme packaged with the Builder, so you do not need to purchase three products from wpbeaverbuilder.com, just two.
Now that you have purchased the Beaver Builder plugins and theme, download them and install them in WordPress. Here are some tutorials walking you through installation:
- Installing the Builder Plugin.
- Installing the Beaver Builder Theme and Child Theme (do both!)
- Installing the Beaver Themer.
If you are not familiar with installing plugins, GoDaddy has an article on adding WordPress plugins that might be helpful.
Building your site with Beaver Builder
The video contains the written instructions below with a little more detail. But because some people are better with videos, some better with step-by-step instructions, I have included both options here.
Install the plugins and activate the theme
- Install and activate Beaver Builder plugin and Beaver Themer.
- Install the Beaver Builder Theme and Child Theme.
- Activate the Beaver Builder Child Theme.
Create your pages
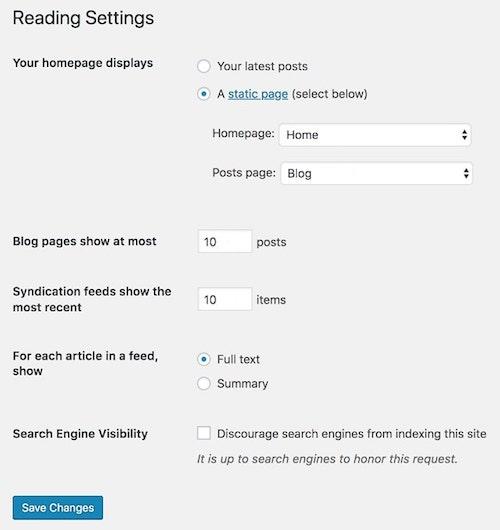
- Under Pages, create and publish two pages: Home and Blog.
- Assign the Home and Blog pages under Settings > Reading Settings.
- View the pages on your site to make sure the URLs are working correctly.
Create a custom header and footer
- Under Beaver Builder, go to Templates > Add New.
- Create a Header template.
- Create a Footer template.
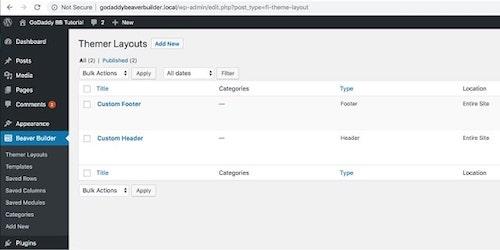
When you create the new header and footer, Beaver Builder will add some dummy content for each. Customize the content as you see fit.
Customize the Blog page
We created the Blog page just so you can see what the default looks like, but you can replace it with a Beaver Builder module. One of my favorite modules is Masonry. With a couple of clicks, you can make your blog look like this:

There are other third-party modules mentioned below that can give you even more options.
Customize the home page
Beaver Builder also has a slew of page templates already included for you. In about two minutes, you can have the home page looking great. Just select the template you want, and then replace the text and images as you see fit.

Add a contact form
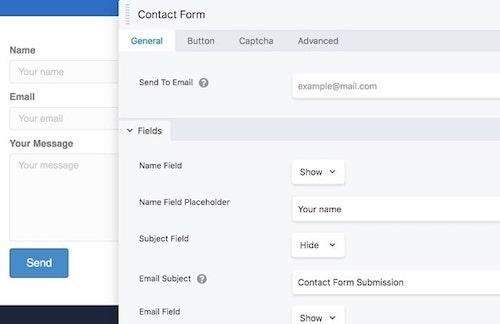
There are many ways to create a contact form. I always want to make sure that the contact form sends an email, and stores the form submission data into the WordPress database.
Best practice is to use a tool that does just that, like Ninja Forms or Gravity Forms. In this tutorial, though, I use the built-in Contact Form module.
Related: Best form builders to use for gathering contact info
Third party Beaver Builder plugins and extensions
Beaver Builder has a ton of modules, but I like to use some third-party extensions as well.
You see, Beaver Builder has its own ecosystem.
In this tutorial, I’m also using the PowerPack for Beaver Builder and the Ultimate Addons for Beaver Builder.
These third-party modules aren’t required to build a WordPress site with Beaver Builder, but it opens the door to building sites more quickly. For example, there is a Team (or Staff) module that is great for creating a team directory.
You can use the default Beaver Builder modules to create something like that, but not quite as fast.
Beaver Builder is a powerful tool
Beaver Builder gives the average web designer the ability to create stunning sites within a few hours of work. Fifteen years ago this type of functionality was a dream, and the future with this type of tool is wide open.
I highly recommend looking into how you can use Beaver Builder in your own WordPress projects.
If you want to build a new website, feel free to test our free website builder solution to create a website in no time.


