For many small businesses, the holiday season can make or break an entire fiscal year. That’s why it is so important to do everything you can to get a leg up over the competition and figure out how to sell more in Q4. This is where Google Merchant Center comes in.
If you do a Google search right now for a specific product, what do you see? The first thing that comes up is a slider with products that are for sale at various retailers, both near you and online. If you click the “Shop” option, you’ll see even more products listed as image tiles with the price and location right below. How do products get up there? The answer is Google Merchant Center.
Google Merchant Center is a free tool available to any shop that sells online, in-person, or both. Google Merchant Center feeds products and their images into Google Search, Google Shop, Google Images and more.
It’s no secret that search results that appear higher up on the page get the most traffic.
So how can you take advantage of Google Merchant Center to get more visibility for your business and learn how to sell more products this holiday season?
What is Google Merchant Center?
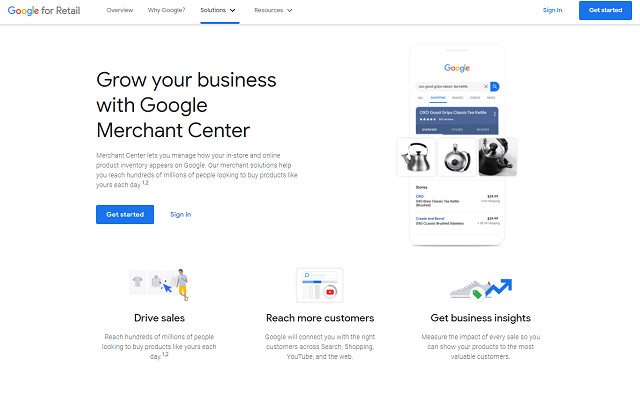
Google Merchant Center is Google’s hub for businesses large and small whether they sell online or only in-person. The platform exists as a place for businesses to upload a store’s product data to make it available and accessible for Google’s various services.
Instead of Google crawling your site and picking up information, you are feeding it directly to Google so they can use it in various ways on their search platform.
The tool is entirely free and, unfortunately, many small business owners don’t know about it. It’s all about giving Google the data that it can then serve to users when they make relevant search queries.
Google Merchant Center also includes ways to track your products and their performance on Google Search so you can make changes to help them appear more often in relevant searches.
Getting started with Google Merchant Center
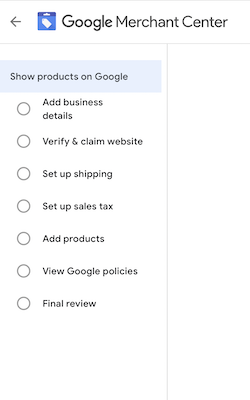
So how do you get started with Google Merchant Center? It’s quite simple.
Log in to whatever Google account you use for your business and go to g.co/merchantcenter. If you don’t have a Google account, you can create one now! Here are the steps you need to take to get set up:
Business information
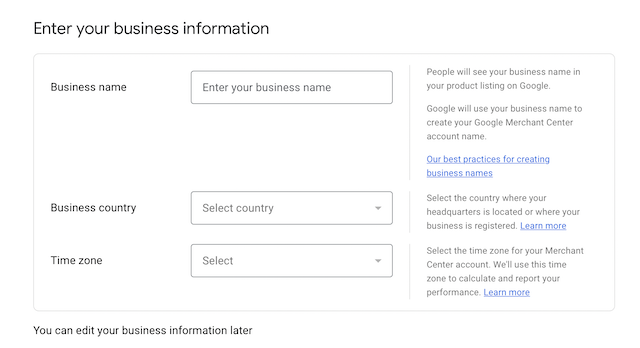
Once you log in, you will be asked to enter your business information including the business name, country and time zone. Once you enter that information, more questions will appear below.
Next, you will be asked where you want customers to check out if they want to purchase your items. If you have an online store, you’ll want to select “On My Website.”
If you are selling in-person only, put a checkmark next to “At My Local Store.” And if you don’t have either setup, you can have customers check out directly through Google by choosing “On Google.”
Finally, you’ll select if you would like to receive emails about Google Merchant Center, then agree to the terms and conditions.
Platform setup
Once you have entered your business information, you’ll be on the platform itself to continue setting up your shop information. On the left, you will see a sidebar with a checklist. You must go through each step before your business is live. For this walk-through, imagine that your business is selling online. Businesses that are selling in-person will not have a few of these steps.
Add business details
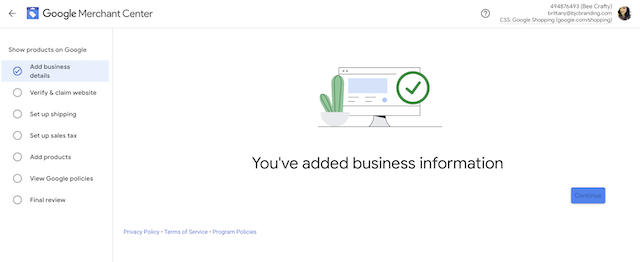
You will click and add the relevant information about your business including its address and a phone number. Make sure the phone number you enter is easily accessible because you will have to verify it once you add it.
Verify and claim website
This task is all about connecting your website to your Google Merchant Center account. Enter your website and click “Continue.” Next, you will need to verify your website using one of two options: an HTML tag or uploading an HTML file. Both options will require you to add something to the HTML of your website, so make sure you have access when you are setting up your account. Follow the instructions that go with either option to set it up properly.
You shouldn’t have a problem adding HTML information to your site unless your store is an Etsy store. You cannot add individual Etsy stores to Google Merchant Center per Etsy’s terms and conditions. Etsy uploads all of the products on the platform to Google Merchant Center itself. If you have an Etsy store and would still like to use Google Merchant Center to sell your products, you will have to add them and use the checkout “On Google” function.
Set up shipping
After you verify your website, you will be asked about shipping if you are selling online. Select the country and currency you are shipping from and the delivery location. Once you click “Continue,” you will be asked to select a shipping carrier method. If you already have a shipping system in place, go through the prompts to reflect that service. If not, you can set one up now.
To set up a new shipping profile, click the option for FedEx, UPS and USPS. Next, add the address you are sending from, the maximum time it takes you to handle an order, and the daily cutoff time for new orders. After that, select the carrier you will be using to ship and the service level you will use.
On the next page, you will determine shipping costs. You can select free shipping for your customers, free shipping over a certain range, a range-based shipping cost, flat rate or rate determined by your shipping carrier. This is entirely up to you! But if you want to appeal to customers, free shipping is the way to go. Once you are done, that item will be checked off your list.
Set up sales tax
Next, you will set up sales tax based on where you are doing business. Google may generate your location itself based on your account but if not, select the state where you are located and select “Continue” to save it.
View Google policies
Skipping over the products for a second (they deserve their own section) you are prompted to review Google’s policies. Click through each one to review them and then select “Continue” to finish up.
Adding products
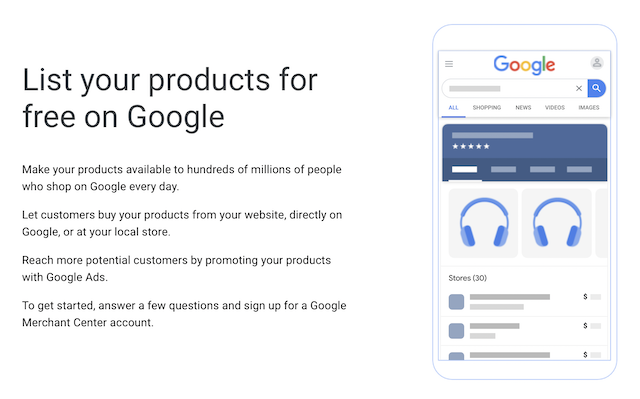
Before you’re able to fully launch your Google Merchant Center account, you will have to list some products. There are three ways to do this: through your website, one product at a time or multiple products at once.
Through your website
You can upload your products easily using your website if you have connected and verified them at this point.
If your website uses GoDaddy Websites. + Marketing, you can easily connect it to your Google Merchant Center account to feed your product data in.
Simply connect your GoDaddy account and follow the prompts to feed in your data.
Click here for a guide to connect your GoDaddy website or online store to the Google Merchant Center.
Add one product at a time
You can upload each product individually using this input method. You will be asked to add information about your product including title, description, image, price and location to purchase.
Fill out as many of the fields as you can, but they all aren’t mandatory. Make sure you include a title, description, price and images. You also will need a link to the item’s page on your ecommerce website where customers can purchase it.
Once you are done, click “Save” and add the next product.
Add multiple products at once
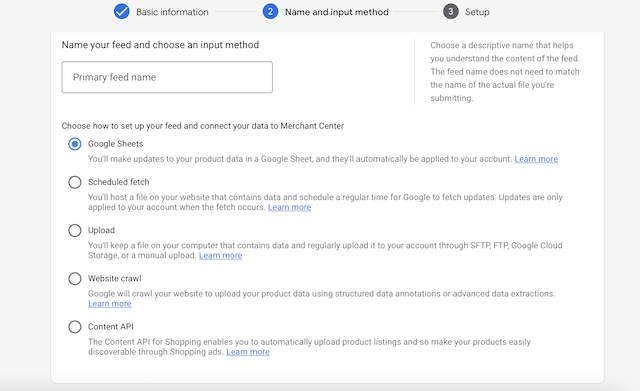
If you have a lot of products, this option allows you to add multiple products at once with a data upload saving steps and time.
After selecting your country and language, you will be given a list of options for how to input your product data. You can choose any of these options to get your products on your website, but the easiest option that will upload them all now is Google Sheets.
Select Google Sheets and click “Continue.” The next screen will ask if you would like to create a new sheet or use an existing sheet. For this scenario, you will select “Create a New Google Spreadsheet from a Template.”
A pop-up will ask you to authorize permission to create a Google Sheet in your account. Click “Allow.”
Next, a Google Sheet will launch with fields across the top specifying what information should be included in each column. You will also see two links — which you will delete when you get started. These provide more resources to help you input your data.
Once you review the resources, you can start adding your data to the sheet. Each product will be a new row with the specifications input horizontally.
Once you have added enough data, you will go back to the other window where you were accessing Google Merchant Center and select the option “Fetch Now.” When you click this, Google Merchant Center will automatically upload the data you have added to your spreadsheet.
Never delete products from your spreadsheet unless you want them deleted from your account!
When you have new products, simply add them to the sheet and upload them. If you need to make changes to products, you also do that in the spreadsheet and then upload it to your store.
How to sell more by integrating with GoDaddy Websites + Marketing Ecommerce
If you built your ecommerce store using GoDaddy’s Online Store, you easily can integrate that with your new Google Merchant Center account. As of July 2021, Google announced a simpler integration with GoDaddy online stores.
You can now add your products to Google Merchant Center without leaving GoDaddy. Simply build your store on GoDaddy, create a Google Merchant Center account and then connect your Google Merchant Center account to your GoDaddy store within GoDaddy.
Related: Reach more holiday shoppers with GoDaddy and Google
Using Google Merchant Center

Once you are up and running, you can use Google Merchant Center to continuously add and edit products as they become available.
You also have access to Google Ads and a platform full of data to show you how your products are doing.
The Performance tab on the left navigation will show you how your products are doing in Google Search and Google Shopping. You will be able to see which are getting clicked on the most, impressions and the click-through rate to your online store.
The Growth tab will provide you with suggestions to boost your performance and grow your business using Google.
Where your products will show up
Once you have uploaded products and they have been approved by Google, they will begin appearing in several different places on Google. First, they will be shown on Google Search once someone makes a query that is relevant to your product. The queries can be about the product specifically, about a brand or a location close to them. This is why it’s important to add as much information to your product uploads as possible.
Additionally, your products will show up in the Shop tab on Google Search with similar products from other merchants.
Finally your products also now will be seen in Google Images with the information on how to buy them attached in full view.
Now you know how to sell more this season
This holiday season, make sure your business is using every tool at its disposal to be seen. Google Merchant Center is a great way to use Google Search to its full potential. Don’t wait for the web crawlers to find your products — be proactive!


